
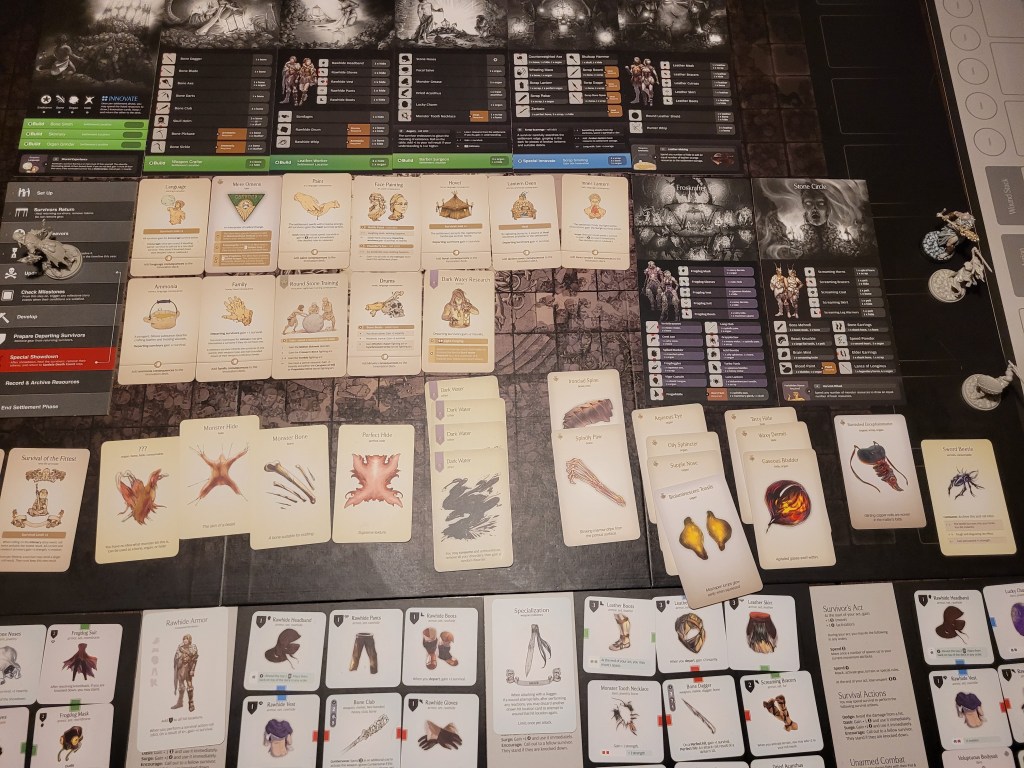
Here we are, back in Bogstop. Whilst I’m moving along a little slower than I wanted to originally, we will prevail. For now, we will have to deal with the upcoming settlement phase. And what a settlement phase it is.
We finally found ourselves with all the necessary Frogdog parts to build that final bit of armor and finish the set! There is just this… lingering feeling of dread. Ever since that White Speaker died in the center of our little village things haven’t quite been the same. And its not the Feline Entity stalking in the dark either. It’s.. different.
For now we celebrate our victory though – and the new found knowledge of Drums (I) we gained during the last hunt. We made it 1 step closer to Song of the Brave (I)! We might see a Bullfrogdog this campaign yet.
We started off the year proper with the event: Jousting! Again!
And whilst I initially debated just sending two newbies, in the end I (actually) loudly exclaimed: No Fear! – and Sir Hermes stepped up to defend his title as champion. The chance of getting Club Mastery at this point was just too enticing, slim as it may have been.

And on to the big one: Forgotten Fear. We had 5 survivors with Blotted Out (FA) in the settlement Glow, Calys, Sir Hermes, Lelia and Jerryn. That’s quite the line up.
Jerryn is the one who got nominated for obvious reasons. Although he rolled well on the event – an 8 – forget all Fighting Arts, which would have only been Blotted Out (FA). We could build our Frogdog set and look towards getting more leather going to be better set up for Slenderman. But on the other hand, if we fought Slendy immediately we would get an extra hunt this lantern year, which also could be massive for us.

For a second time I loudly exclaimed: No Fear! and we revealed the horror, accidentally unveiling the Feline Entity as well. This fast-tracked us to departing for a special showdown, leaving 3 endeavors and all the loot in the settlement.
Special Showdown fighters:
Thalass (leather bits, bone dagger)
Selen…
Well, as I was putting together my team I couldn’t help but feel a bit underwhelmed. Mostly by myself and me taking these actions. So, thinking about it for a moment and considering how I had proclaimed ‘No Fear!’ twice already I settled on a different group altogether.
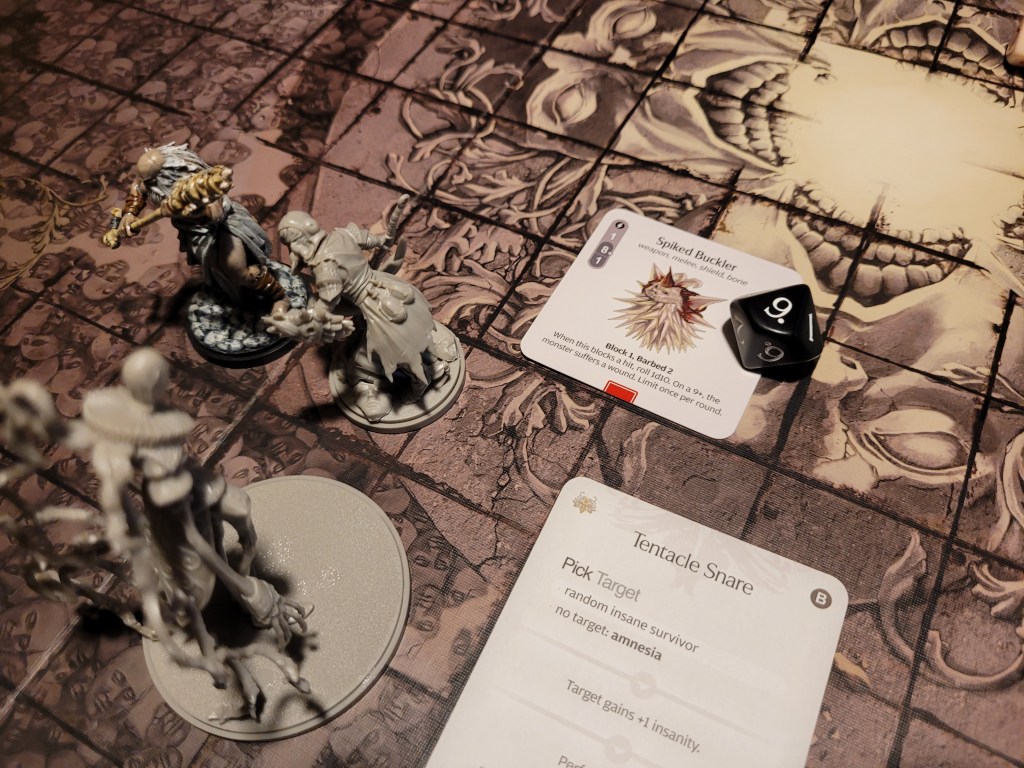
Lelia (frogdog bits, spiked buckler)
Sir Hermes (rawhide set, bone club)
Ragnar (leather bits, bone dagger)
Hysteria (rawhide set, scrap sword)
With this group of people it felt less a question of “if” we manage to defeat the monster and more of “how” high the toll is going to be to deal with it. We were bringing our Red Fist (SFA) survivor after all. The potential damage this group could deal per round seemed pretty nuts, we just needed this… thing… to stick around long enough for us to wail on it a bit.

Err…, two things: 1 – there is still Glow in the line up of that picture, but she got exchanged to Hysteria. There was no reason at all to risk progression on her in a fight with no Hunt Exp. And 2 – I only noticed after the fight was done that Sir Hermes had been wearing Lucille’s Husk of Destiny. It did not change anything, but rather nerfed Sir Hermes a little bit instead. So… oops?
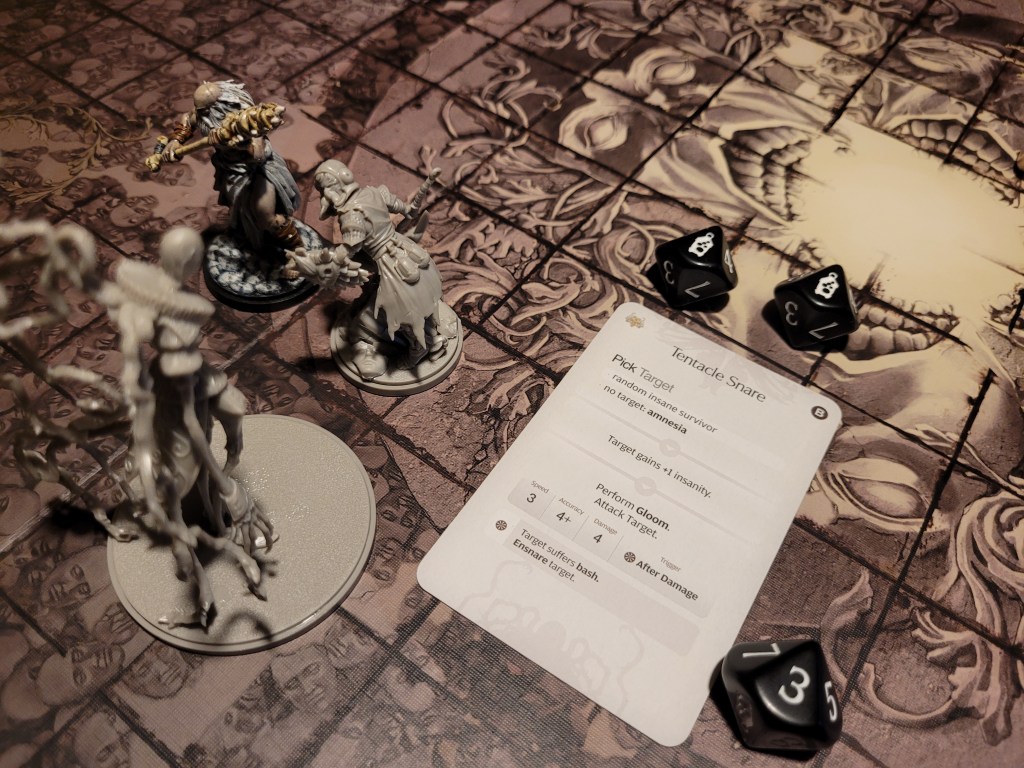
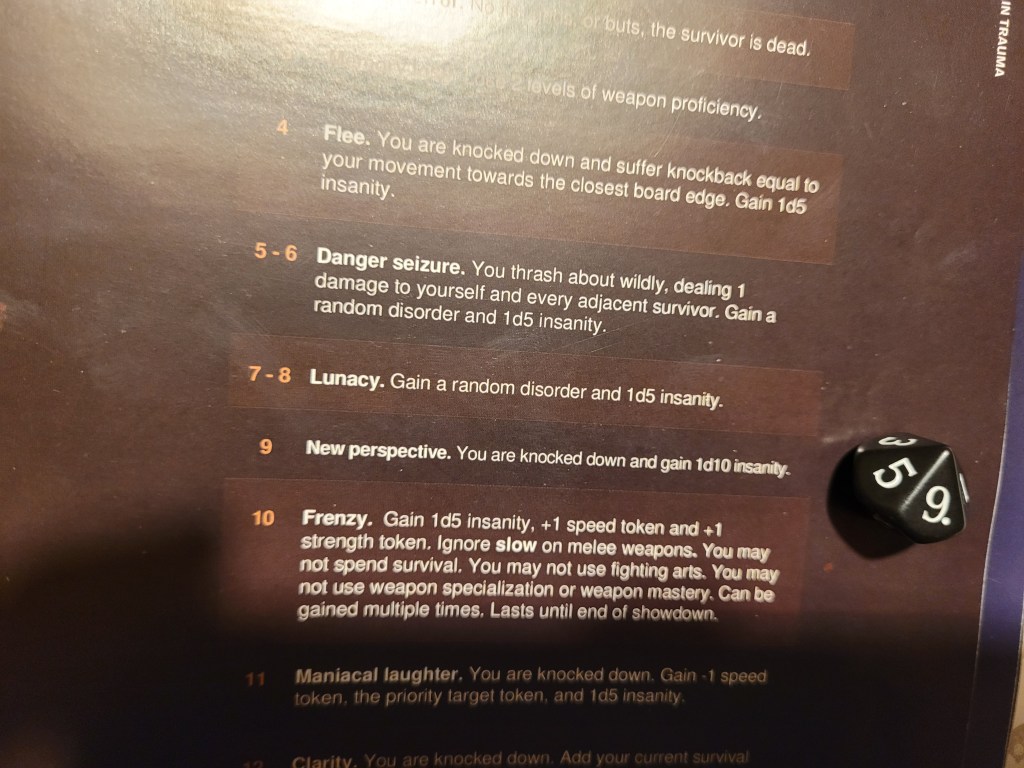
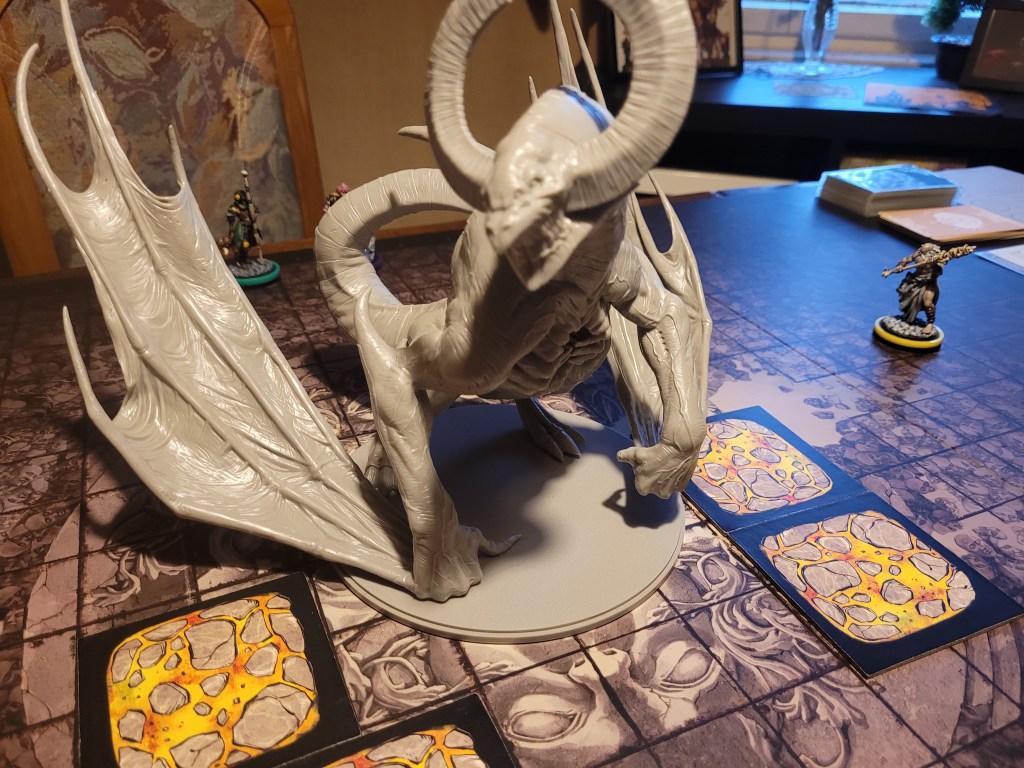
The Slenderman monster on Lvl1 has 11TGH and 6MOV, typically dealing 4 damage on a successful hit – yikes. His main passives are Gloom and Ensnare.
Gloom teleports the monster behind the target instead of moving (its less “お前はもう死んでいる” and more an ‘out of the corner of your eye’-thing.). And Ensnare takes people off the board if they score lower than their insanity on 1D10 and has you roll for how badly they are drowing, bleeding or going insane at the start of the survivor’s turn. But you might get some Dark Water (SR) for your troubles when you come out. A lot of Slenderman’s hit locations and attacks add a bit of insanity each time, so its only a matter of time before you have to go for a swim.
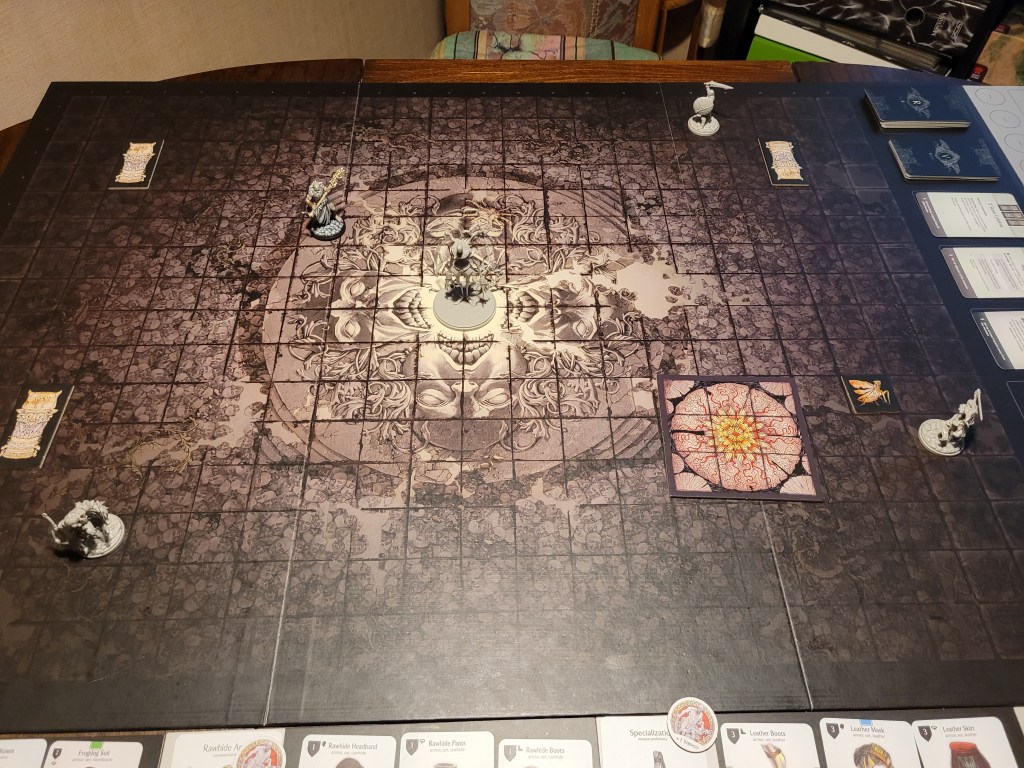
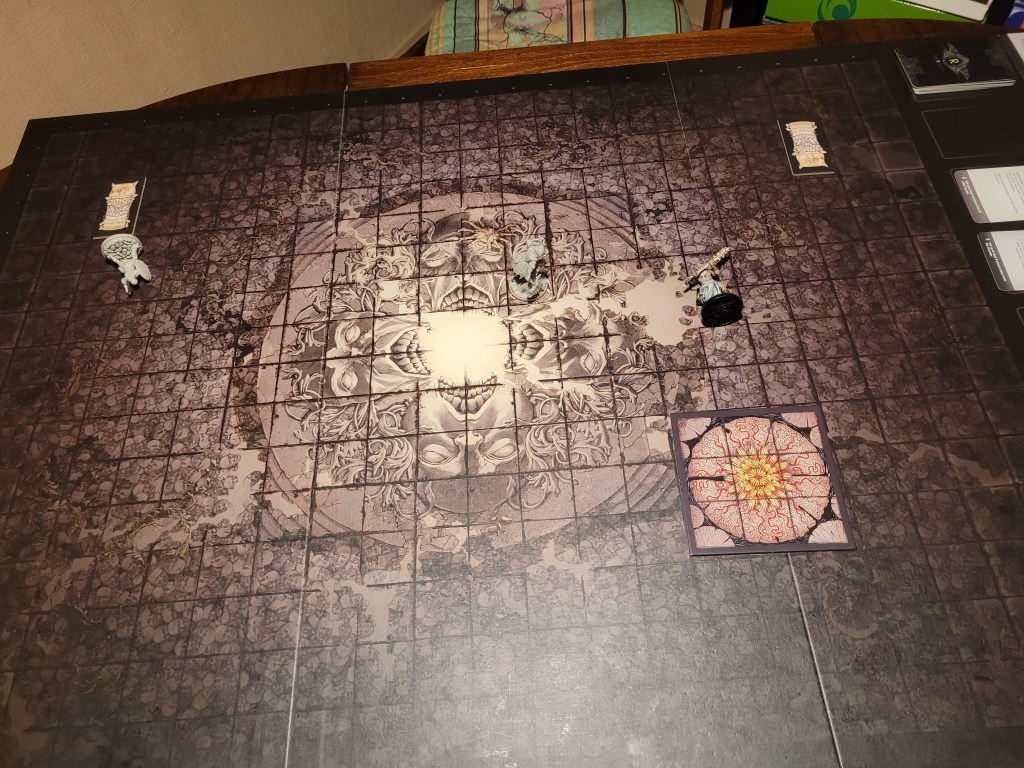
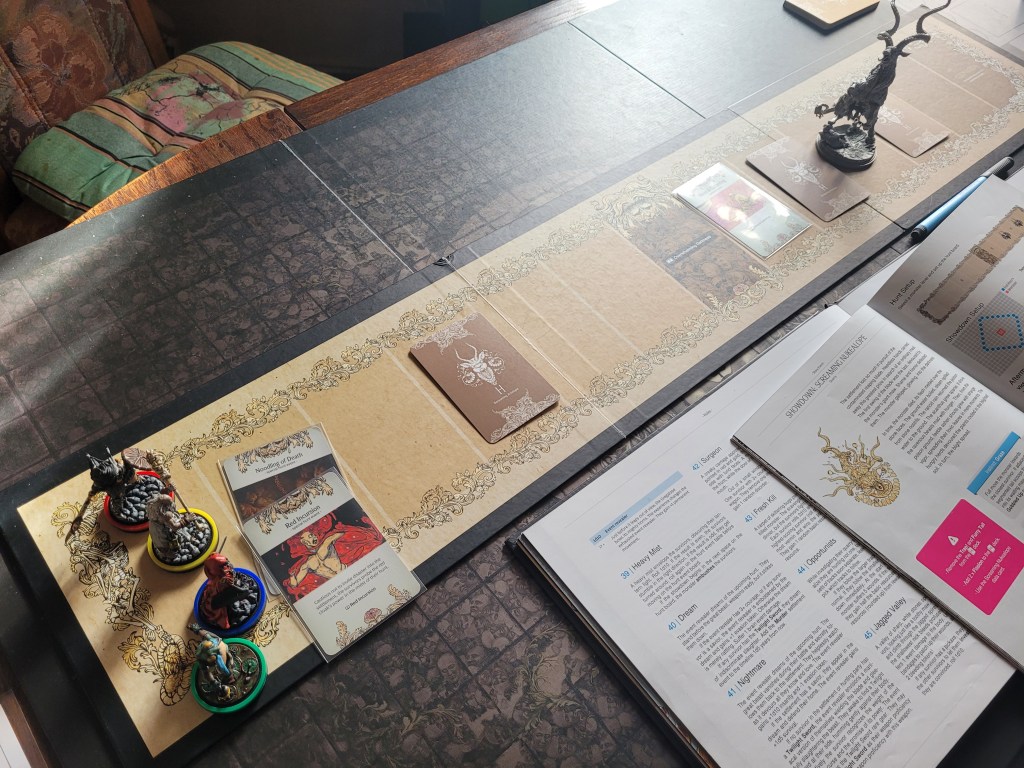
Set-up for Slendy always just looks terrible, being placed in the 4 corners of the showdown board. We spend our turn running up towards the monster, with Hysteria headed for the bug patch due to her Vermin Obsession (D).
The first card from the monster was Do you Believe? – already out to ask the hard hitting questions. It targeted Lelia, hitting once on 7+, which she blocked.
And she wounded on the counter! Rolling a Lantern 10 for her shield!


Back to the survivors – more continued running towards the monster. Hysteria picked up a sword beetle from the bug patch and could now use survival again. Lelia simply renewed her block as Sir Hermes dashed in, hitting and wounding the monster, with its reflex sending it away, destroying 1 of the small stone columns.
10 cards remaining, next up Tentacle Snare, targeting a random insane survivor. Why, that was Lelia yet again. 2 hits, 1 block, 1 dodge.
And the shield wounded again with its ability!
Because the game had kept to the swamp-cesspond-theme we had a mammoth leaf on the board again as well, which enabled Hysteria to jump into the fray at this point. But she missed her swing, sadly.
Lelia renewed her block – I wasn’t feeling the need to attack with the shield just yet… and well, blocking seemed to be doing the trick too. In a way.
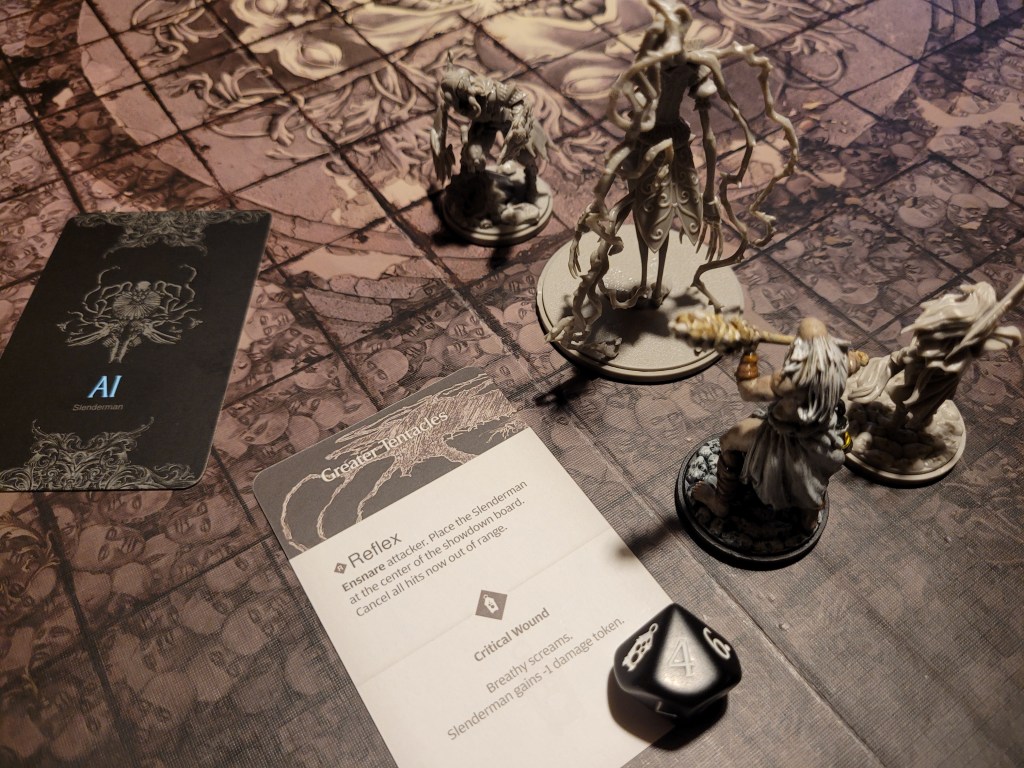
And Sir Hermes swung for another hit, wounding as well. The reflex did not ensnare him with his 0 insanity, but it moved the monster to the center of the board, into a prime position for Ragnar to strike!
And what a flurry of blows it was. 2 hits in the monsters blind spot – one of them perfect (+2STR from Mighty Strike FA) – for 2 wounds dealt as Ragnar surged on top of that. Another 2 hits, turning into 1 more wound.
This plant came to the wrong neighborhood!

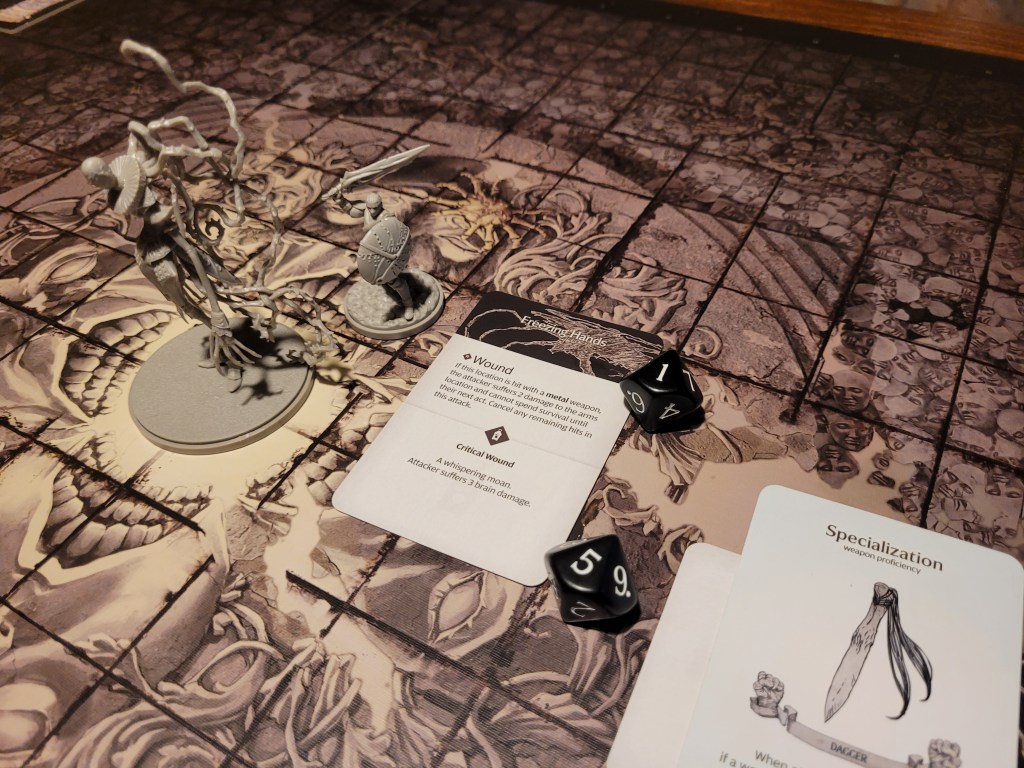
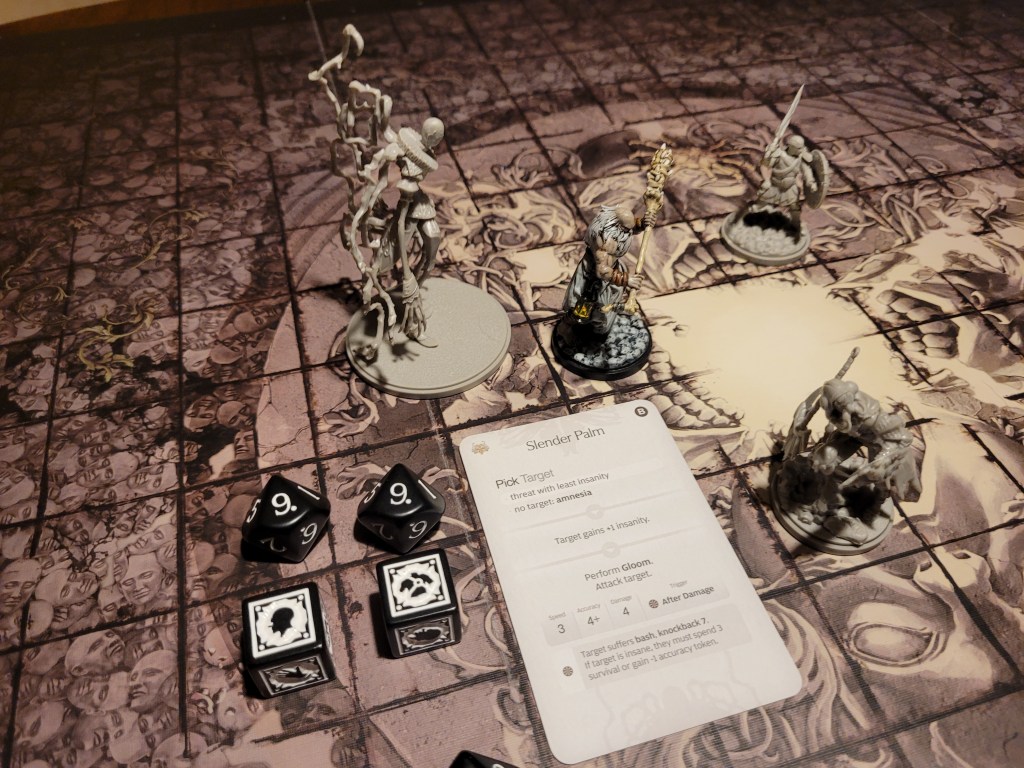
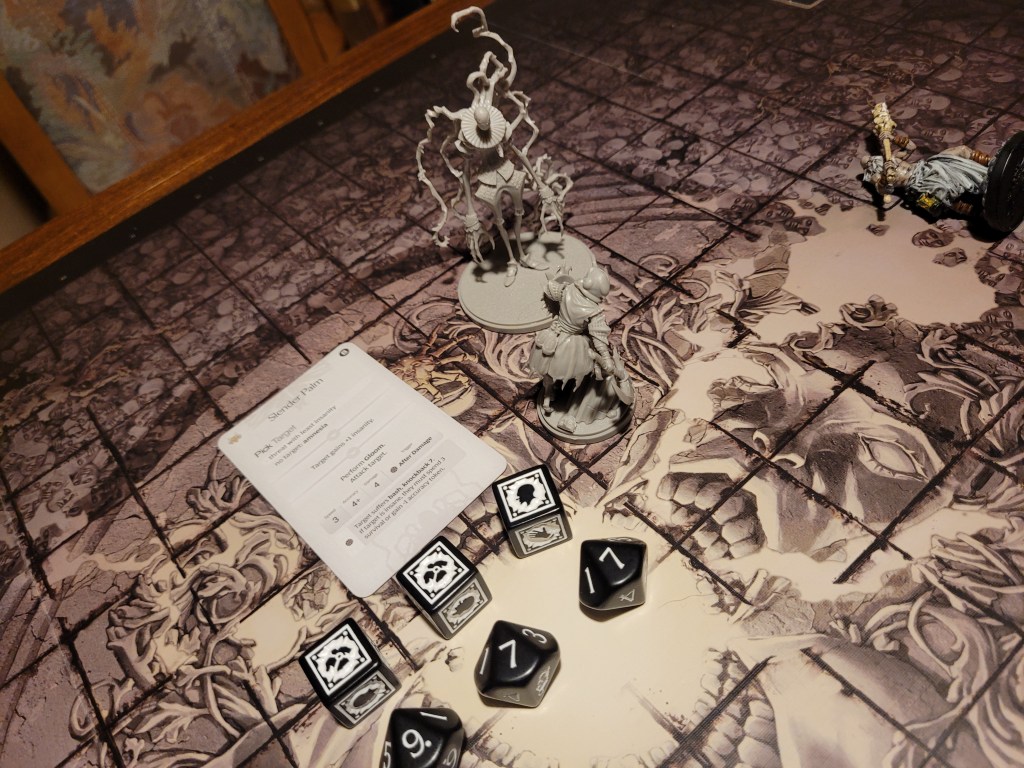
Only 5 cards remaining already. Slender Palm is drawn. Threat with least insanity would be either Sir Hermes or Hysteria. I picked Sir Hermes who got hit twice by this 6+. And for 4 damage no less – that was quite painful even with the dodge. The remaining hit went to his waist as he was flung back and through Lelia, knocking down both.

Our counter offensive didn’t start off too well. Hysteria swung, landing a perfect hit, having her wound on everything but a 1 – which she thankfully managed but she got knocked down by the reflex on the card.
Meanwhile Ragnar had picked up Sir Hermes, who picked up Lelia. Sir Hermes also used his rawhide headband to look at the monster’s AI cards and because I’d rather not have a card that easily activated Slendy’s Amnesia instinct, he also encouraged Hysteria, who surged again.
Another perfect hit secured another wound for us but sent her off to the far corner of the board.
Lelia finished the turn by blocking and heading towards the center of the board.


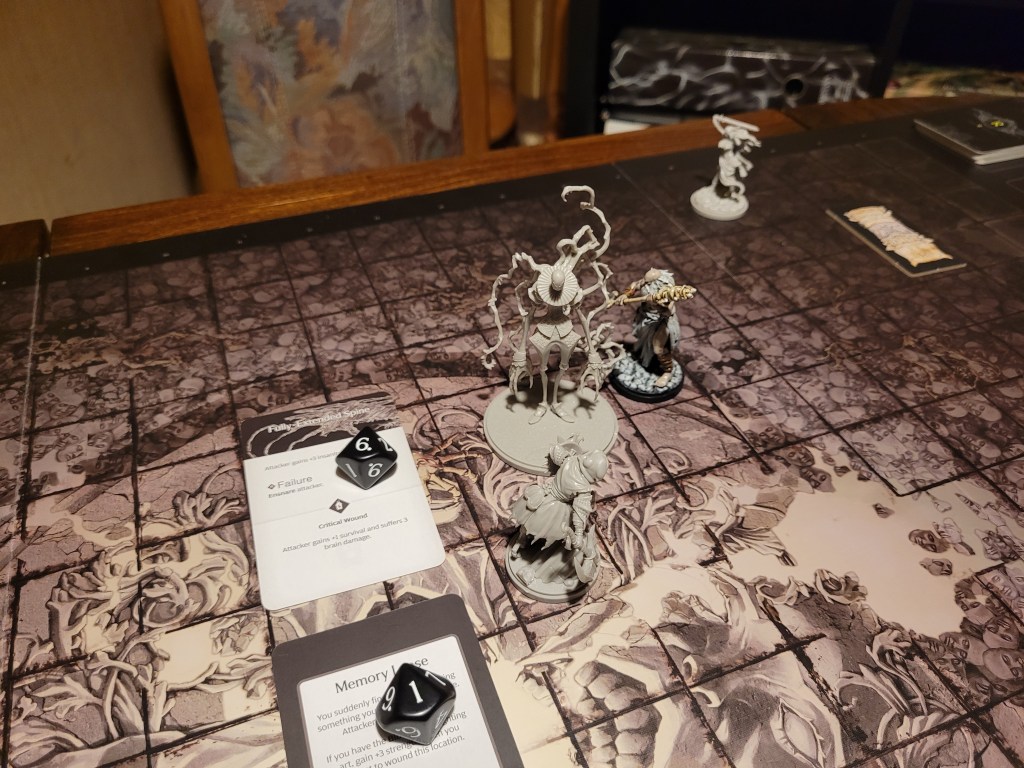
3 cards remaining, Slender Palm again. That was likely the worst draw possible. Sir Hermes still had the least insanity as he took another 2 hits, dodging one, he still was flung away again.
Hysteria spent her turn, running up towards the fight as Ragnar went in for the next round of stabs. He hit 3 times, with 2 perfect hits (relevant thanks to his Mighty Strike FA’s +2STR). At this point I was starting to get a bad feeling about how this was going. You know that moment – when things are just going a little too well?
Ragnar managed to wound the monster twice before it stepped away a bit. This was also great and terrible at the same time. We would now be stuck with Slender Palm on repeat if we did not manage to take 1 more wound off.

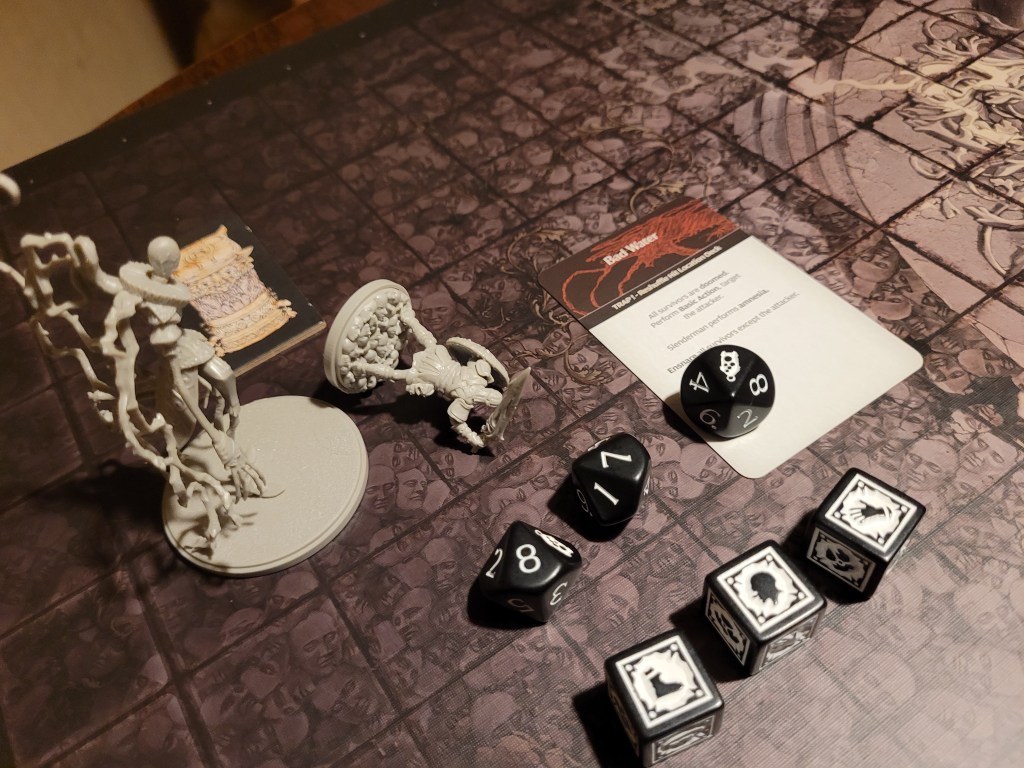
No Fear got announced again and Ragnar dashed in to surge. He hit the trap, getting shredded by the basic attack before Slendy and Hysteria vanished into the dark place. Luckily she had Legendary Lungs (SFA).
1 card remaining. Slender Palm – so ice cold it sends you running away screaming with frostbite. Lelia was the only threat remaining and she got hit 3(!) times on 7+(!). She did have Extra Senses (FA), so I spent all of her remaining survival to dodge twice and the last hit is blocked. One more roll for the shield.
Nothing.
Hysteria returned to the battle field soaking wet and unimpressed.

Sir Hermes got up and started the turn by running in to swing at the monster, but failed to wound on a 1.
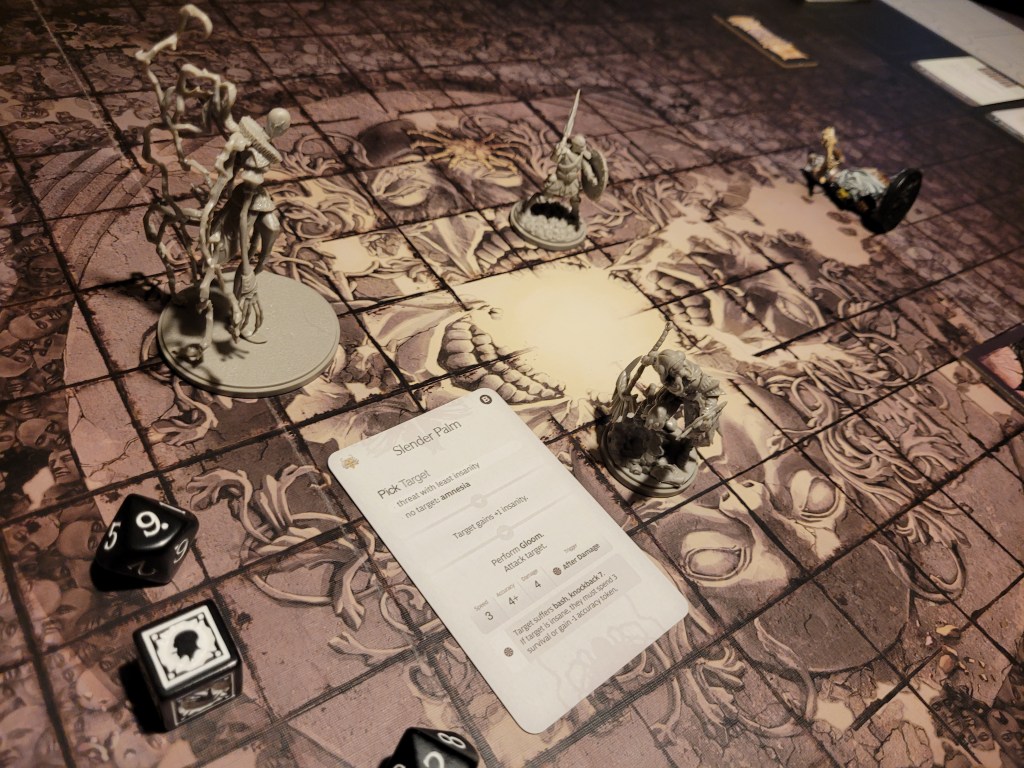
Ragnar dashed in from the other side and got 3 more hits. This time he did not hit the trap – unfortunately all of the cards would Ensnare him if he did not manage to wound. At 11 insanity he had to wound or he would be going for a bath. He was wounding on 4+, so things were looking surprisingly decent to kill the monster outright.
The first hit – rolls a 6 – Slender Palm gone.
Second hit – rolls a 1 – Ragnar gone.

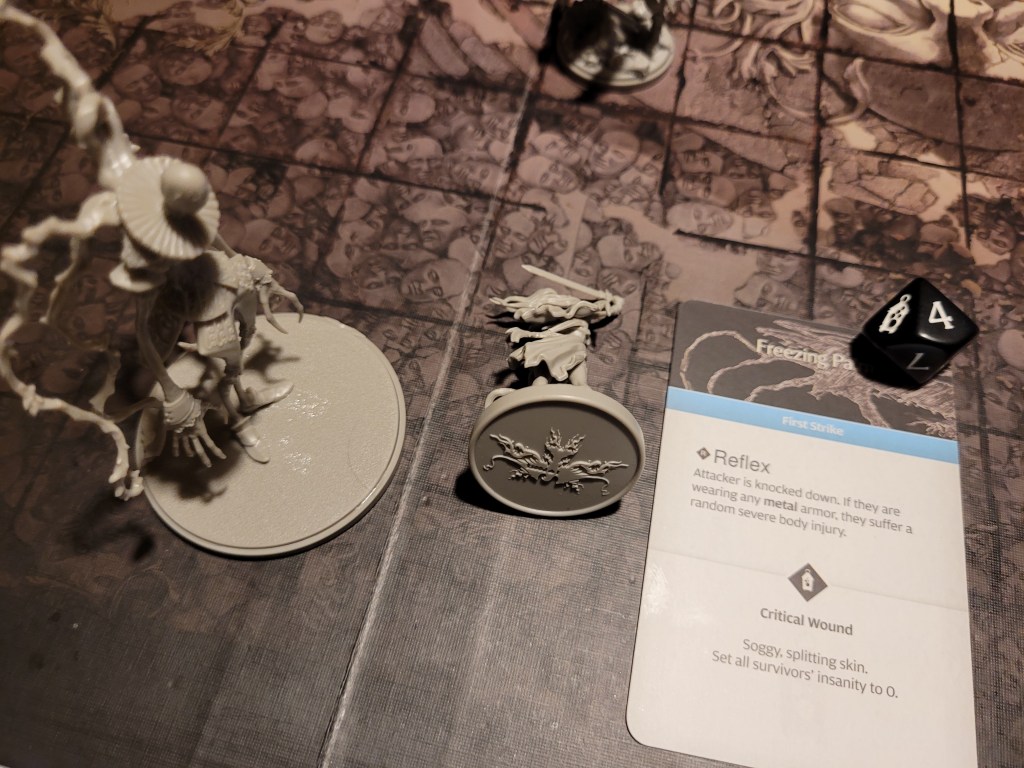
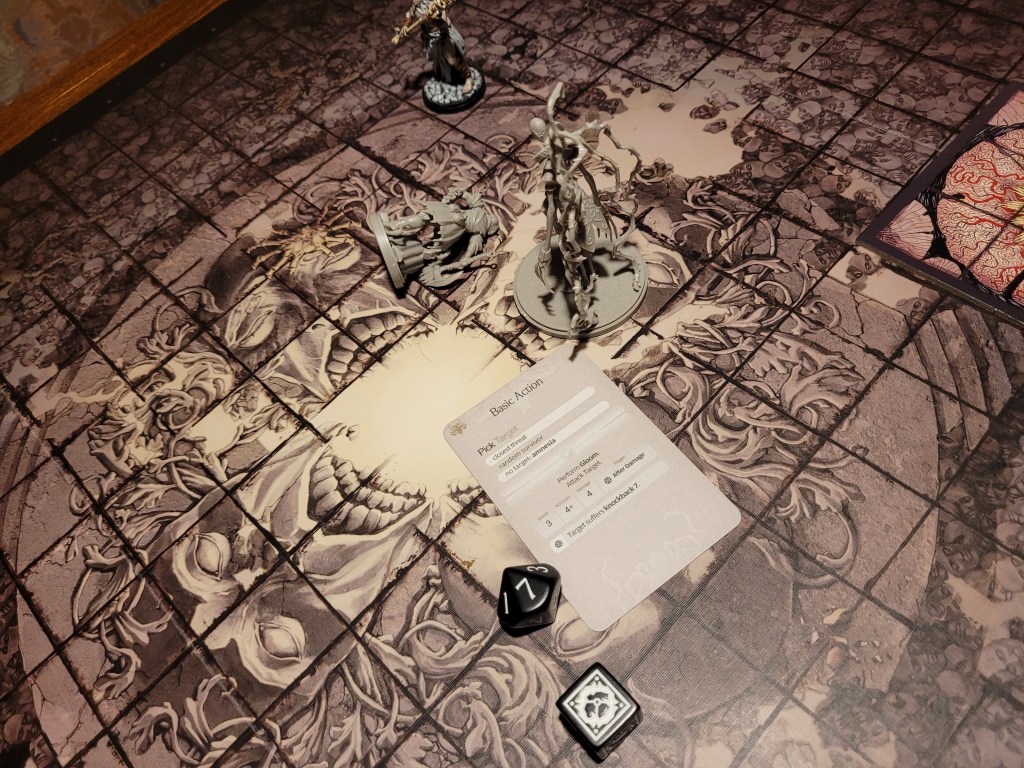
0 cards remaining. Down to the basic attack, it targeted Lelia once again. She had tried to wound the monster with hit from her shield last round (failing miserably) so she had no block up. With no survival either, she took 4 damage to the chest and got knocked down by a heavy injury.
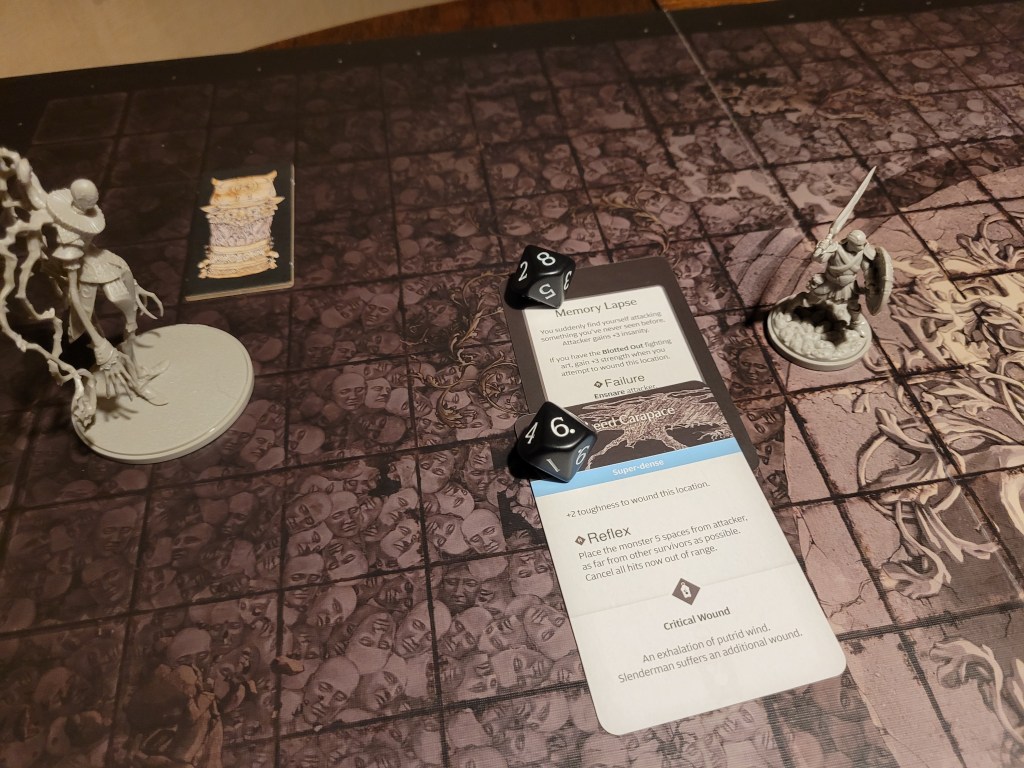
Meanwhile Ragnar was tormented in the Dark Place, rolling a 1 – gaining a bleed and a random Brain Trauma. Of course he remained stuck there as well.

Sir Hermes saw the opening in the monster. He spent the last survival he had and dashed in as well. He hit easily enough… but the wound was another 1. His bone club got swallowed by a dark water puddle and he jumped in after it.
Hysteria went next, but she drew the trap again! The basic mostly missed, only giving her a light injury to her foot, but she was now alone on the board. We were spiraling towards doom all of a sudden.


But truthfully, its moments like these – when Hysteria is suddenly alone on the board, the dread of the monster returning soon, the helplessness of the forced inaction – that I enjoy so much about this fight. (That I enjoy a lot more than I would have thought before actually fighting the thing.)
0 cards remaining. The Slenderman reappeared behind Hysteria (predictable jumpscare), the basic hitting her 3 times. We dodged the duplicate body hit and with 3 armor at most hit locations, she even remained standing.
The rest of the group struggled in the dark place. Sir Hermes remained in the watery prison, Lelia emerged wet and bleeding and Ragnar was now afflicted by PTSD (D). Both gained some more Dark Water (SR).
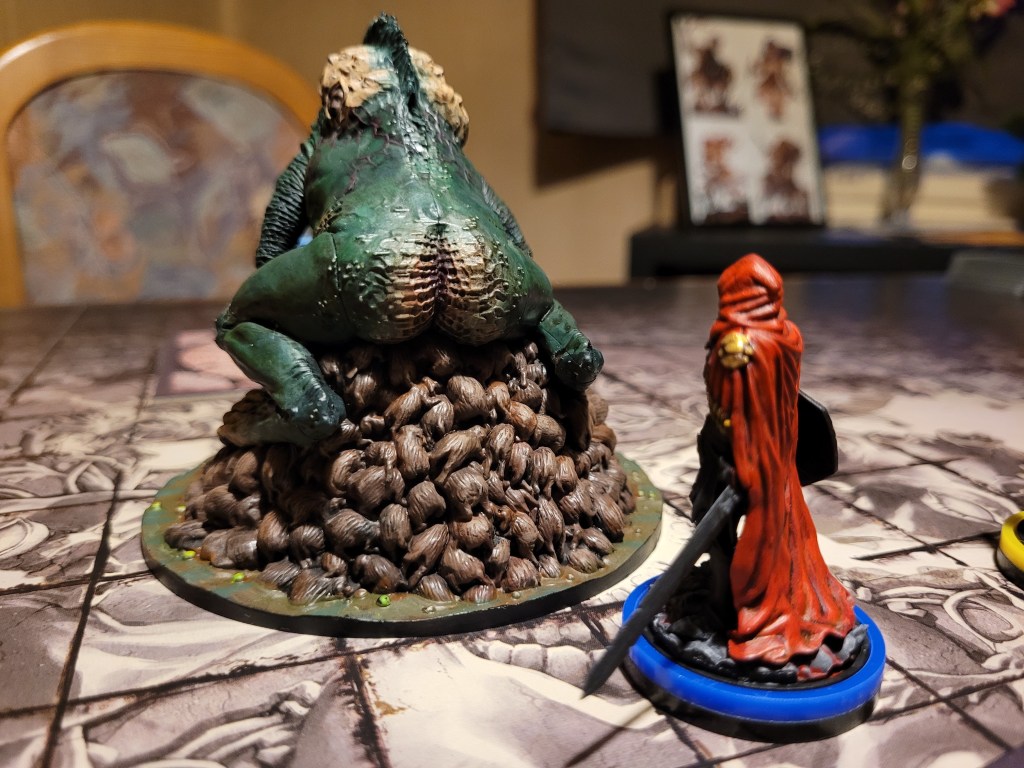
One more attempt for Hysteria to end this. The blow strikes true and the monster crumbles, withering, perhaps even wilting next to the mammoth leaf.

As all 4 survivors gather again, we gained our rewards. Unsure what they were doing here to begin with no Hunt Exp was gained. We gained Dark Water Research (I) before rolling low on the rewards table adding 1 additional Dark Water (SR) to our haul of loot. That was one hell of a Frogdog fight. We finally got that missing resource for the chest armor.
I’ve said it before and I’ll say it again. I really like this fight from a theme-stand point. Having only fought it twice, the rose-tinted glasses are still firmly in place and for what its worth, I can see how Slendy can be a colossal dick as well if his cards line up in its favor. The 4 damage base line is also scary as hell, though we just kinda beat him up this time. But, well, I did bring Red Fist and a good part of the A-team so that part wasn’t all that surprising. The buckler triggering twice was also a welcome surprise!
We could get started on Dragon King for this years hunt.
Thank you very much for your time and don’t jump into dark puddles, you just might know where you end up,
Amathul

Leave a comment