Before I get into the nitty-gritty, let me just say this:
This is not meant to be a guide and more a reflection on my time and the experiences I’ve had with what this particular settlement location builds. Guides in general are a tough thing with KD:M for me and whilst a little guidance is without a doubt helpful for discovering interesting strategies ever so often, I would encourage you to just give stuff a try and don’t blindly follow the generalized input from the internet or any one person.
Don’t over-optimize – try stuff out! Have fun with it!
Case and point for me: some of my overall favorite weapons in the game are typically labelled as “too expensive” and you “should never build them” from what I have gathered over the last year.
I also may or may not utter guide-like statements at times when going through the items, I would suggest you do not take them as such.
You have been warned!
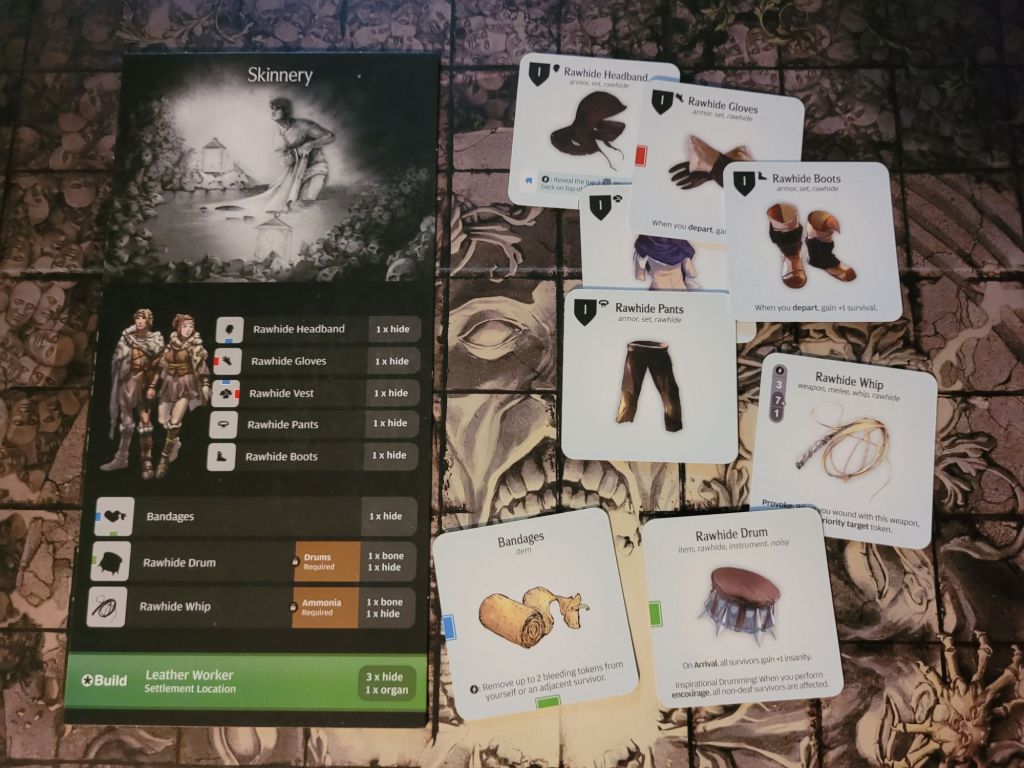
This is the second of the 3 basic settlement locations that can typically be built in any given campaign (so far) and this post is likely going to be a reasonably quick one.
The Skinnery is your place to get Rawhide Armor from and it is well known how powerful that set is. Whilst the completed armor set only has a total of 2 armor points for each hit location, due to survival being such an integral component of any survivor’s ability to live out their lantern years in the harsh world of Kingdom Death, a set bonus that gives you a 50% chance of not spending survival is sure to be very powerful during every stage of the game.
And its not just the set ability either.
The combination of head, chest and arms armor specifically is another strong reason for its all-round applicability. It just combos so gosh darn well!
Let’s start by pointing at the strongest bits!

Rawhide Headband – cost: 1 hide
1 armor point for the head location – armor – 1 down-blue affinity piece
If you activate the blue puzzle-piece affinity on this armor piece, you can spend your activation to look at the top 2 AI cards of the monster and put them back in any order. This is obviously a very powerful ability.
Whether you want to control the monster’s behavior, dodge especially dangerous attacks by wounding it off or just get an idea of what is coming, this piece alone makes it is easy to see how this set has such long staying power in any given campaign.
Rawhide Vest – cost: 1 hide
1 armor point for the chest location – armor – 1 up-blue and 1 right-red affinity pieces
For connecting both the blue and red puzzle pieces, you get +1EVA.
Rawhide Gloves – cost: 1 hide
1 armor point for the arms location – armor – 1 left-red affinity piece
+1 Survival on Departure
Another quick and easy piece that rounds out the 3-piece-center of the set.
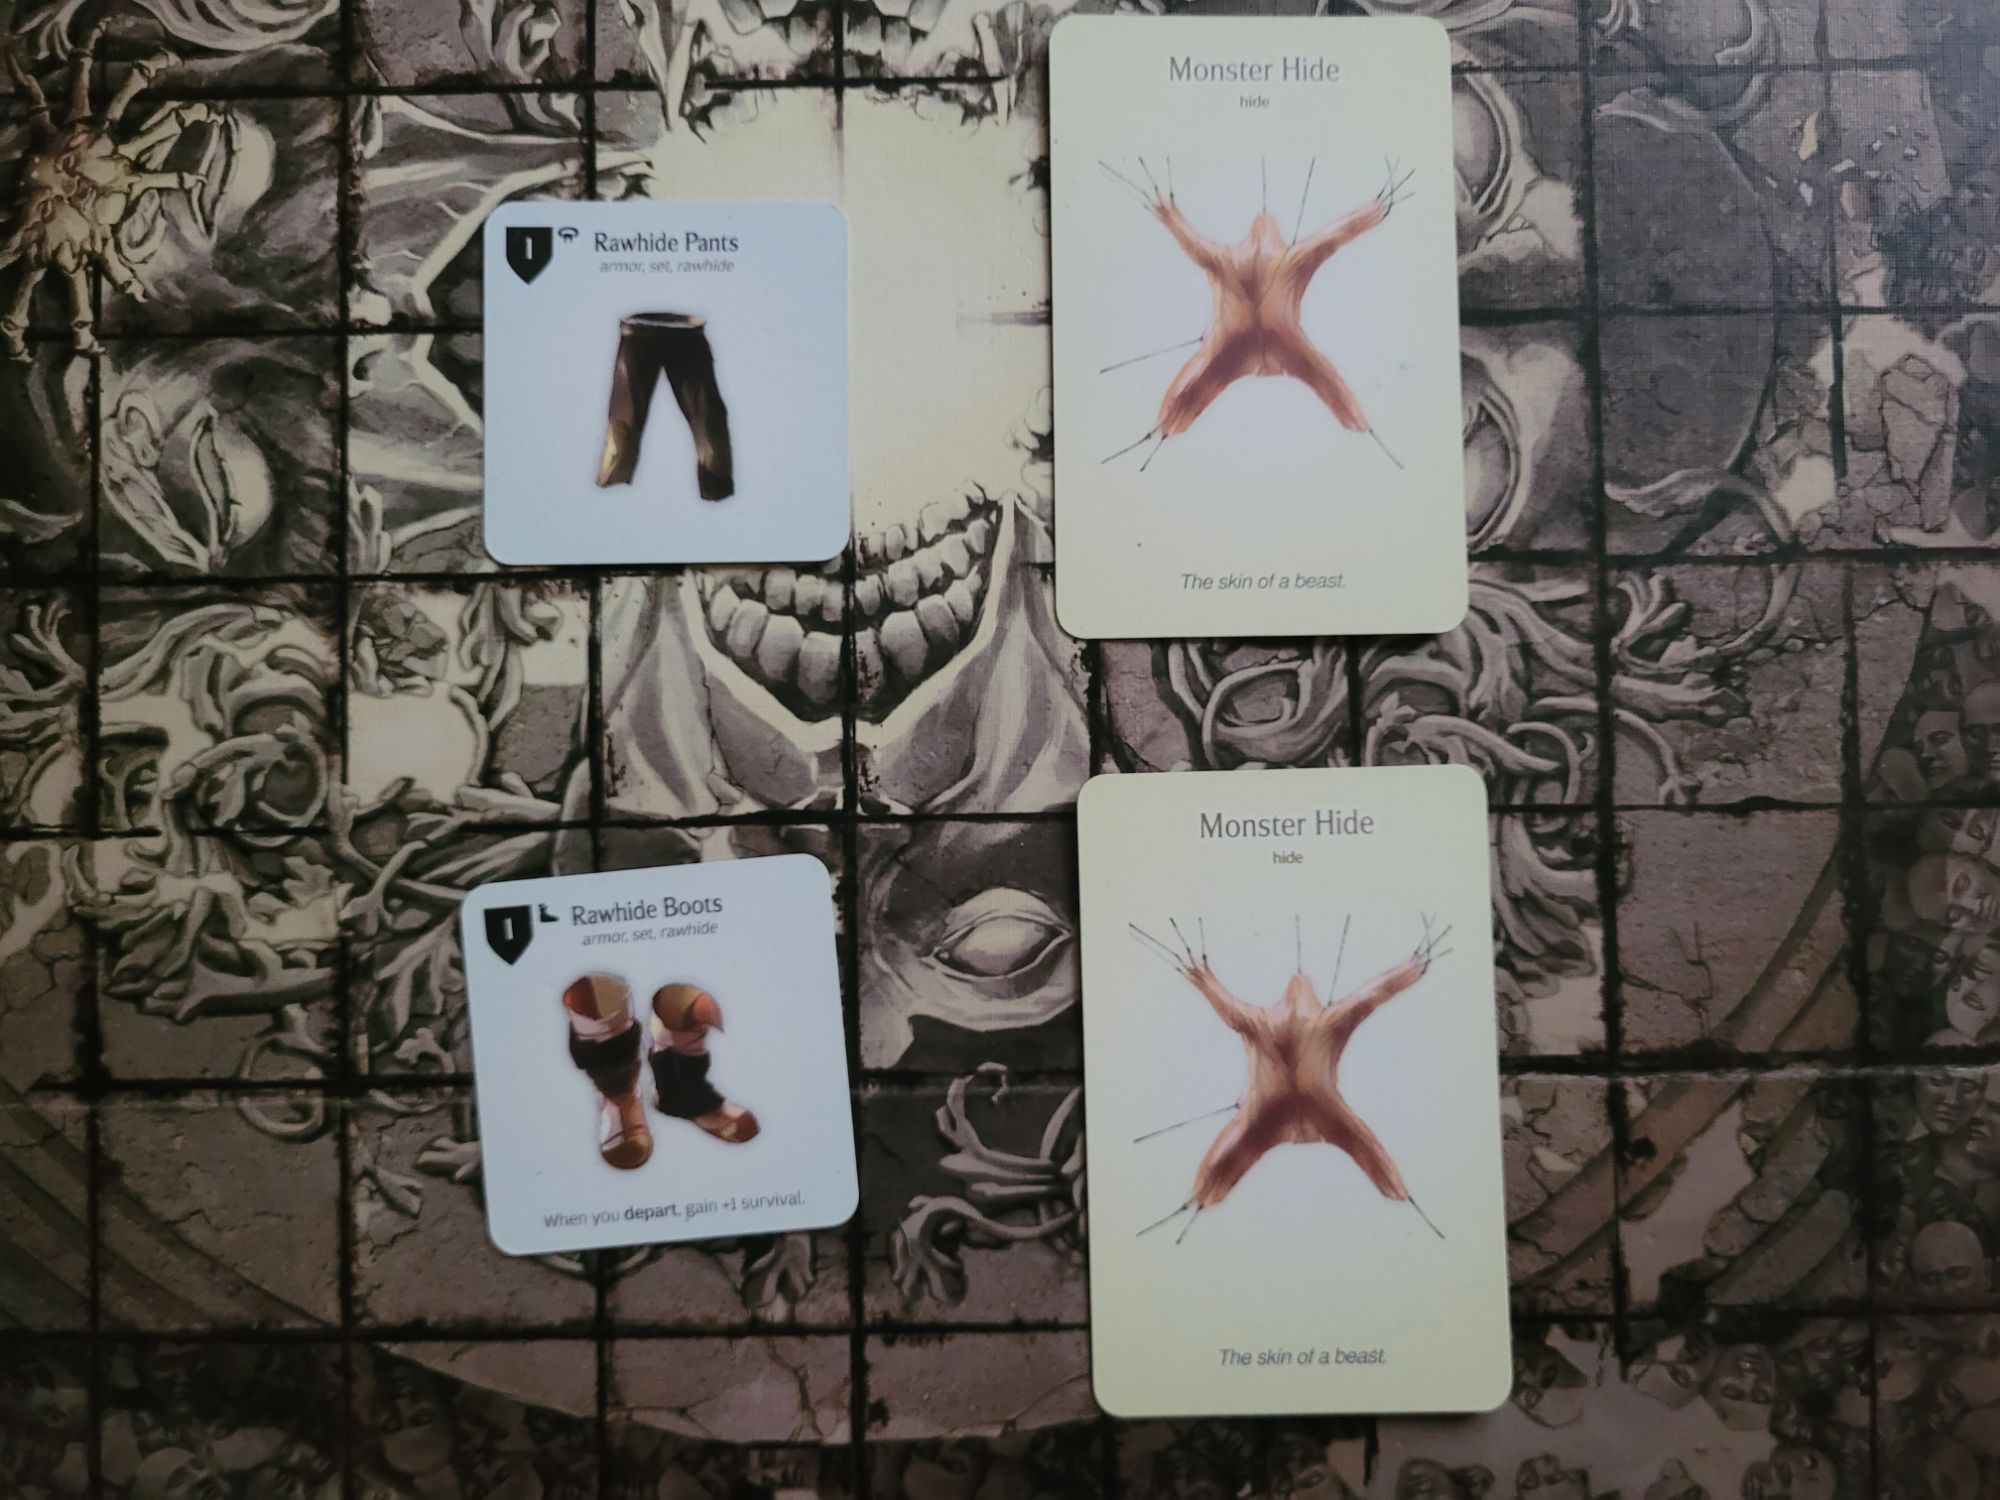
Rawhide Pants – cost: 1 hide
1 armor point to the waist location – armor
Nothing!
So there is a whole spiel here about “Technically, not quite!” And it both feels about equally weird to put this here or delete it as a whole. So for the time being, I will leave these thoughts in, but likely not post them again when looking at other armor:
Whilst on first glance this has just the exact same stats as the Cloth survivors start the campaign with, it is a component of the 5 piece set, so a round-about argument can be made that these pants actually give +1 armor to all hit locations and the set ability, at least if you are building them last (which you are likely going to do).
Rawhide Boots – cost: 1 hide
1 armor point to the legs location – armor
+1 Survival on Departure
Yet another cheap item with a decently strong ability for the early game.
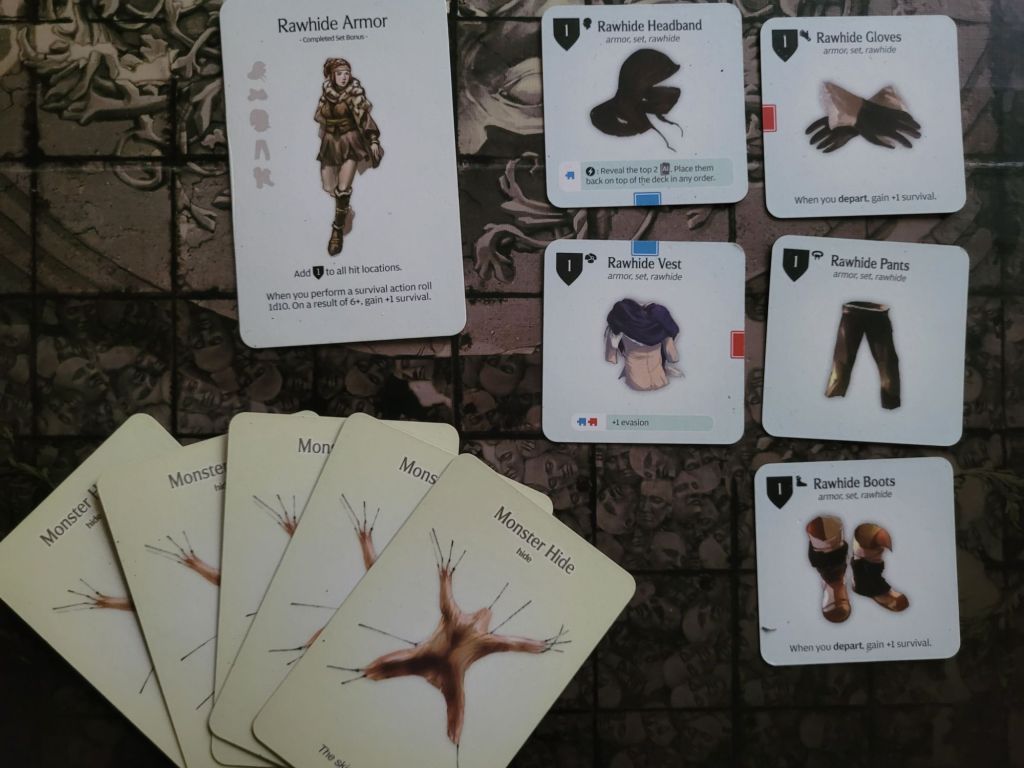
The Full Rawhide Armor – cost: 5 hide
2 armor to every hit location
Every time you spend survival for a Survival Action, roll a dice: on 6+ you regain 1 survival.
It’s cheap and has 3 (5) strong abilities.
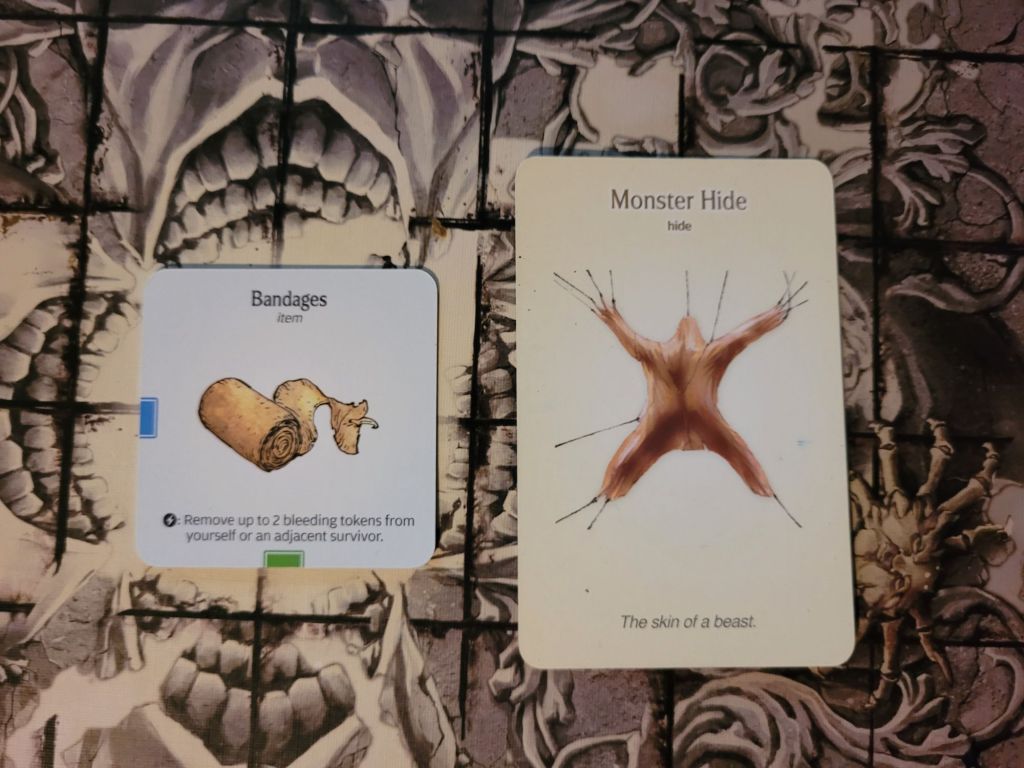
Bandages – cost: 1 hide
1 left-blue and 1 down-green affinity pieces
Activate these to remove up to 2 bleed from yourself or an adjacent survivor.
I will say, I tend to overlook these and not typically build any at all if I don’t get them before Butcher Lvl1. Still, they can and will routinely save survivors’ lives for my friends and I really should not be ignoring them.

Rawhide Whip – cost: 1 bone and 1 hide
3/7+/1 – Provoke (on dealing a wound, gain Priority Target)
The first whip you can build in the game, but only if you have access to Ammonia (I).
I have tried to make this work a mere handful of times. And yeah. The bad ACC and low STR are just terrible to get those first few wounds in. Whips also don’t really scale into the mid-game (without Frogdog) and feel mainly like a tool to mitigate hunt events to me.
I also tend to just not draw Ammonia (I) early in most campaigns, so this whip gets further delayed due to me being unlucky in that regard.
Rawhide Drum – cost: 1 bone and 1 hide
1 left-green affinity piece
1 survival on Arrival and when the character with the drums uses Encourage all knocked down survivors stand.
It is also an instrument and noisy, and – shock-horror – locked behind having Drums (I). I actually like these for their utility. Mainly having the +1 Survival on Arrival has helped me a lot before in a low-survival environment. A decent amount of hunt events do punish noisy though, which leads to all noisy gear typically receiving some amount of scorn from the community at large.
I really don’t mind that part that much personally, but I also have not been harvested that often. I’m sensing that there might be a correlation between those two statements.

And, once more: the path into the future at the beckon call of your fingertips!
Leather Worker – cost: 3 hide, 1 organ and 1 endeavor
Whilst the armor itself is not nearly as important compared to rawhide (though a practical stepping stone), Leather is a staple in a lot of crafting recipes from the mid-game on.
Overall, in my campaigns I typically set out to build 1 rawhide set and fill in gaps in other gear grids with additional pieces.
I do feel strongly about not scouting too much (be it HL or AI) ever since I heavily used it in a campaign that got me all the way to the end in LY30 and whilst I am noticing me falling into certain patterns when I think the danger-level is too high, I will more often than not willfully ignore it. I have to admit that this does stand at odds with my constant fear for the survival of my precious characters.
But, generally speaking: I like big numbers, both for armor and damage, what can I say?
Well.., I am just going to say it plainly.
Rawhide Armor feels a little too good.
And yet another not too hot take delivered. Good job, me!
As far as we know, it is somewhat expected (known?) that this set will receive at least a partial rebalancing in the future. And whilst we will have to wait and see what the actual official changes will end up being, from my personal standpoint, reducing the survival regain chance to 40% or 30% would do a lot already.
Other campaigns might also see sort-of soft-nerfs to the set by having different alternatives to build all-together. Whilst we still don’t know too much concrete stuff about the Inverted Mountain campaign, the Pond Scum Armor is supposedly an early game replacement to the progression we have known thus far.
All in all, the future will have to tell us more, whether that is going to be a card pack (unlikely *imo*), 2.0 (likely *imo*) or CoD (likely-ish *imo*).
I am sorry that this took this long to put together for what little I actually said in regards to the items as a whole. It seems every time I make plans stuff just sorta kinda happens. Like holidays. Or totally unforeseen, more-or-less yearly get-togethers.
In any case, I’d love to hear about your experiences in the (mostly) early game, and I’ll try to be more “on time” with the Organ Grinder for next week.
As always, thank you very much for your time, and don’t forget to make use of your Crab Spider-hide!
Amathul

Leave a comment