
For a second (technically third) time we have made it to the final encounter of a campaign together! This one also wasn’t exactly a bumpy ride, this time not carried by the whims of a singular weapon, but rather the People of the Sun as a collective!
A collective with an “everyone for themselves!”-type of mindset, but still a collective.
So, we have made it all the way, but at what cost?
Half of the A-team got killed in the last fight, and the objectively best set of armor at our disposal had been burned to cinders (which, to be fair, likely would have happened in the Finale anyway).
Luckily for us, this Sunstalker fight is supposedly on the easy end of fights – I wouldn’t know first-hand at this point in time – this was my first ever PotSun campaign!
But none of these last few Lantern Years had played out the way I had expected them to – so I was ready to be surprised!
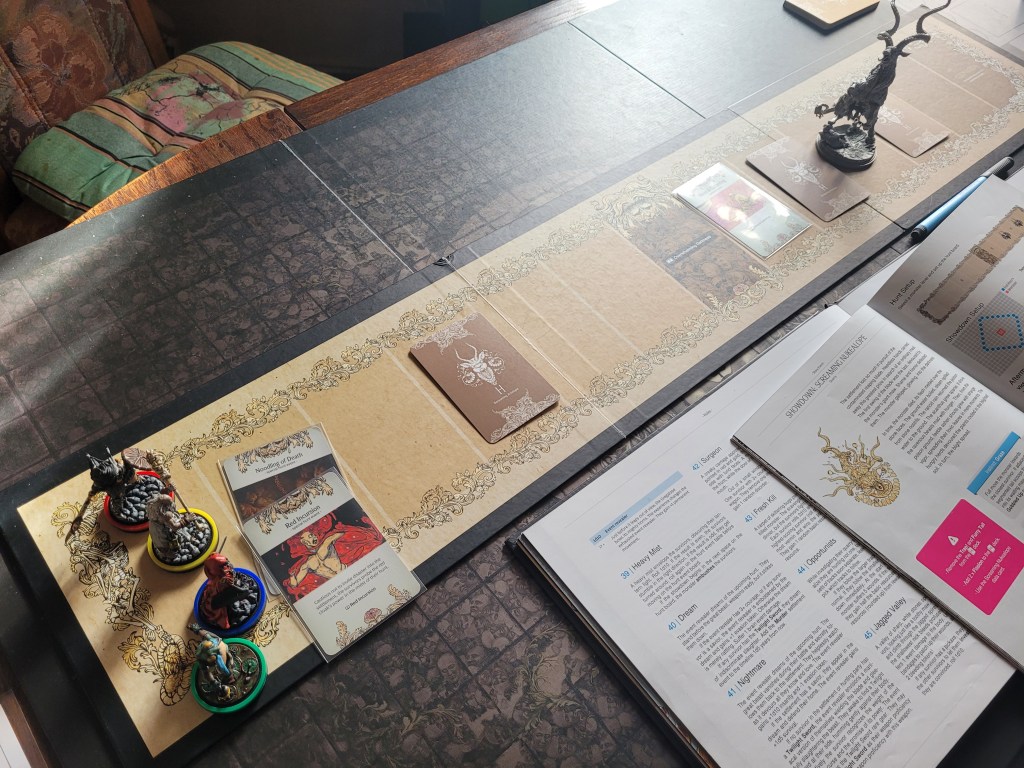
We had 10 endeavors to work with and a final random settlement event incoming.
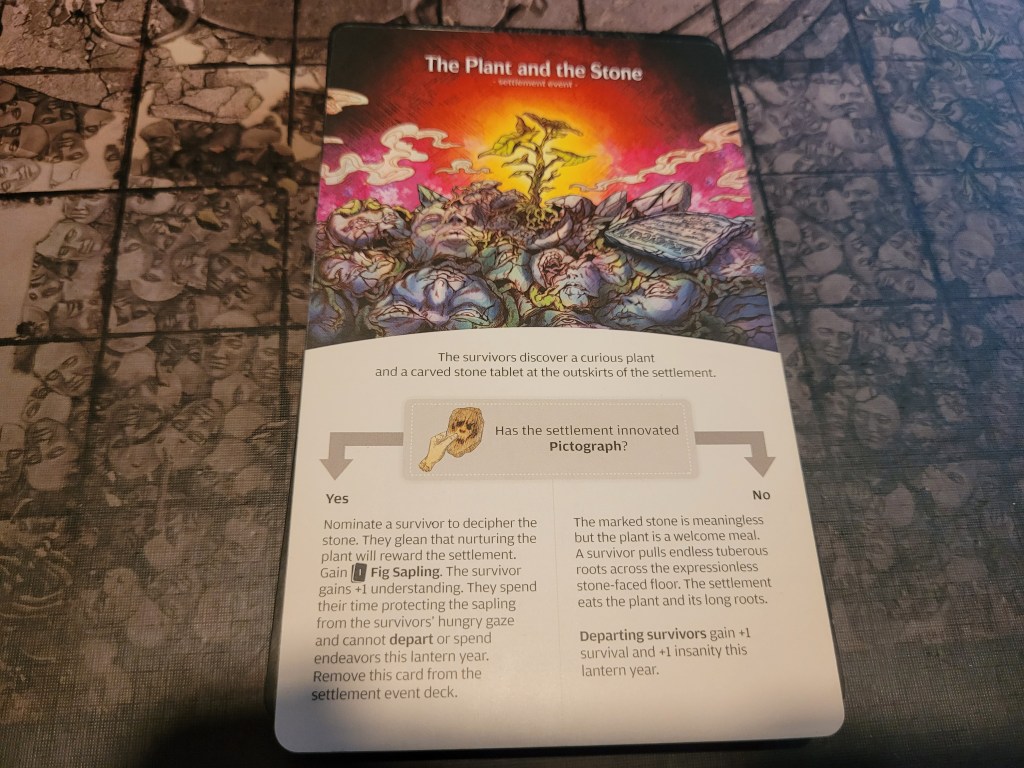
One last time for Azure Pond: The Plant and the Stone.
Skrelle had been up to more tomfoolery again, planting another tree. But joke’s on her, we still couldn’t read! Between Saga (I), Storytelling (I) and Song of the Brave (I), we staunchly believed in the purity of oral traditions and the beauty of song!
But most importantly: Muzashi didn’t fall into a hole.
Before I did any developing this time around I started tinkering with the gear grids, and I understood pretty quickly that at least 1 of them was going to be a mess. We didn’t have a suitable replacement for the lost set as the King’s Curse had slowly torn apart one of the Rawhide Armor sets we had been using.
Ultimately I decide to move the Screaming Armor over to Muzashi. Having him equipped with at least some armor might help him deal a little more damage and not die instantly should he ever get hit more than once.
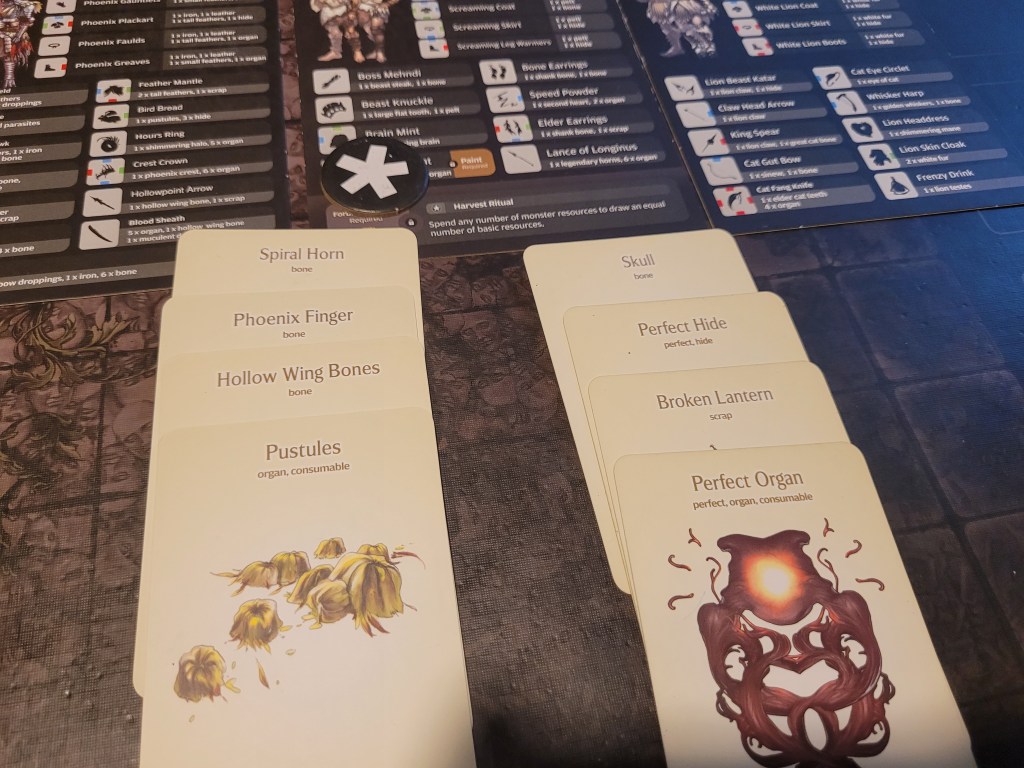
First off I needed to take a look at what we still had remaining in storage:
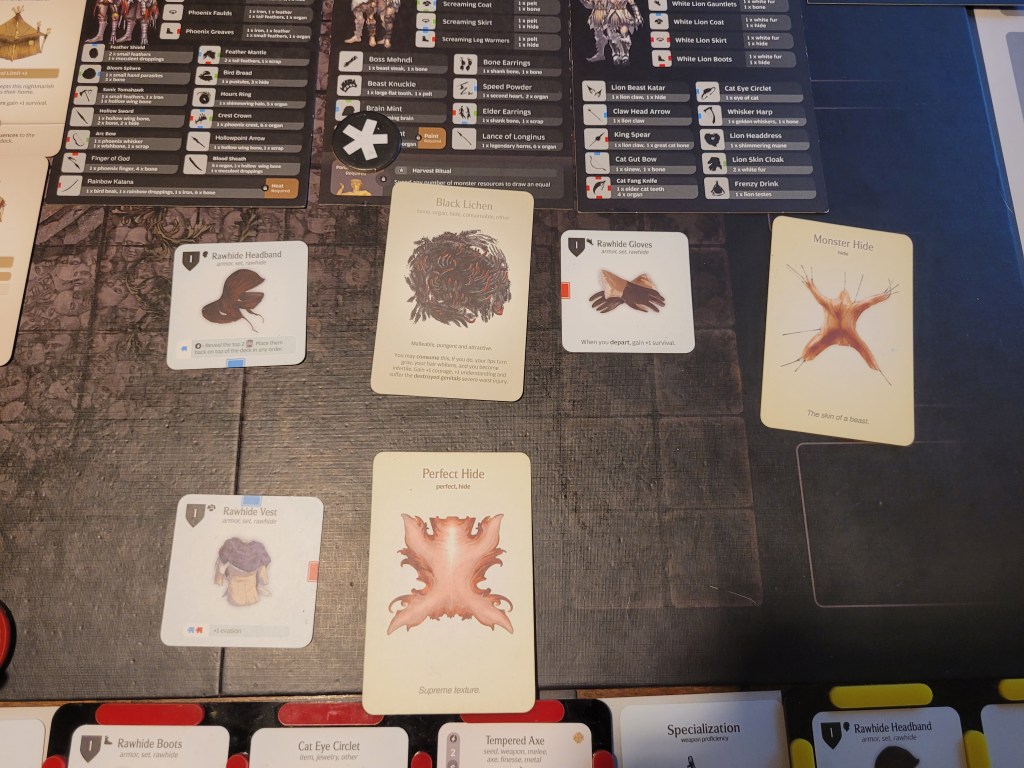
Spiral Horns, Hollow Wingbone, Phoenix Finger, Pustules, Perfect Hide, Black Lichen, Gnawed Gastrolith, Elder Cat Teeth, Legendary Horns, 5xBroken Lantern and 2xLife String.
And looking at all these resources, I was pretty confident we should be pretty likely able to remake that second rawhide. We had 2 hide already and we could still use Harvest Ritual on 4 of those resources.
And that is exactly where we were going to start this Lantern Year.
Funnily enough, whilst I didn’t exactly have high hopes overall, it still turned out a little disappointing. We did get another Perfect Hide at least and that meant we had 3 hide to rebuild the remaining rawhide bits for Moon.
Next, we took one of the Life Strings to the Sauna Shrine (I) and spent a reroll to get the armor/STR-token result.
We had 5 rerolls left at this point and I had the great idea to have Moon try Forbidden Dance (I). It took me all rerolls left in the settlement except for Muzashi’s to get her a positive result (+1EVA).
(No! Don’t worry about it! Ignore it! I know! Don’t think too hard about it! What I’m talking about? Don’t worry about it!)
With 6 endeavors left and considering this was the final year not much was left for me to really do.
I did send Helios to tell a story and he went off the rails pretty quickly, securing us a departing insanity bonus. I remained unsure what to do with these last endeavors and spent them on Drums (I) again after a bit of consideration.
I realize there was still some merit to pumping out more babies for rerolls, but I suffered from severe lastyearitis and had to move quickly.
I could had have also sent people scrap scavenge and hope for the courage, but losing ACC wasn’t a great reward on any of the people that the option would be relevant for. So we gathered around the bongos instead and spread some insanity as the Feline Entity watched over us throughout it all!


Some say (movies certainly do) that animals knew when bad things were about to happen. The Knowledge Worm was most certainly smarter then us and saw something coming. It approached Helios (41 insanity) one final time and on a 6, they just cuddled it out.., again.
I’m sure as far as pets go there could be a lot weirder things in KD:M.
As the worm scuttled off into the darkness, our rhythmic drumming seemingly called out to The Sun above.
And the ominous red light slowly made way for a shining grin lined with rapturous teeth before a ravenous Sun finally descended upon us!
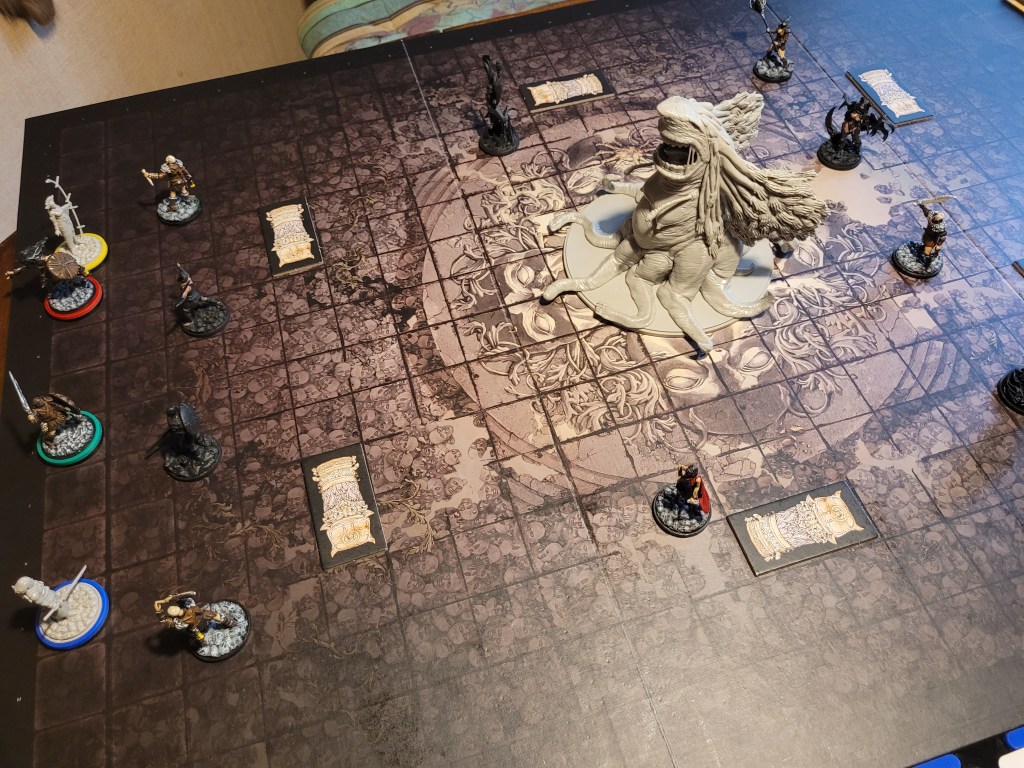
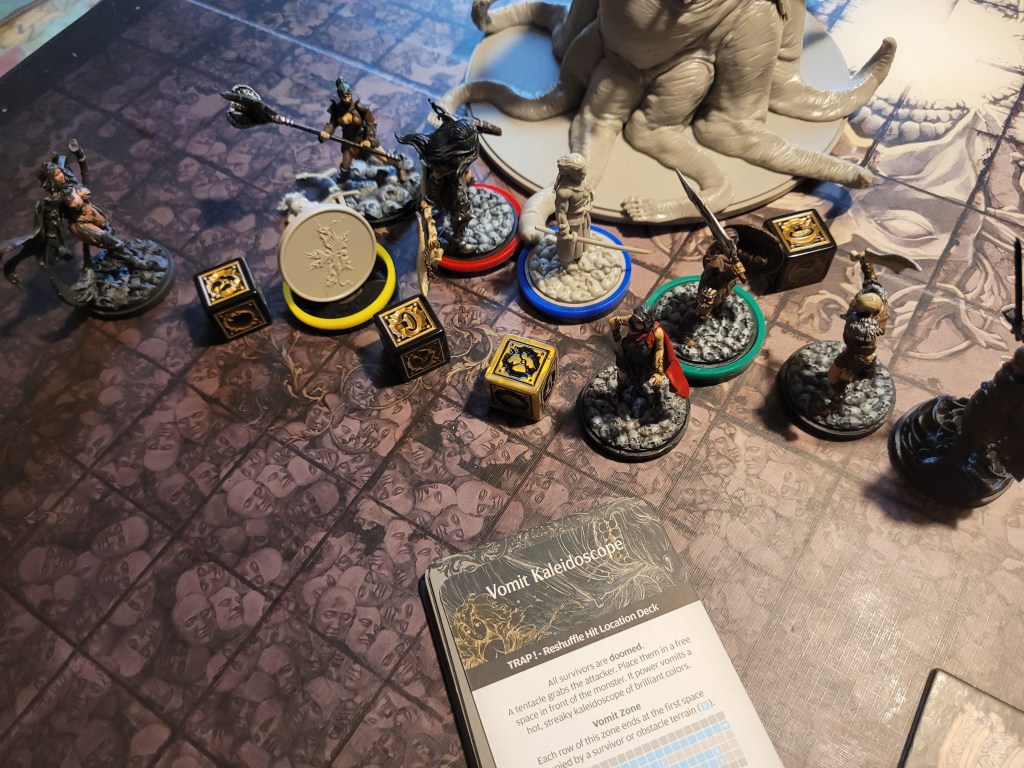
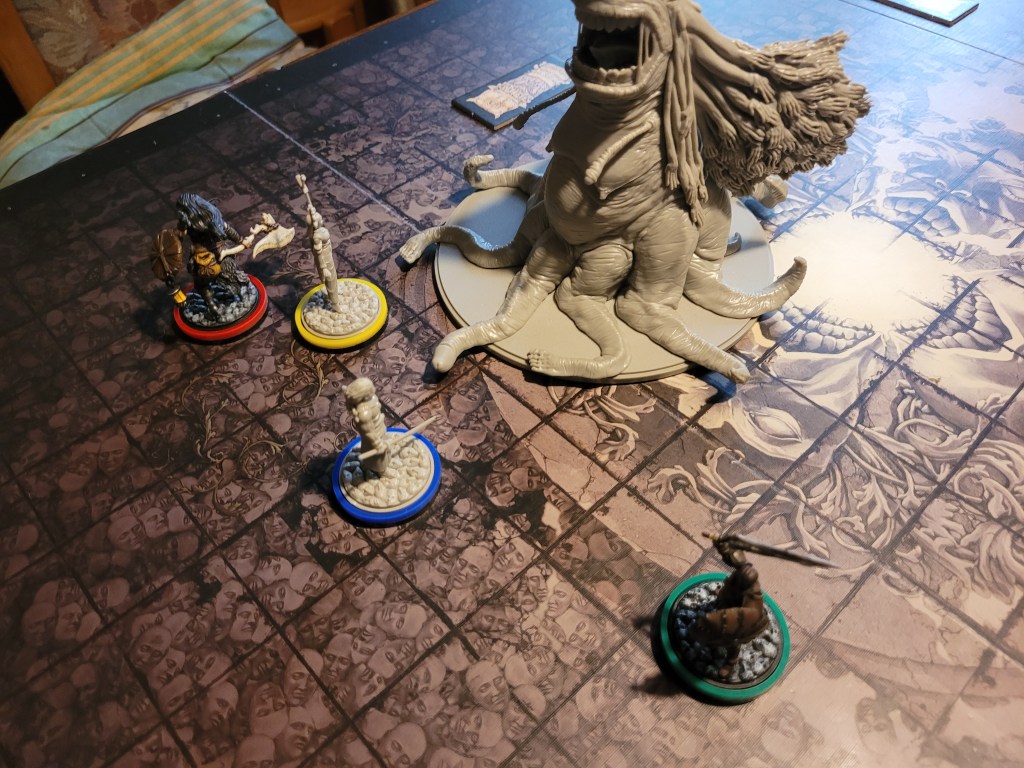
The Last Line of Defense:
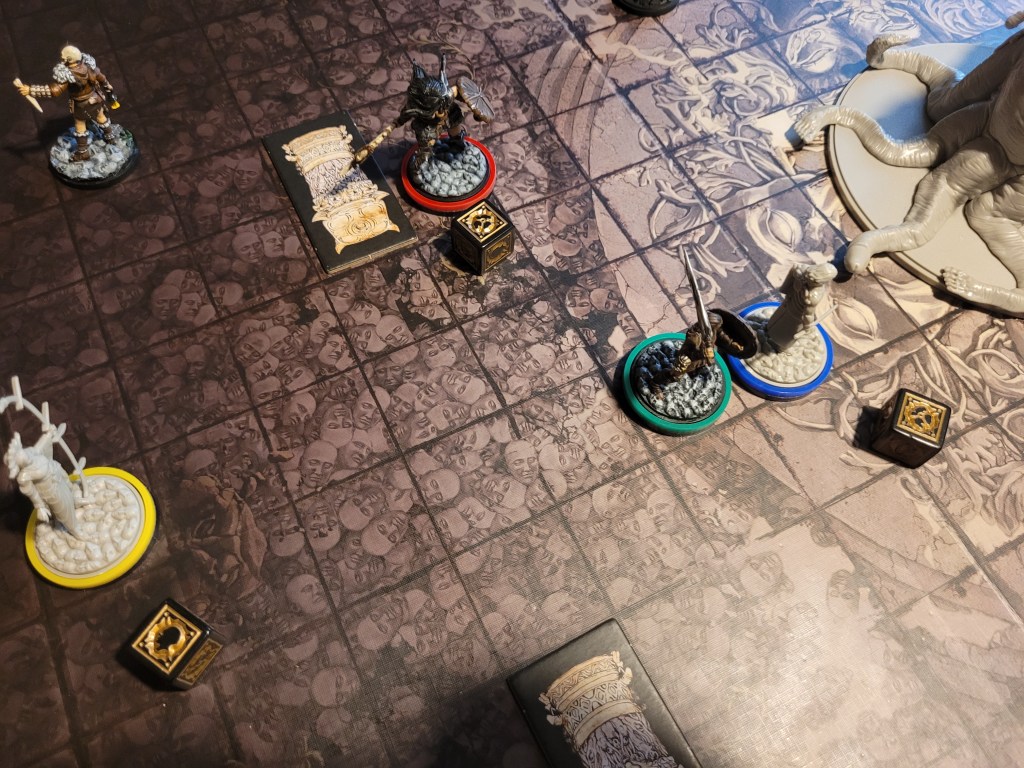
Helios – green (Leather Armor, Lantern Sword)
Muzashi – blue (Screaming Armor, Tachyon Nodachi)
Moon – red (Rawhide Armor, Sonic Tomahawk)
Stardust – yellow (Rawhide Armor, Arc Bow)


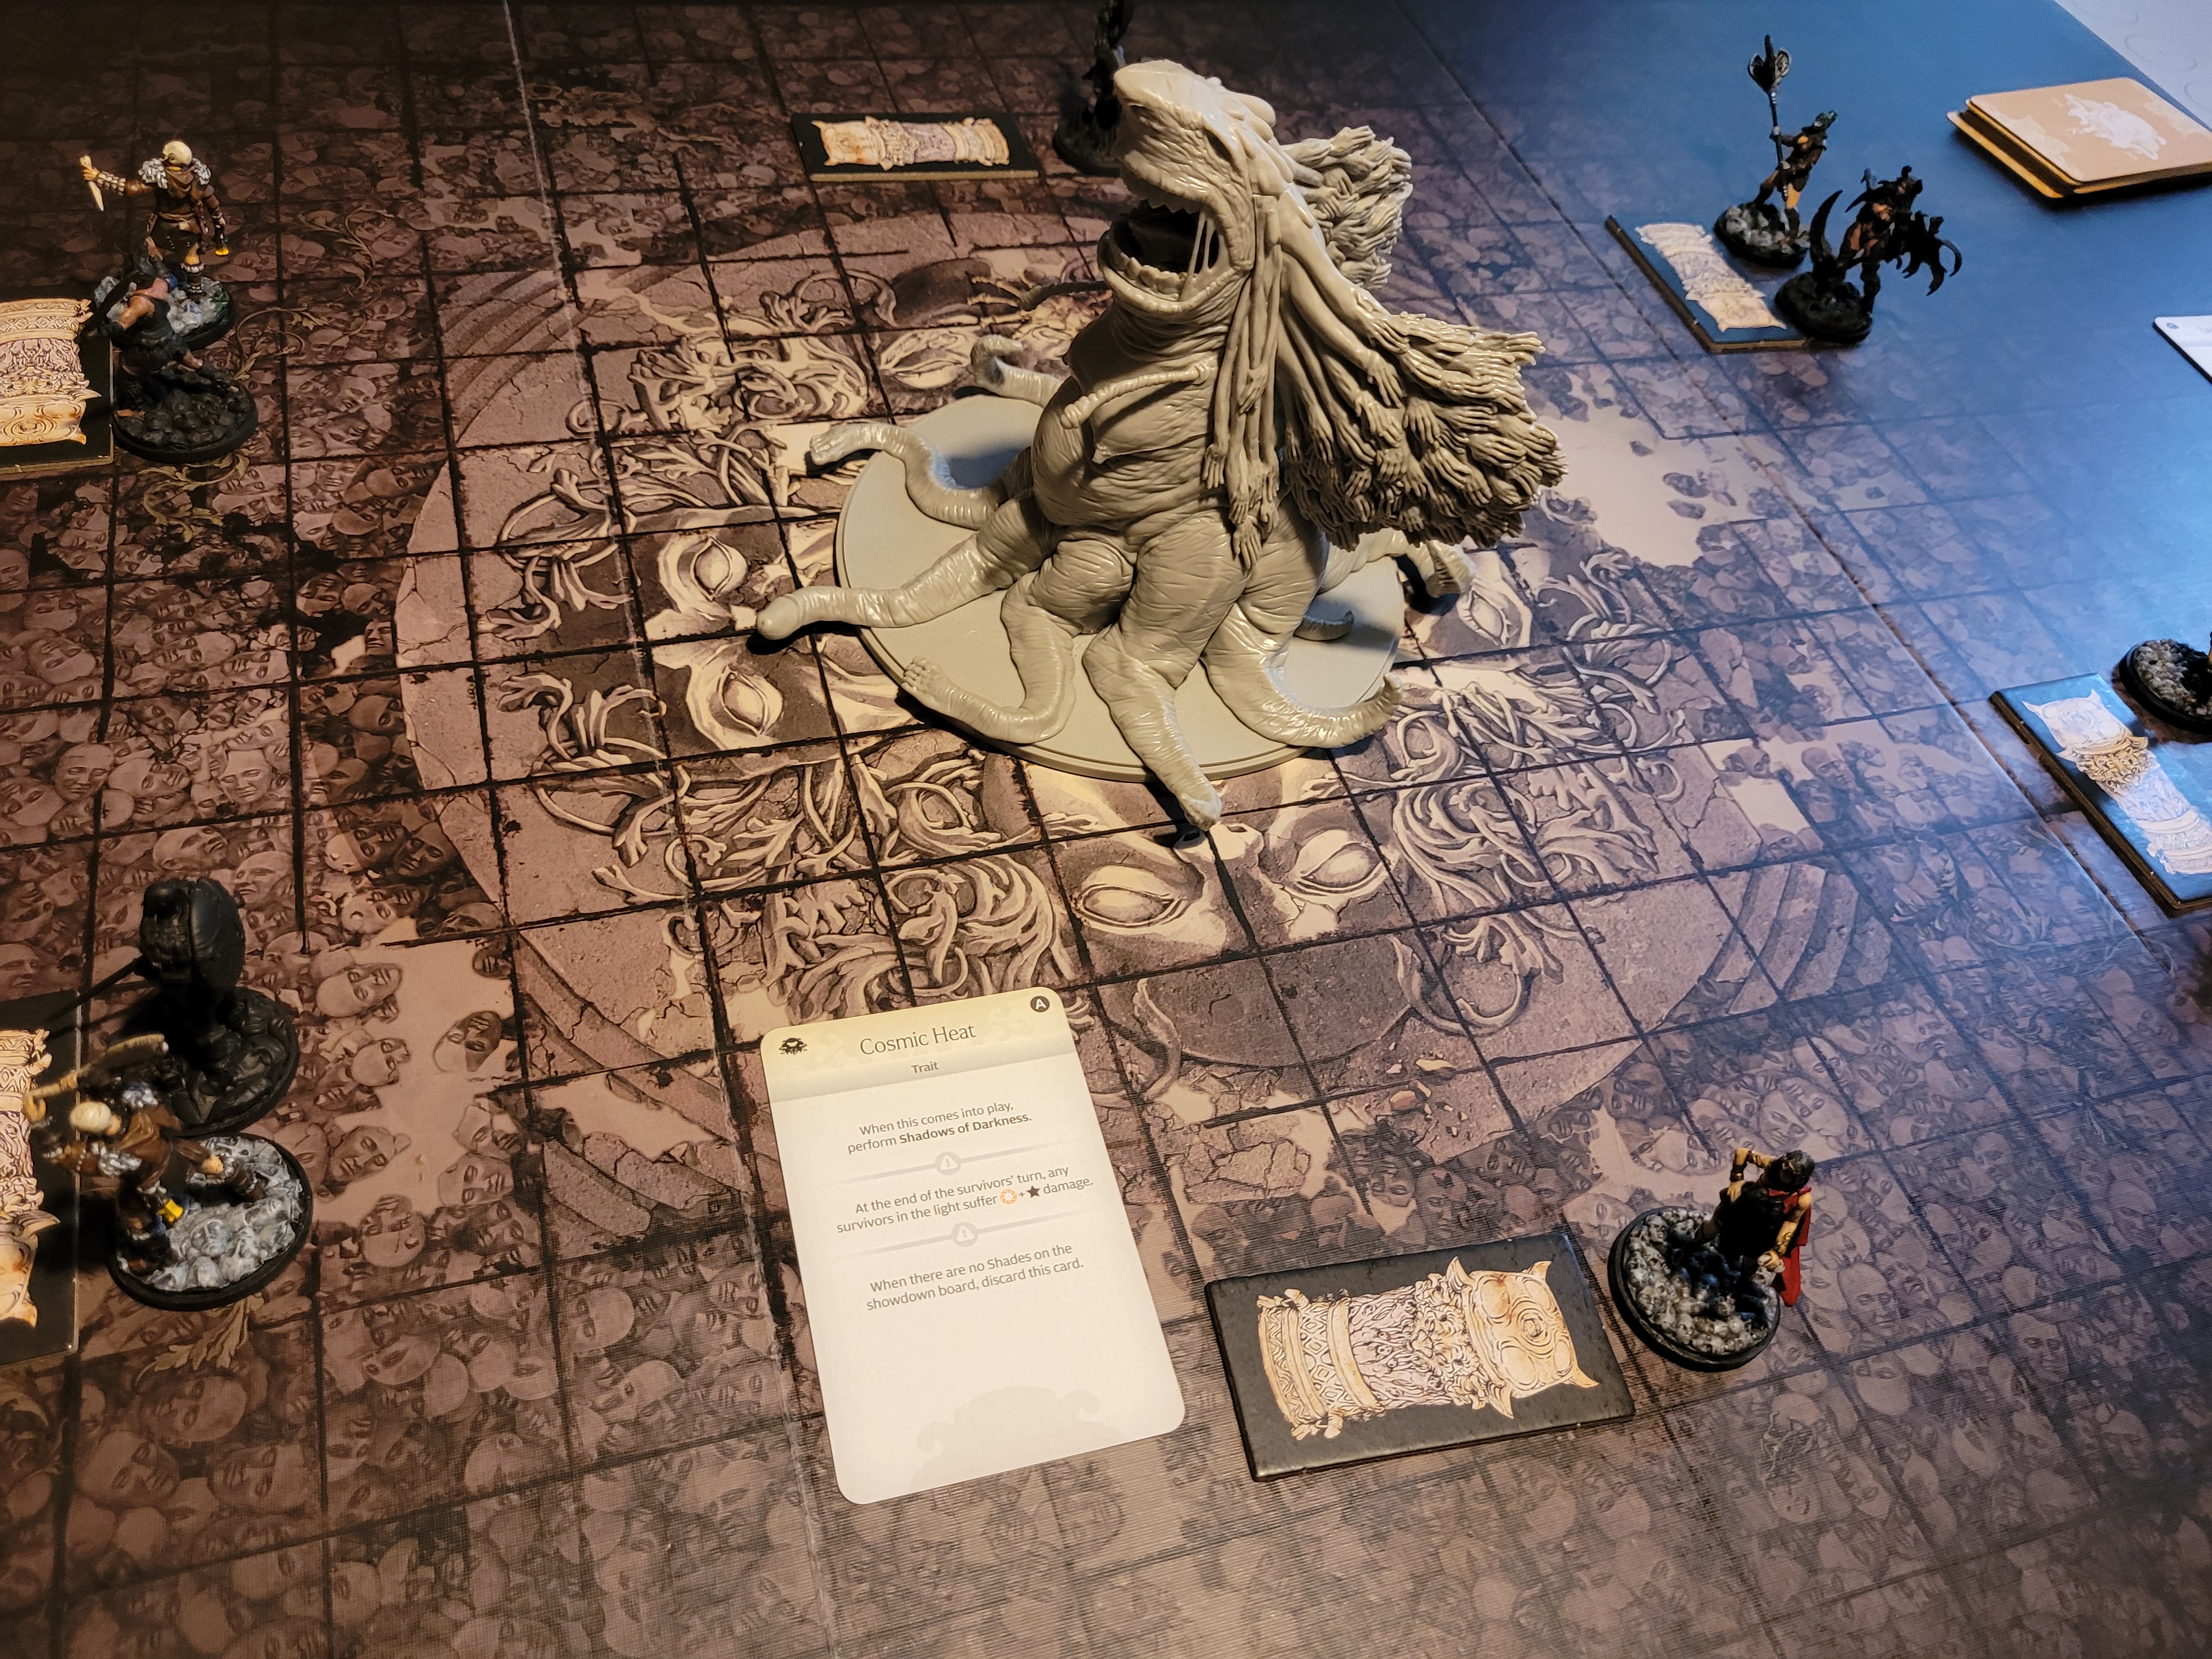
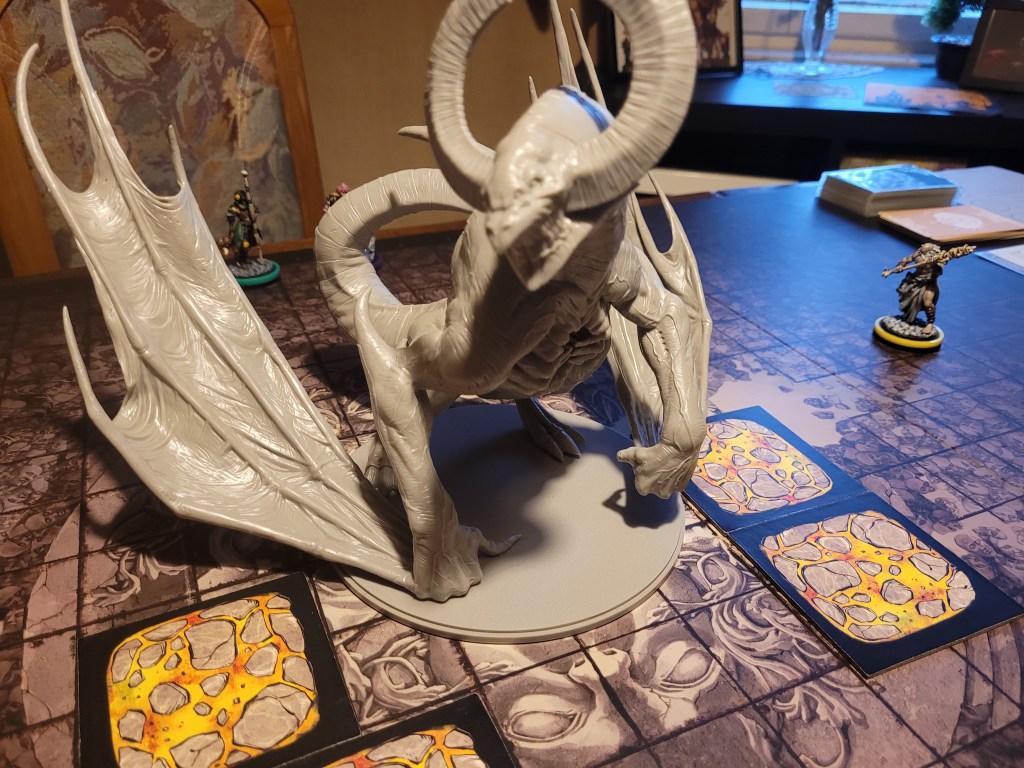
Functionally the Great Devourer is a Lvl3 Sunstalker with +2TGH and +1LCK. The latter meant only Muzashi would be able to crit the monster.
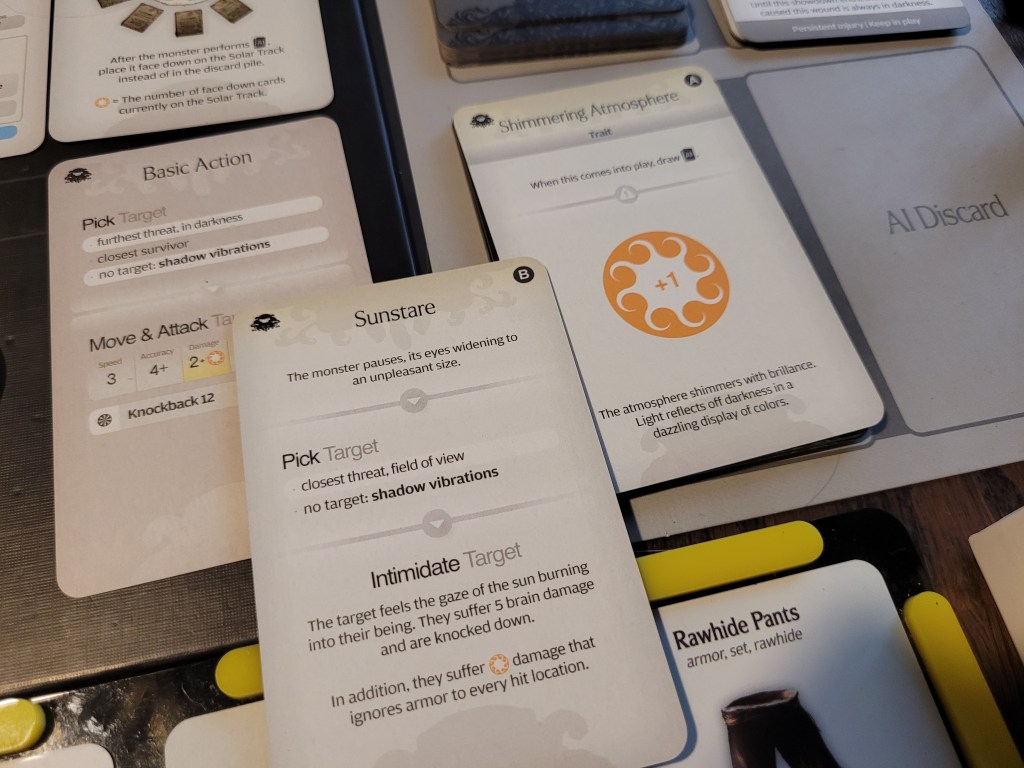
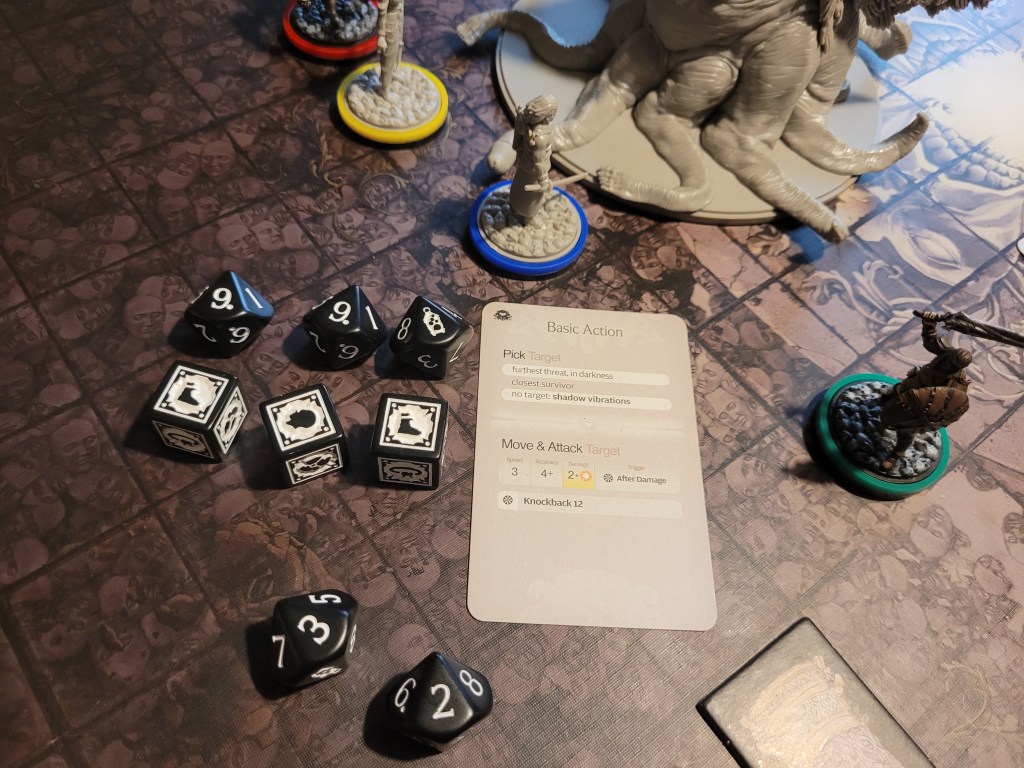
Besides featuring hit location cards with the banner Lightspeed (which is faster than First Strike) and bringing minion rules to the table, a Lvl3 Sunstalker has a whole host of traits.
Any fight with this monster prominently features the Sun Dial, which not only tells you the direction light is shining in (which will be VERY relevant) but also collects played AI cards, scaling various other effects via the Solar Energy trait.
After each third card placed on to the Sun Dial the Sunstalker will explode in a solar flare dealing damage and incinerating all flammable gear if caught in the light.
Survivors and terrain will cast shadows though (Light and Shadow), which essentially act as safe spots for both defense and offense.
However, on the flipside, the monster can also spawn minions in these dark spots (Shadows of Darkness) called Shades to harass survivors.
On Level3 all solar flares will spawn Shades (Living Shadows) and the survivors not only arrive at the fight with a status that makes them unable to lose their bleeding tokens (Black Blood), but the monster also sets up a Shade in the shadow of each terrain (Monochrome).
The monster itself has 16MOV, 18TGH (a lot less than last year), and the typical +2DMG/SPD. Furthermore it has the above mentioned +2LCK and +1ACC in total.
And – untypically – it does go first.

As far as I remember from fighting the lower level variants of this monster, the fight can very much alternate between explosive (for both parties) and annoying.
Let’s find out how it plays out today!
According to the internet this is supposed to be easy!
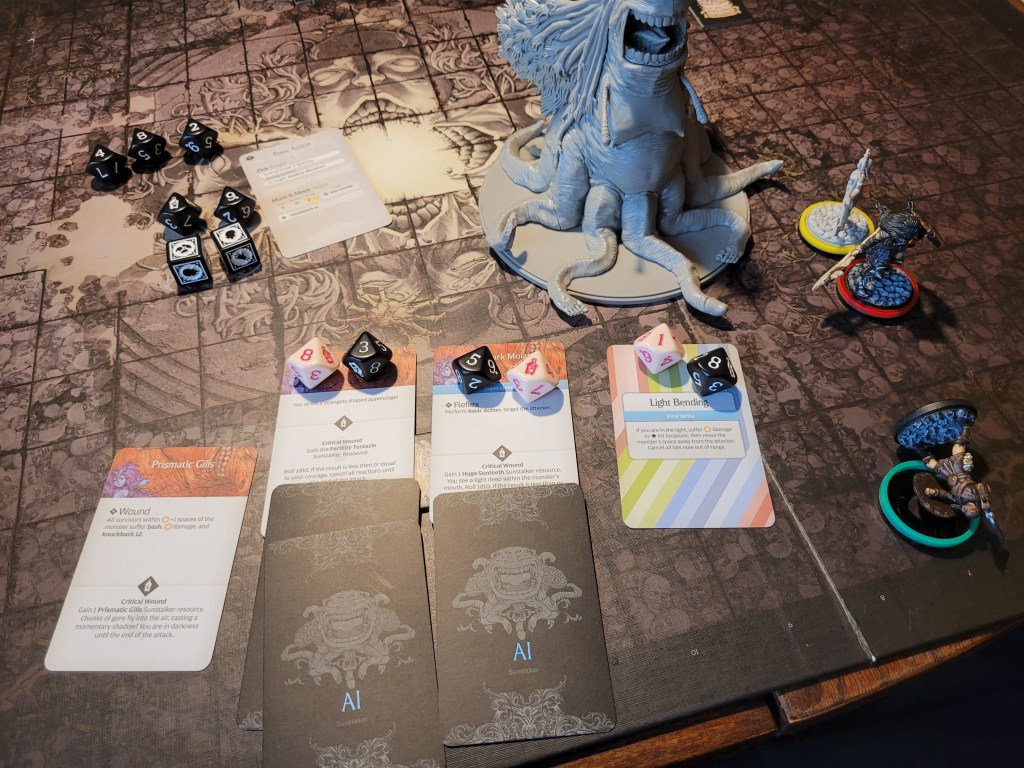
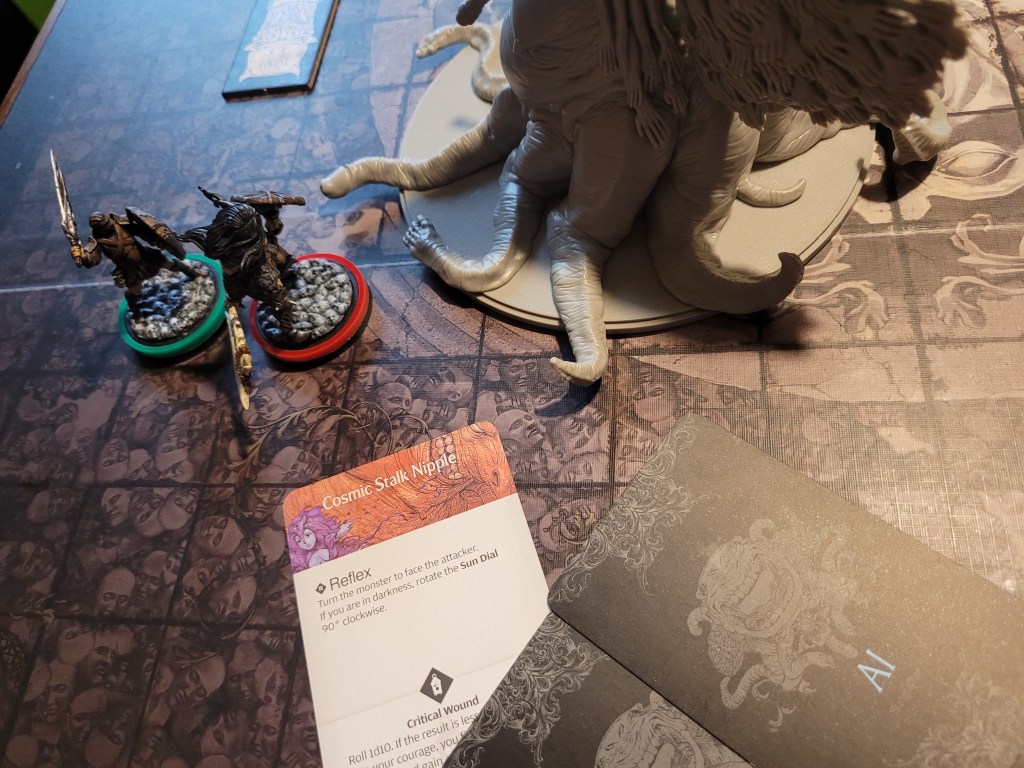
20 cards in the deck. The first card played in this finale was: Cosmic Heat. Oh, great.., a trait! The monster wasn’t going to move this turn and instead it doubled up on its minions.
There is also constant damage going to come in at the end of the survivor’s turns for anyone left out standing in the scorching light, until all Shades have been dealt with.
After the monster’s turn all minions got to activate and they each “blindly” rushed towards the closest threats with their 4MOV.
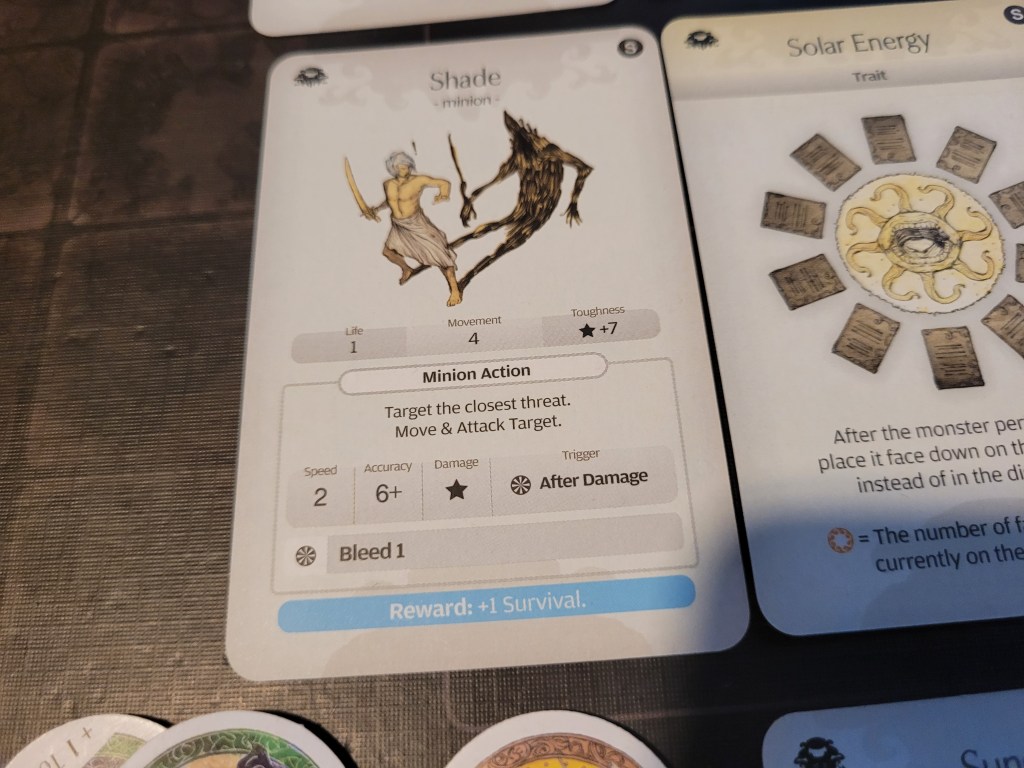
We started our counter offensive with Moon and she went to try and eliminate her closest Shade. Minions usually have a single HP, Shades have 10TGH to wound.
She hit it once and wounded thanks to axe spec. As a reward for killing Shades, the survivor that dealt the killing blow gains 1 survival.
Stardust shot her bow, using bow spec to actually hit, but failed the wound on a 1! She would have to dash away from the closest Shade, but wasn’t able to reach any shadow this way.
Helios didn’t care about what was going on with the upper team of two and simply stepped up to his closest Shade and attacked it. He easily felled the offensive minion with his Lantern Sword hitting 3 times.


He then dashed into a position where he could offer shadow for Muzashi.
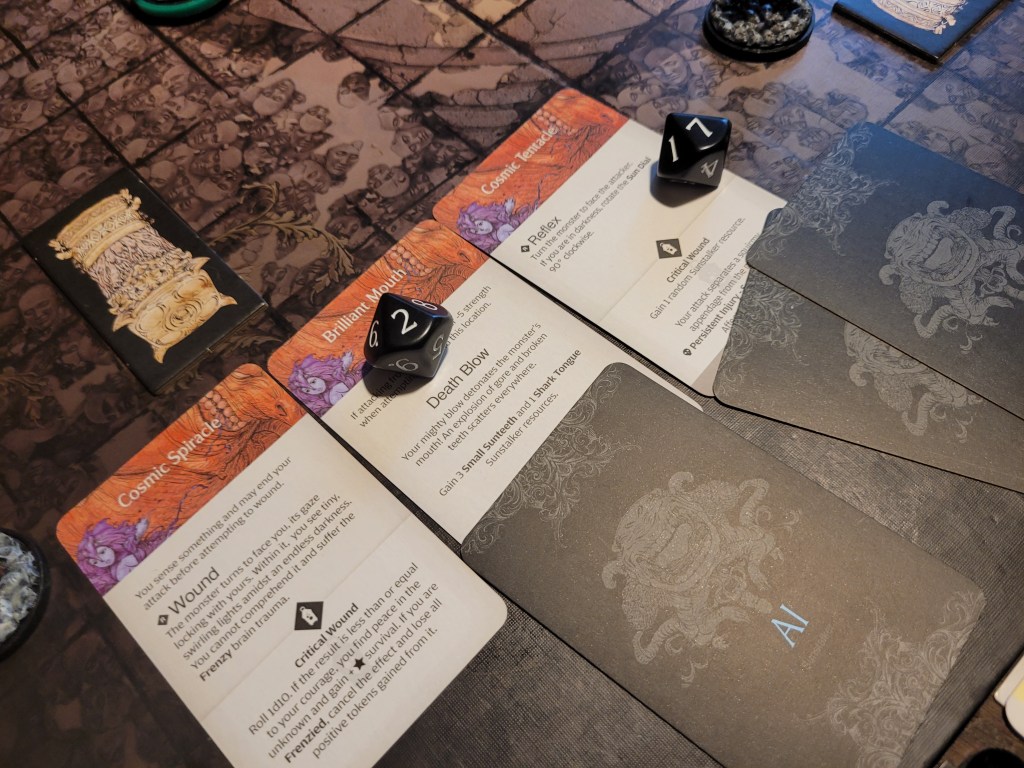
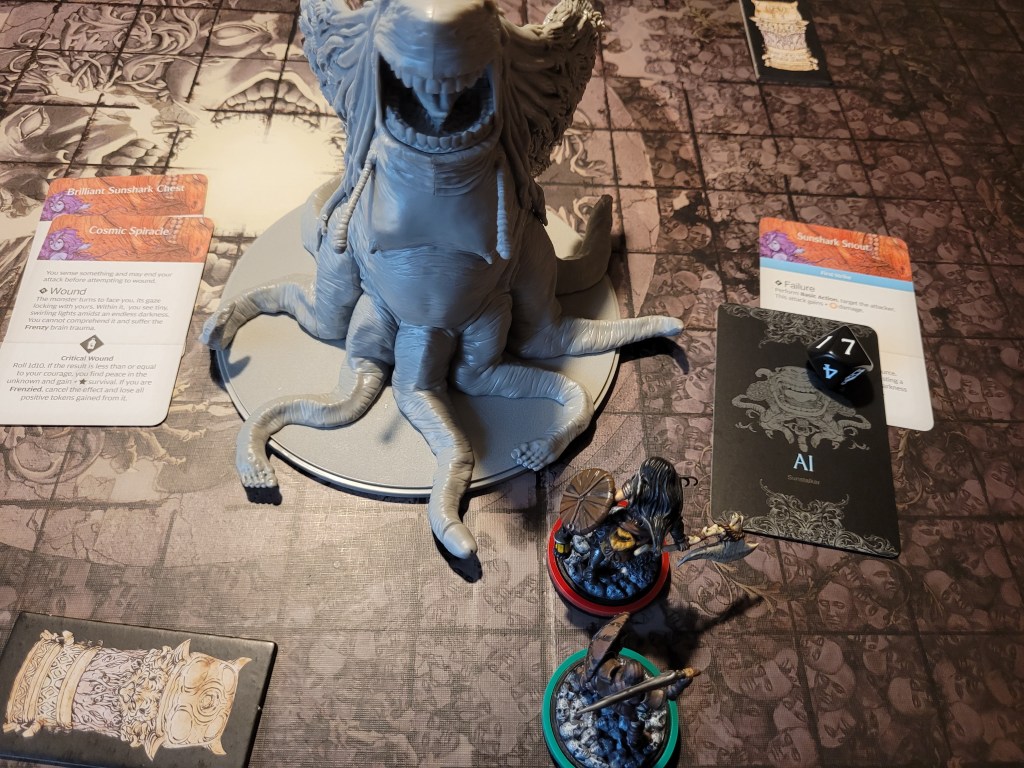
Our chosen warrior spent 3 survival on Dash, Overcharge and Embolden and attacked. Hitting 4 times in total the light shifted around us, and he was no longer in the shadow. Fortunately the remaining 3 hits didn’t care too much about that. At 20STR before rolling he easily dealt 3 wounds and opted to not hit the Cosmic Spiracle to avoid suffering the Frenzy brain trauma. (It was only after the attack that I realized that the hit on the Deathblow only wounded because of Embolden.)

As our turn ended, Cosmic Heat dealt 3DMG to everyone but Helios.
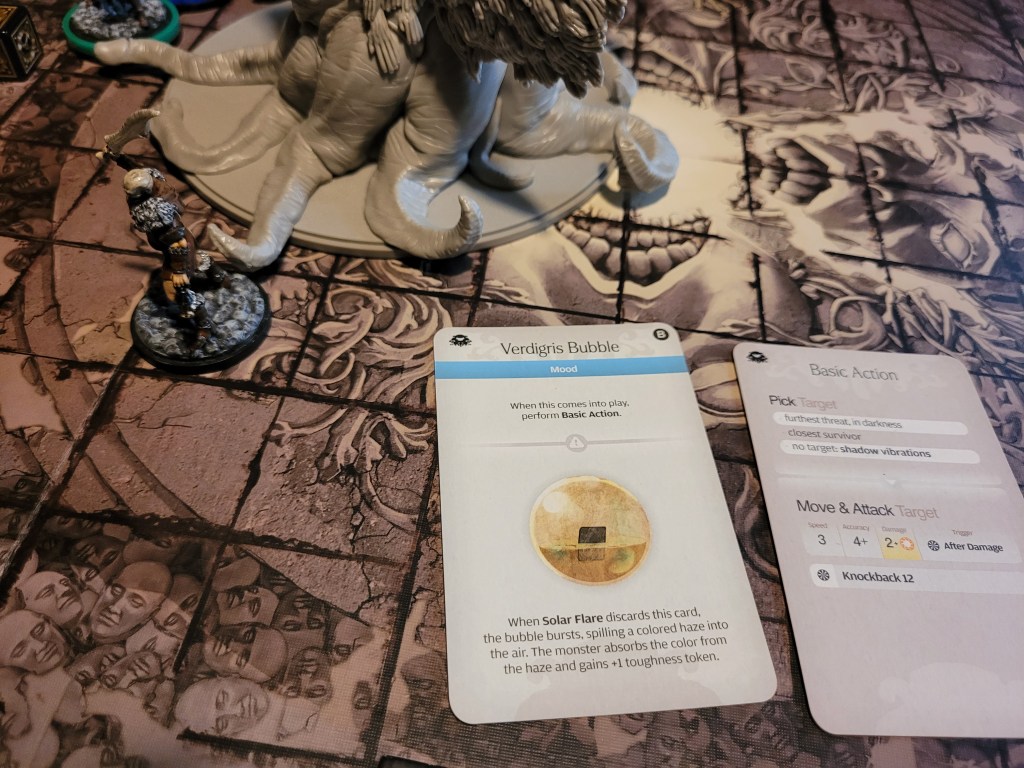
16 (17) cards left in the deck. Vermillion Bubble was the next card. This Mood would only really activate after the next Solar Flare, so we got lucky in a way – this postponed the Solar Flare by a turn.
Its basic attack targeted Helios, who was the only one standing in darkness at the time. Muzashi used the flow to dash out of the monsters path to not get flung away and knocked over. Even despite the +1ACC, Helios was only hit on 9+, and he evaded all hits with ease!
As the Shades swarmed towards us, Moon got attacked by one of them, carefully dodging the one hit connecting on 8+.


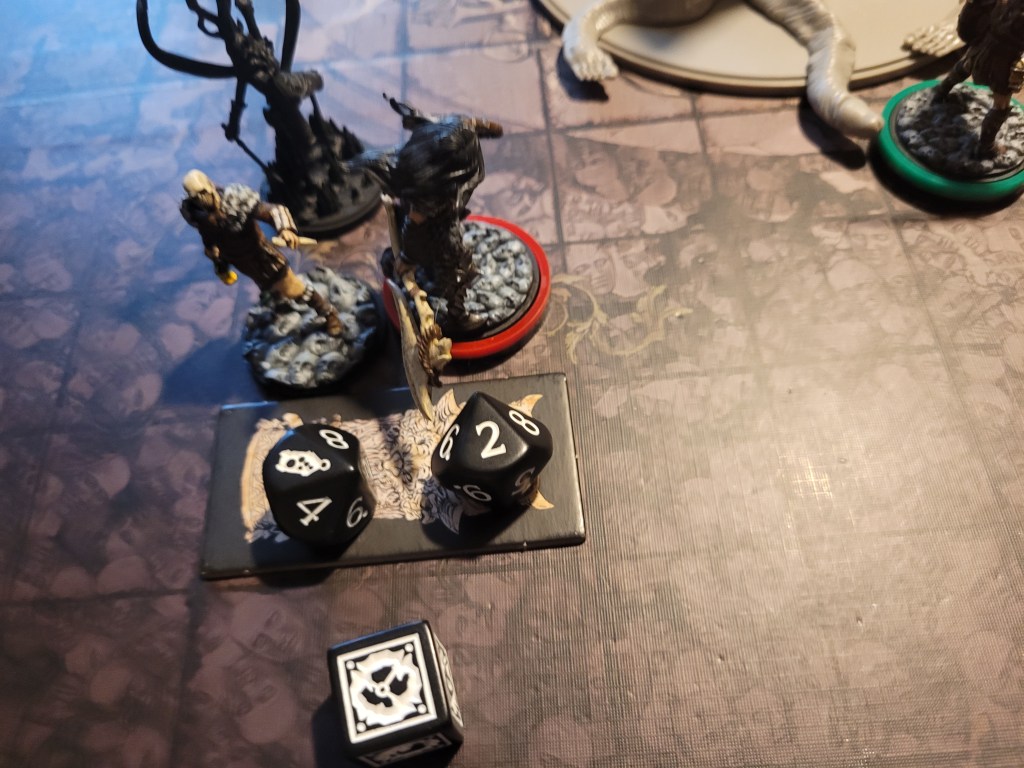
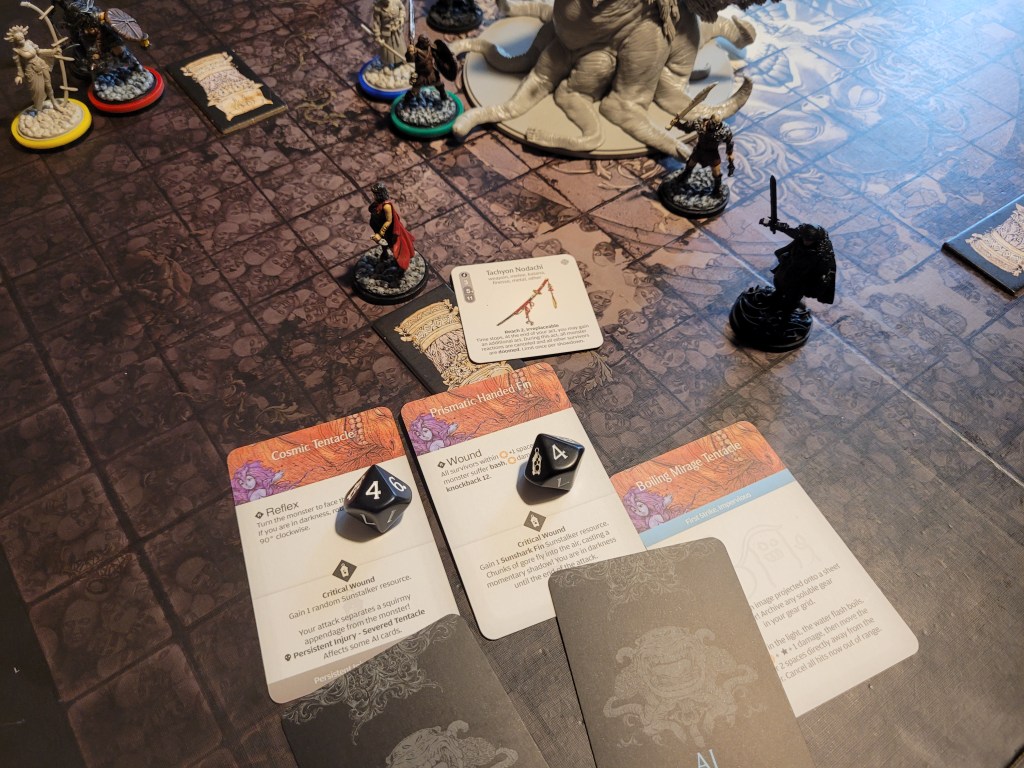
Muzashi activated first and unleashed his attack with the typical Overcharge/Embolden combo from the shadow Helios cast for him. He hit the monster 3 times, dealing 4 wounds in total even finding a crit… just on the wrong hit location. He was sprayed with ink and flung backwards, leaving yet another Shade in the spot where he had just stood moments ago.
Moon and Helios both cleared out one more of the swarming minions before they hid behind a safe pillar.
Finally Stardust joined them to use her Rawhide Headband. She revealed another Trait that would draw both cards next turn or an Intimidate that would target the Stalwart Muzashi.


11 (13) cards remaining in the deck, unsurprisingly, Sunstare was played as per my design. Muzashi was the expecting target, and he suffered 5 brain damage (21 down to 16) but remained standing because of Stalwart.
The solar flare track was still empty, so he did not take any additional damage from the card either.
The Shades continued to swarm towards us, but both Helios and Moon proved too slippery to be hit. A true power couple.

Helios destroyed the Shade at his side before he moved into a spot to provide shadow to Muzashi again.
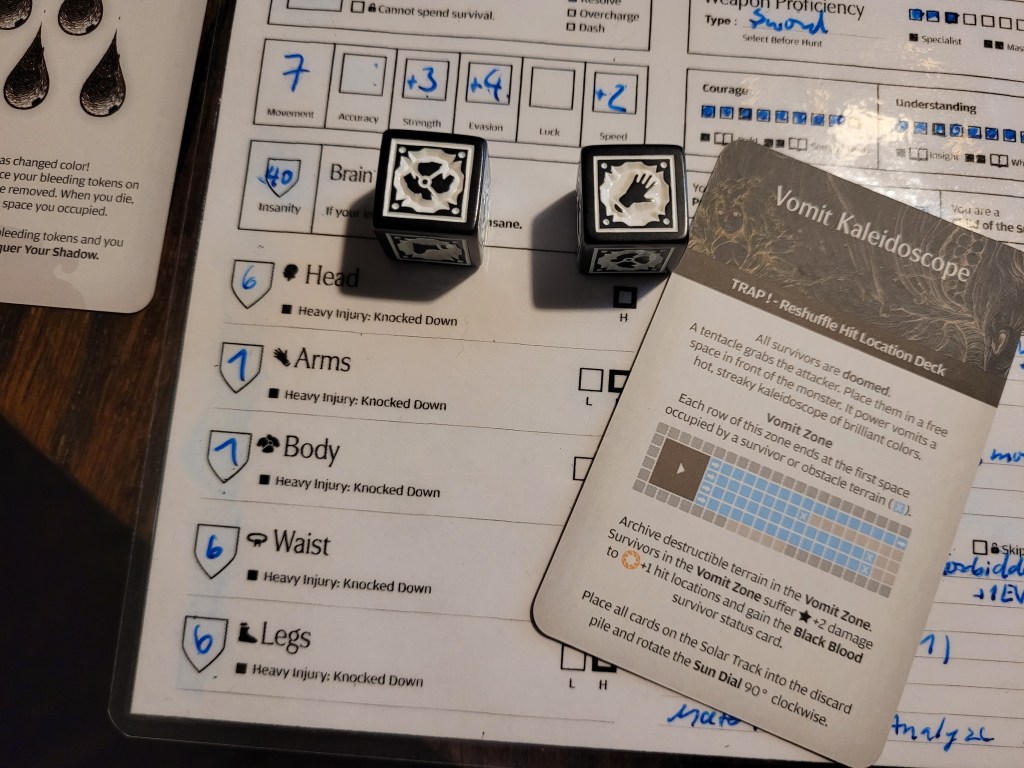
Muzashi in turn attacked with Overcharge/Embolden again and unfortunately, he found the trap.
Helios tanked the vomit with his arms and body and the solar track emptied for us. It felt a bit early to me but I got rattled and Muzashi used the effect of the Tachyon Nodachi whilst he still could. Time once more slowed to a crawl and whilst the monster could still follow his movements, even setting up a Mirage Tentacle, Muzashi was already in the shadow of Helios again, cutting away freely as all reactions were canceled for this attack.
Moon slew another minion afterwards and dashed all the way over to Muzashi’s side. Finally Stardust checked the monster with her Rawhide Headband again and I put another Mood on top before Helios got cooked in the unrelenting heat.

9 (11) cards left in the deck. The Verdigris Bubble was played. Another Mood that activated only on Solar Flare, and another basic action.
The basic attacked Stardust this time.
On 5+ she was hit a whopping 5 times for 4DMG each – she just about avoided severe injuries, but her armor was mostly gone after the pummeling and she crashed chest-first into the Stone Collum behind us, taking out important cover for the rest of the fight.
The minions piled in on Moon and Helios again. Moon was forced to dodge 1 hit, but Helios remained untouchable.


Muzashi saw another chance and went ahead spending his 2 survival again before he attacked. 4 clean hits .. into the trap again! Oh no!
And the way the monster shifted. This was the perfect storm for the Sunstalker. It hit all 4 of us!?
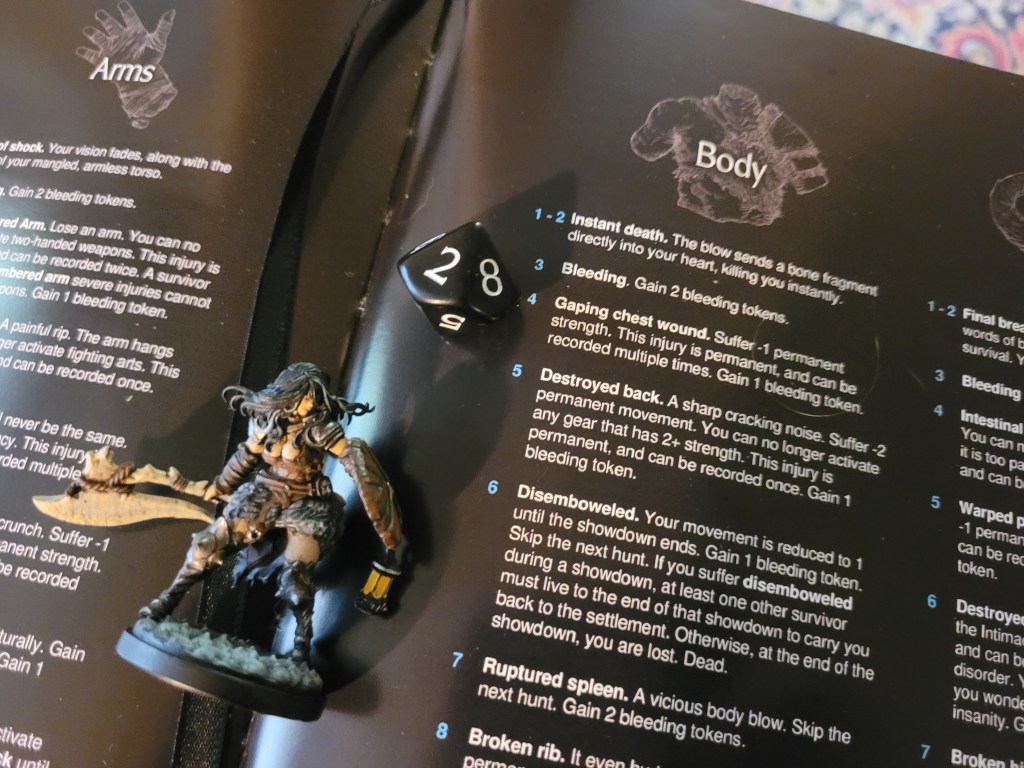
Whilst it connected with just 1 hit location per survivors it was still 5DMG for each of them. Moon and Helios were fine, but both Muzashi and Stardust took it to their by then armor-less chests. That was a severe injury for each of them! Stardust rolled first and got Disemboweled – she was down to 1MOV!
Muzashi on the other hand would have almost died! He rolled a 1 but now the time had finally come for him to use his lifetime reroll – into another 6, also Disemboweled!


But what was even worse: him falling over caused both Helios and Moon to also fall due to their Overprotective disorders!
Which also meant they were all going to take Cosmic Heat damage! 3 more damage for each of them. Muzashi had to take another severe!? This time to the head – a 7 – blinding him in 1 eye!


8 (11) cards remained in the deck, Tentacle Whip was played this time. With nobody in darkness we were able to redirect the attack to Helios. 2 hits which he both dodged with ease.
With no threats to go after the minions just .. waited?

All four survivors slowly rose to their feet, Muzashi shifting over his Eyepatch to the ruined eye as he held his gut in place.
Moon started off our turn by killing a Shade before moving to the next and using Embolden and to enable her Sun Eater (SFA) ability to spend her STR-tokens to Surge and kill it as well.
Helios did the exact same. Even Muzashi pitched in, attacking the closest shade, and once they were done, no minion remained on the board and Cosmic Heat could be discarded for the time being.
Trying to maximize my chances, Stardust used her Rawhide Headband again and we put the third and final bubble on top.
8 (11) cards remaining – Verdant Bubble. This prompted yet another basic attack, this one going after Muzashi again. A 7+ to hit against him had me feeling safe, and yet he was still hit 3 times. He dodged the hit to his head, but he suffered a severe leg injury anyhow. A 2 violently severed his appendage.
In an instant, he was dead.
He would never travel the darkness in search of Storm or to teach his weapon art to another settlement.


There were colorful bubbles in the air and our strongest damage dealer had just died – what were we going to do?!
Helios was incredibly fast and he was able to makes it all the way around the monster to the shadow cast by Moon (with a dash). He used Overcharge/Embolden and finally attacked The Sun for real. He found 4 hits. Wounding on 9+ with sharp, he dealt 3 wounds before the monster hit him back with a basic.
And what had felt like an easy choice for Helios, ended with 2 severe injuries for him!
Not only was he Disemboweled as well, he also suffered Shattered Jaw.
We did desperately need and try to deal some more damage though. So there was no real stopping here!
Stardust dashed 1 space away from the monster to make room for Moon. She stepped into the dark gap and swung away after using Overcharge/Embolden.
The light shifted at her approach though and soon she was blinded and fell to the floor with a heavy injury to the chest.
Finally, Stardust used her Rawhide Headband again and we prepare for the worst.

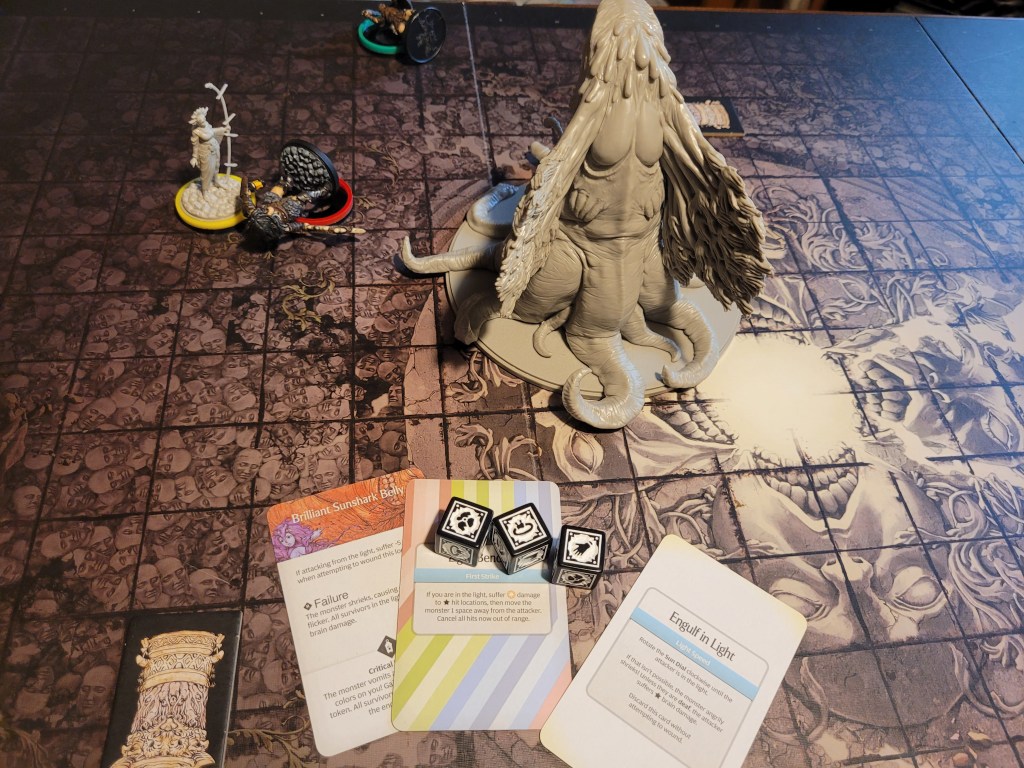
4 (8) cards remaining. The monster unleashed a Cosmic Roar. Only Stardust tried to flee as the AI card disappeared onto the Solar Flare track.
We were 1 card away from triggering a solar flare and Moon could only reasonably attack from the Light. And just before I was ready to give up I saw that there was a way for Helios to offer shade to her! With a dash and the ability on his leather boots he could just about inch in to a position in front of the monster.
Moon joined her partner and attacked after the ol’ Overcharge/Embolden. Whilst she only found one more hit, but she did manages to deal a Devastating (1) wound before the Light Shifted yet again.
Undeterred she still used Sun Eater (SFA) to try again! 2 wounds to kill it. 1 more wound for relative safety!
3 hits! No Lightspeed! Suddenly this was looking good again!
There was a First Strike in the batch though, and she really had to wound that! On 5+, that wasn’t out of the question! She hits the Sunshark Snout .. and axe proficiency saved the day! From a 2 up to a 7!
The last AI card was gone and we only needed 1 more wound for the kill.. she failed the wound on the Cosmic Spiracle and would need a 10 against the Brilliant Sunshark Chest. Two failed attempts later – the monster shrieked! 4 Brain Damage did not phase us in the slightest!
Stardust got a chance to shoot her bow. Only 6+. She missed despite the reroll.
0 (5) cards remaining. The deck was empty, the monster was no longer able to complete its Solar Flare! All those bubbles would remain useless for it!
A basic attack was unleashed instead. No threats remained in darkness, thus Moon was the target. There was a decent chance she could go down, so Helios dashed away beforehand to not fall over together with his partner.
Only 1 dodge on her, the hits came in hard and fast – forcing her to take a body severe. And she died instantly – oh no!? 6+ to hit at 6DMG per hit.
Helios fittingly gained Traumatized (D) as he witnessed the death of his partner.
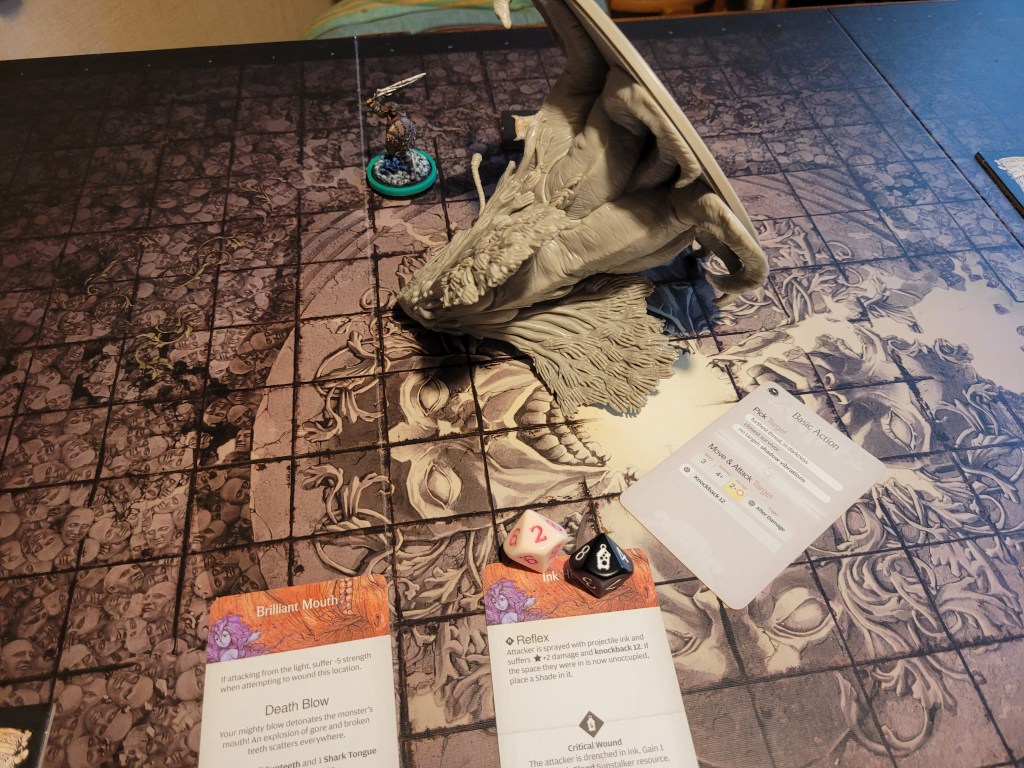
Stardust shot her bow, but it was in vain – double 4, a miss. If only Helios had Range 1. He could have actually attacked from the shadows. Still, he had to try.
2 hits on 5+. The Deathblow had -5STR to the attack on it. But he was a sword specialist, he could roll first and then determine the hit!
He rolled a 12. And that was enough to wound the Ink Heart with a critical wound!
This was it!
We did it!
The Great Devourer lay defeated!!!
A pyrrhic victory at best, this fit perfectly into the narrative of the ending. The Ancient Sun defeated, the small Sunstalker offspring had been devouring whatever they could, survivors, buildings around the settlement, storage and all.
The 2 surviving people, the mighty Helios and the young Stardust were both disemboweled and would have both died anyway left to their own devices, were either of the 2 the last one alive.
Slumped on the ground next to each other and the dead Sun, the two stared in bitter silence at the shattered remains of Azure Pond, a destiny too cruel to fight against.
As the young Sunstalkers eventually made their way out into the world, spurred on by this last feast, one by one, the light dimmed and darkness took root swallowing whatever debris remained behind – ruins to be discovered by other settlements.
Maybe Helios and the Knowledge Worm (I) shared one last cuddle before it returned home to the Silver City.

That one trap draw messed me up big time, and almost cost us the whole fight. On the other hand, those trap draws also helped us as they quickly removed all cards on the Solar Flare track.
The Sunstalker was fairly amicable all in all, as far as final bosses go, putting out so many moods, only ever threatening Solar Flare once in the end. And whilst the sheer number of minions looked scary, they really couldn’t do much to us with their 6+ to hit and 10TGH.
Still it came down to the wire in the end and we were just about able to inch through.
Whilst I am sure you can reach this point with much more powerful survivors, I am happy with what I had for the most part. Of course Phoenicia or any Warrior of the Sun in the finale would have helped a great deal, but I neglected babies too much for that, I noticed that a little earlier to be honest. I would expect Collective Toil to work pretty well in this campaign as well (as I remained too scared of the dark).
But I will leave all further thoughts to the Epilogue.
Again, I am happy that I made it to the end, and I think I know quite a few things to improve upon for next time.
It should also be pointed out that with Muzashi’s death the Tachyon Nod…. never existed.
All in all, I have enjoyed myself – I do still like the Core quarries a lot but I am also looking forward to Season 3 with all the new stuff – “Halfway up the Mountain” when, my pre-order finally arrives, that is.
I also do sincerely hope you had fun as well, dearest reader, and/or learned something new about the game at some point during the journey.
I will be back with an Epilogue next week.
As always, thank you very much for your time, keep an eye to the sky, lest The Sun might just descend with a wide open, hungry mouth beset with huge, blinding teeth,
Amathul

Leave a comment