
Featured in the Allies and Adversaries pre-order bundle and the Inverted Mountain Campaign as its Nemesis Node 2 monster, the Red Witches lay claim to one of the most coveted spots on any campaign’s timeline – the replacement for the King’s Man.
All jokes aside, the Red Witches offer a tough, but unique experience, changing meaningfully for each of the 3 encounters you will have with them as more and more adversaries (rather than just stat-tokens) get added to each subsequent fight.
Yes, they even have their own AI and Hit Location decks for each witch!
Obvious Spoiler Warning!
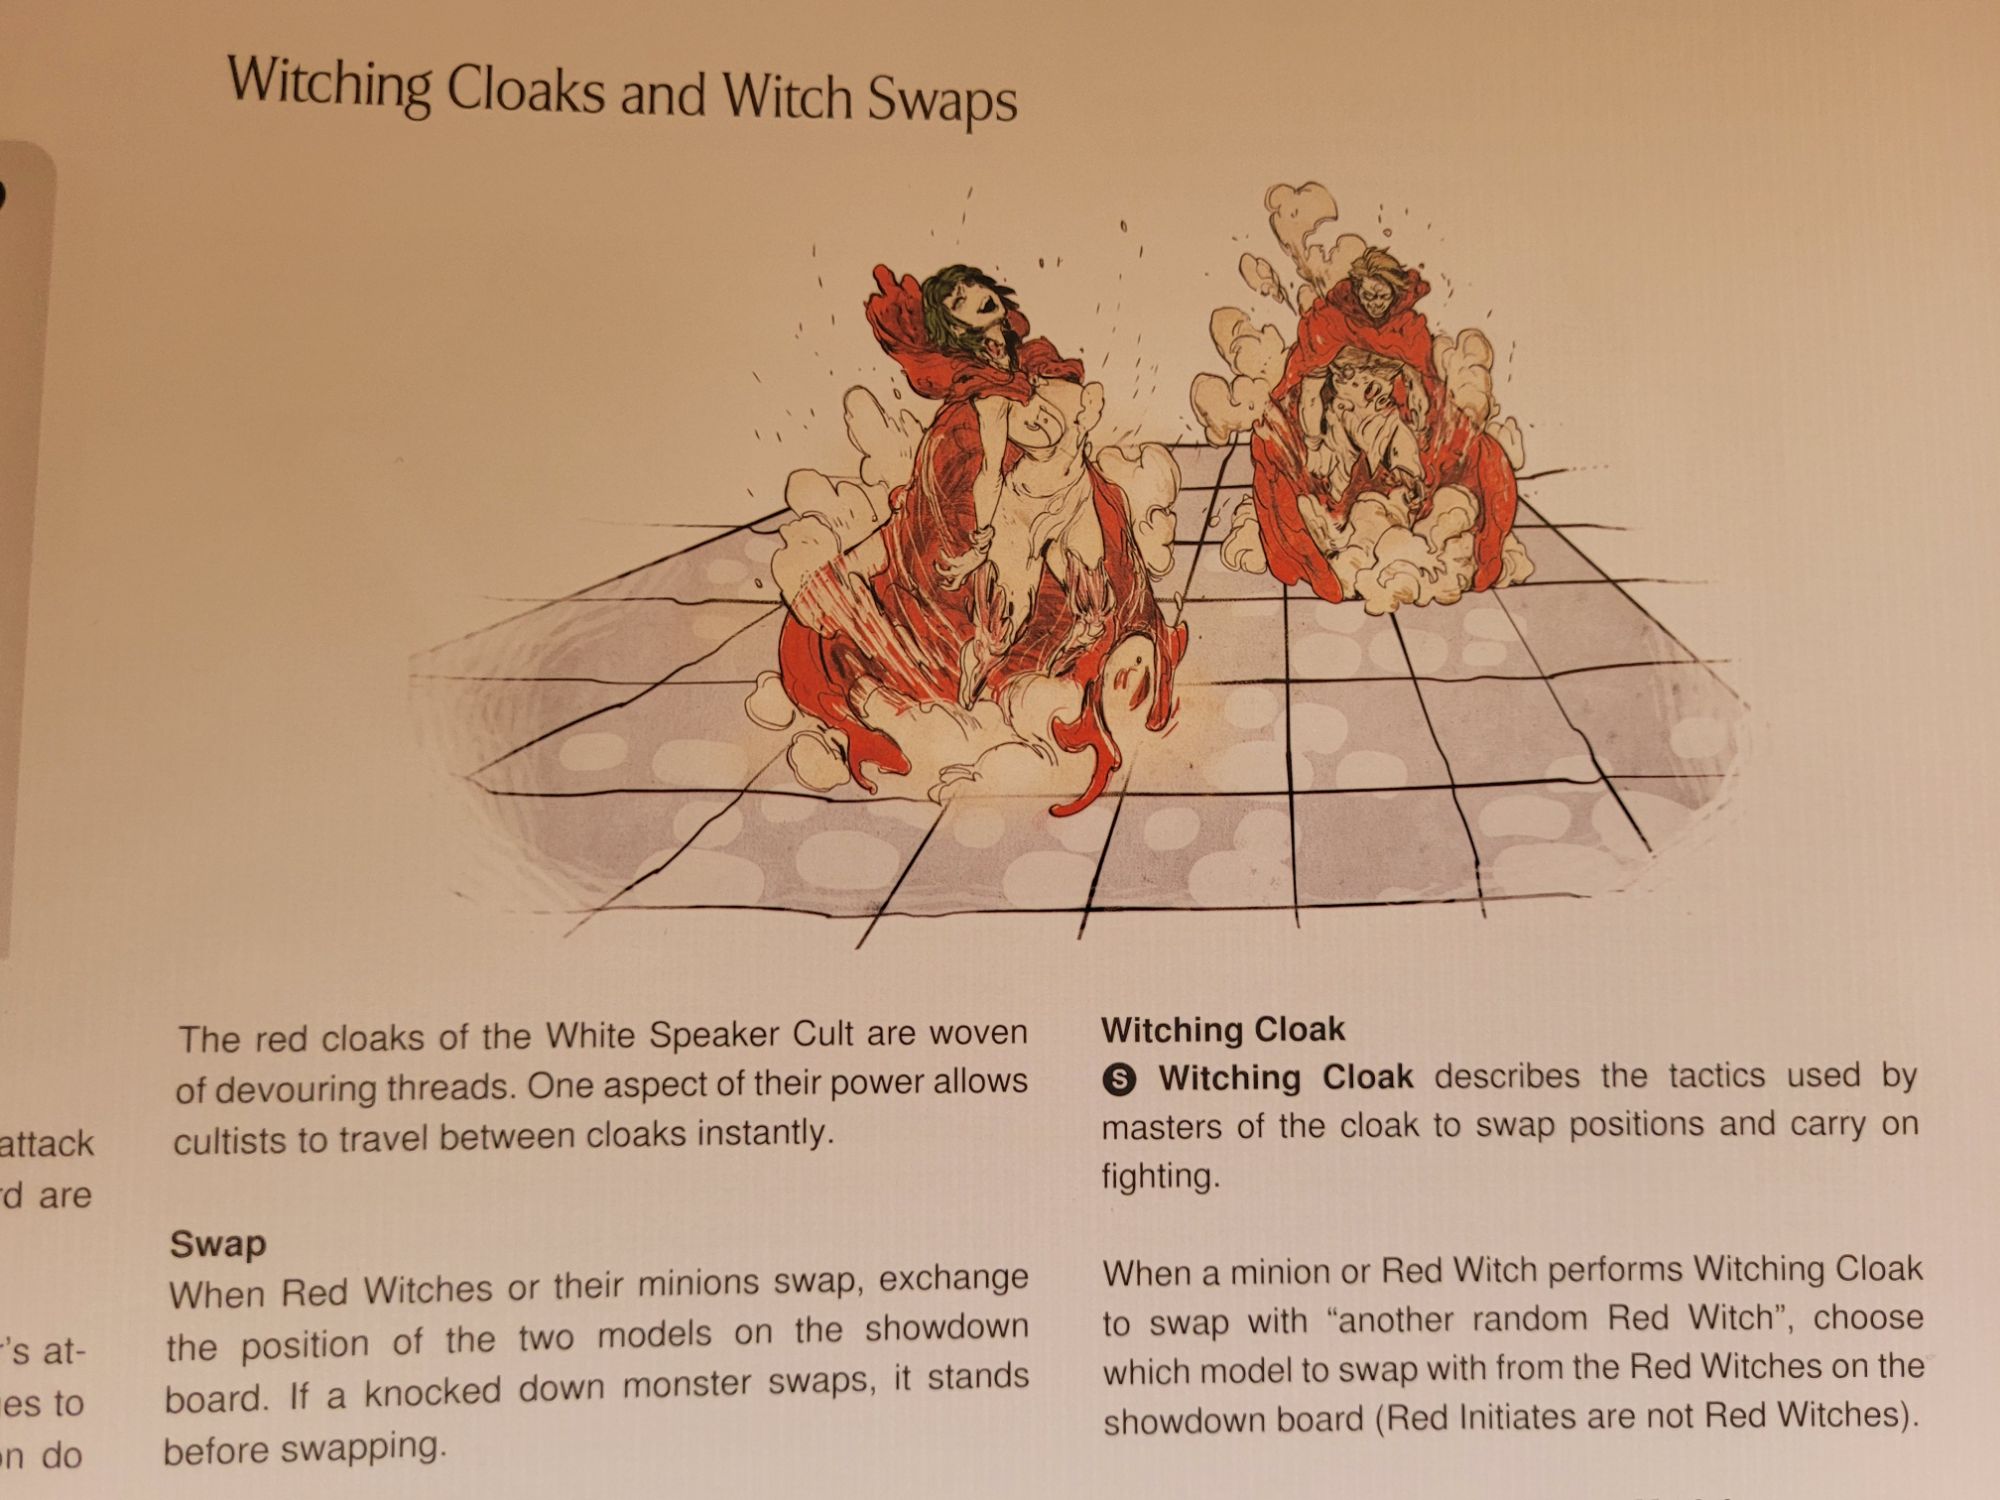
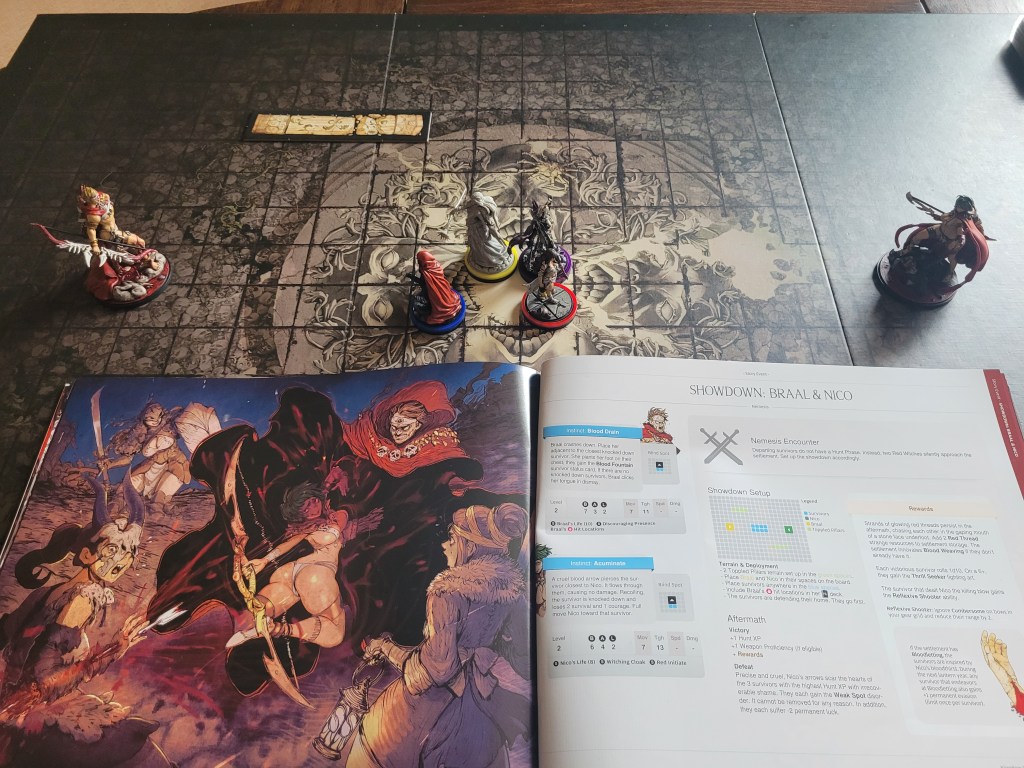
Whether you are pitted one-on-one against the ferocious Braal as her vicious temper runs wild, or in a duo with the impish Nico draining your will to live – or as all three of them unite under the gaze of the inscrutable Seer – the Red Witches will thoroughly test your ability to navigate an ever shifting battle field, especially as they start to make use of their Red Cloaks by switching positions with one another freely.
And if you manage to best the Red Witches in any of these encounters, you might just find yourself able to make one of these caustic cloaks yourself.
As for the WHYs and WHATs about the arrival of the Red Witches in your settlement, those remain at least partially nebulous.
Whilst we know for a fact (from Kickstarter quotes) that they are out here hunting the Pariah – and the synergy content between the two expansions all but confirms this, we are left wondering why they wouldn’t be able to find the Fiend, despite Seer’s omniscience, or why they wouldn’t just eradicate any settlement outright once they spotted the slightest signs of the corruption left in the Pariah’s wake.
Or, wait, scratch that second part.., depending on what they do find, they will eradicate your campaign right then and there.
Furthermore, whilst it may not appear like it at the beginning, the Red Witches are all pulling their punches during the fights to some degree and even if the survivors manage to get a few good hits in over the course of any given encounter, in the end, none of them is ever truly killed and they all just retreat into their cloaks, more or less satisfied with the outcome.
This does become especially evident as some of the events trigger and they just manhandle the survivors even after having been beaten just the year prior – breaking survivors with ease and without any fanfare.
And as they also travel into the Tyrant’s domain – who the Pariah steers clear of – as well as to the Pools under a Sun or the Dreamkeeper, we are left to wonder whether the Red Witches might just be looking for new recruits for the White Speaker Cult instead.
In any case, should your survivors have met the Pariah and heard its foul whispers, be sure to hide that blood-sucking bowl it gave to you and NEVER EVER tell the Red Witches that you’d rather be Two.
They might just grant you your wish on the spot.
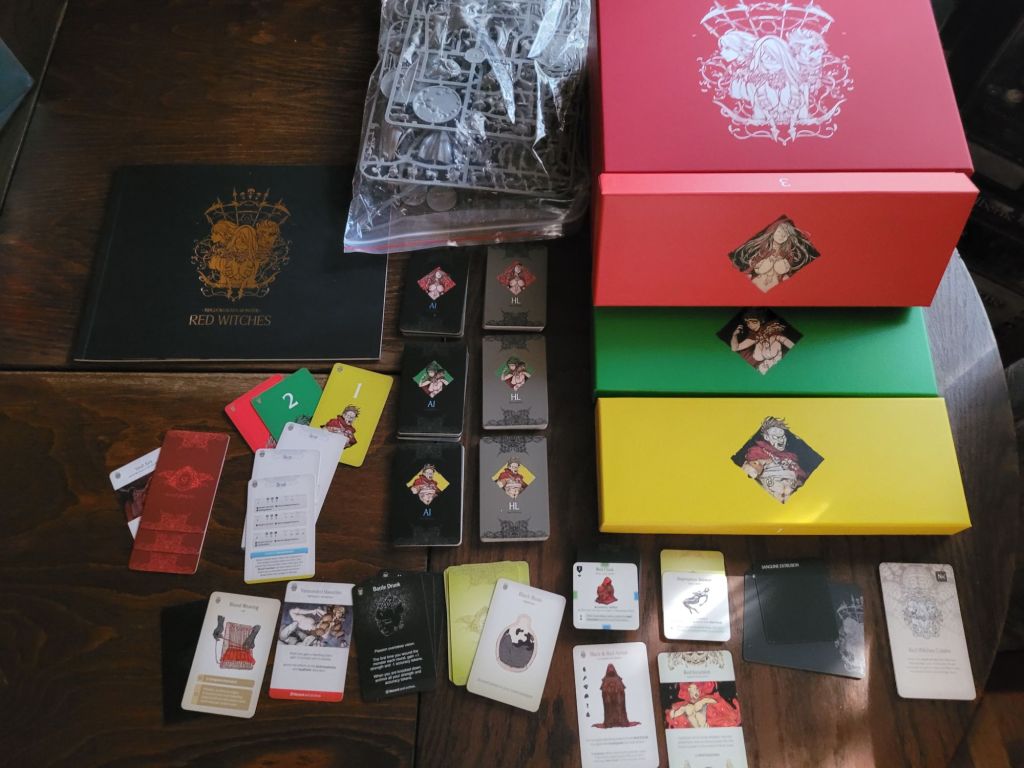
Together with the Pariah and the Black Knight, the Red Witches complete the line up of Nemesis monsters for the Inverted Mountain Campaign.
Between their overarching theme & models, the fact that you can start crafting a whole new armor set if you manage to beat them, a new type of fight with several opponents and the coveted Nemesis Node 2 spot, this expansion was always set up to be a slam dunk.
But was it actually or did it reach terminal hype over the years of scope creep?
That is why I wanted to talk about the Red Witches today.
I will, once again, be looking at the expansions gameplay from a non-Arc survivor perspective, touching on the Lore in passing as we move along before I ultimately draw my conclusions.
From here on out there will be even more Spoilers!
***
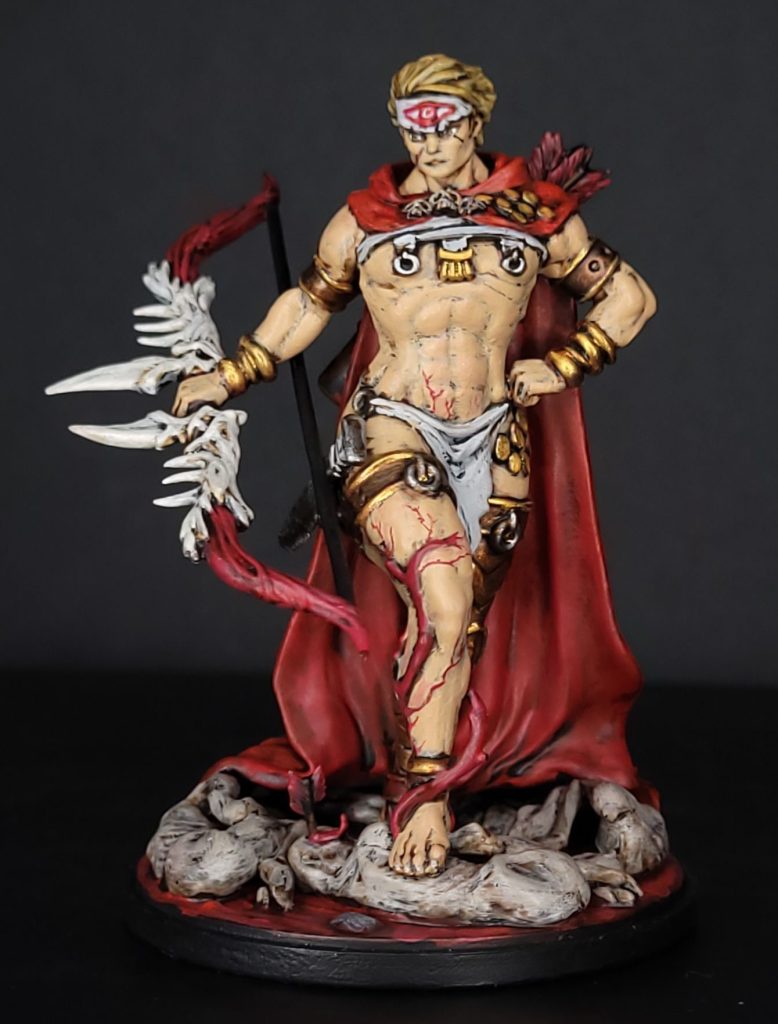
The First Witch – Braal
***
Arriving in Lantern Year 9 in the event Challenger at the Gates, Braal comes in like a proverbial wrecking ball, her temper unmatched and unrelenting. She does not care for you, your plans or the game’s very framework
If you are a very methodical player, used to slow play and meticulous action, Braal flat out hates you with a passion. And this event and the following fight might well be the reason why you bounce off this expansion if you approach them the wrong way.
The event introduces us to a 5-minute-timer, and for as long as this settlement phase lasts, until you prepare your departing survivors at least, every 5 minutes you are instructed to return to this event and roll on the corresponding table. Braal is foaming at the mouth, ready to go and punch somebody RIGHT NOW!
Most of the time this roll will steal an endeavor and reduce your departing groups insanity for the fight, but in the swingy nature of KD:M, it might also kill somebody ever so often .. or just switch off the timer after giving somebody else a few buffs.
You can just see her stomping a stone face with her foot, yelling at you to be done.
This timer will return for the fight as well, reflected in her Boiling Blood trait card: for the entirety of the fight, every 5 minutes, Braal will perform a basic action at the next survival opportunity, no matter whose turn it is.
If this sounds like a lot, or just too stressful to you – there is some solace to be had in the fact that the timer is only used when Braal is alone. Furthermore, I will also say that you can game this timer a lot. If you need to take a breather or don’t want actions to double up, you could just wait it out – and more importantly – the timer is restarted only after resolving the roll on the event or the basic action.
Whilst I personally don’t think you really need to do something like this, rules queries should probably be resolved during this “down time”.
I would say, the easiest way to deal with her timer is decisive and fast play.
And from personal experience I would say 2 to 3 rolls on the event and 3 or 4 basic actions should be what you are aiming for.
Of course, this will be easier when you are playing solo and/or if you are ready and willing to throw everything you have at Braal during the fight – Founding Stones, Sword Scabs and more.

As for stats, Braal has 7MOV and 11TGH – which do NOT change for any of the 3 fights and she only gains additional SPD and DMG modifiers for the third encounter.
Her AI deck is also always the same, with 7B, 3A and 2L cards.
This is largely because all 3 Red Witches use the Life trait – Braal’s being set to 10 for each fight.
Most of Braal’s attacks will knock people down. Whether she suplexes them, kicks them in the stomach or just muscles them to the ground you are very likely going to end up on the floor with tears in your eyes.
And a lot of them are synchronic attacks as well, so you will have to watch out not to get hit with multiple people by them.
Oh, you thought the first of the bow-and-arrow-wielding Red Witches would not just charge at you to knee you straight in the face?
Rookie mistake.
Turns out Braal might actually be doing us a favor here.
Oh, you’ll find out eventually.
Her heavy focus on knock down will be further complicated by her second trait Discouraging Presence, which limits any Encourage or Fist Pump survival action to only be performed during the respective survivor’s act.
I also wanted to mention the 2 legendary AI cards for Braal in particular.
Meteoric Warrior has been shown off on the Kickstarter quite early on and still remains eye-watering if it gets drawn, especially within the context of her traits.
This attack forces you to search the AI deck for several more cards and play all of them. This will likely also trigger 1 or 2 basic attacks in between just because it takes so long to resolve everything.
But there is a form of counter play to it: if nobody is adjacent to Braal the card is simply discarded AND she suffers a -1TGH-token on top of that.
This card is a prime example for why you want to know what the Red Witches are doing, ideally at all times – so polish those Frogdoggles!
The other legendary card tells us a story – each of the Red Witches has one of these – for Braal it is the story of the Princess and the Dragon.
We have heard a lot about his particular tale over a couple of major releases now as it is also featured fairly prominently in the Killennium Butcher Vignette and tells the story of the first Forsaker.
These legendary AI represent Moods that will have a chance to give out a Secret Fighting Art if you roll well enough or if the circumstances line up properly.
But enough about the AI – for all the of the Red Witches the true killers are the Hit Location cards!
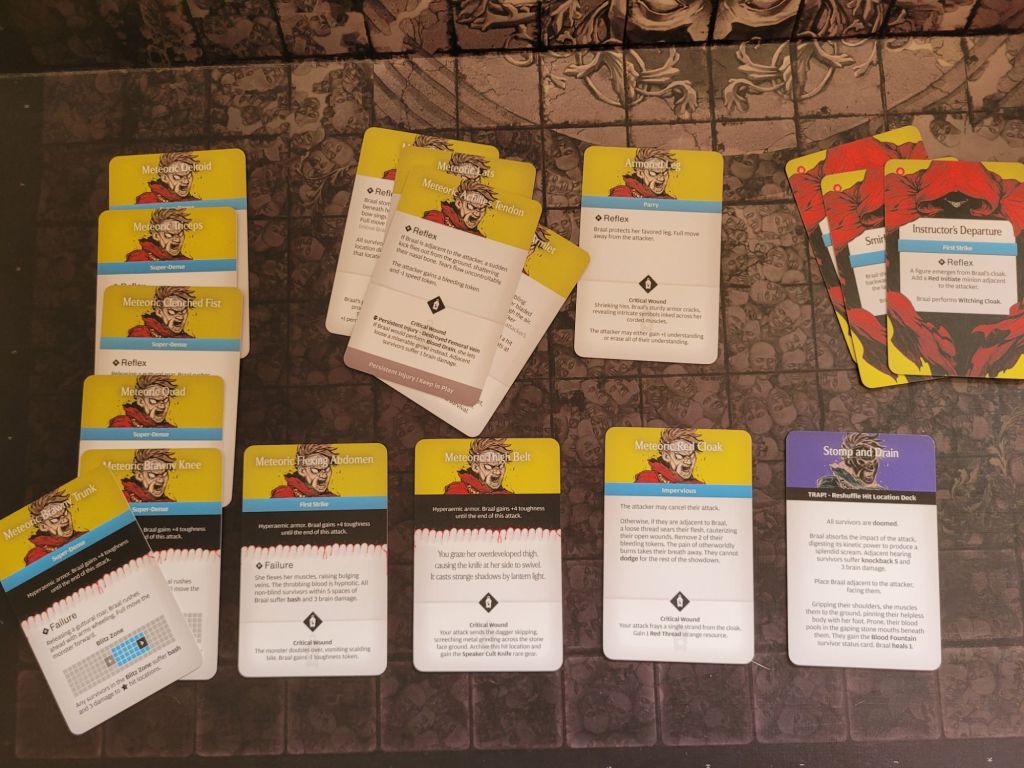
For her solo fight Braal has a total of 15 HL cards – which get bumped up to 18 once Nico shows up in Lantern Year 19.
6 of them are super-dense, whilst 4 have a blood magic field – and if you own the Pariah expansion you already know these fields are bad news. And whilst nowhere near as volatile as with the Fiend and its AI cards, it should come as no surprise that the enforcers of the White Speaker Cult employ the same sort of secrets in their defense.
For Braal, her on reveal effect gives her a stacking +4TGH until the end of the attack, making wounding her just that much harder.
Completing her defense are a parry, an impervious hit location and a trap that heals her for 1. But as anybody knows: the best defense is a great offense so Braal is also set up to deal a lot of damage passively.
Her reflexes will run people over (dealing 3DMG on collision), knock people down (for 5DMG) or just remove all armor in a random spot if she touches you as she runs off.
A crit-build will also only get you so far against her as she has a lot of hit locations without any critical effect – on the flipside however – you might also be able to acquire a fan favorite weapon from her if you get lucky: a Speaker Cult Knife!
Braal wants to fight all out and she also wants to be fought all out. Culminating in her being pretty disappointed if you lose against her.
So bring your A-team and the strongest weapons and have at it!
Defeating the Red Witches can be quite worthwhile!
You not only gain a special ability suited to the witch in question, but they also have unique bonuses applied to their rewards if you have certain innovations.
Having early access to Nightmare Training (I) might be worth it when facing Braal.
***
Rewards / Hunt & Settlement-Phase Gameplay
***
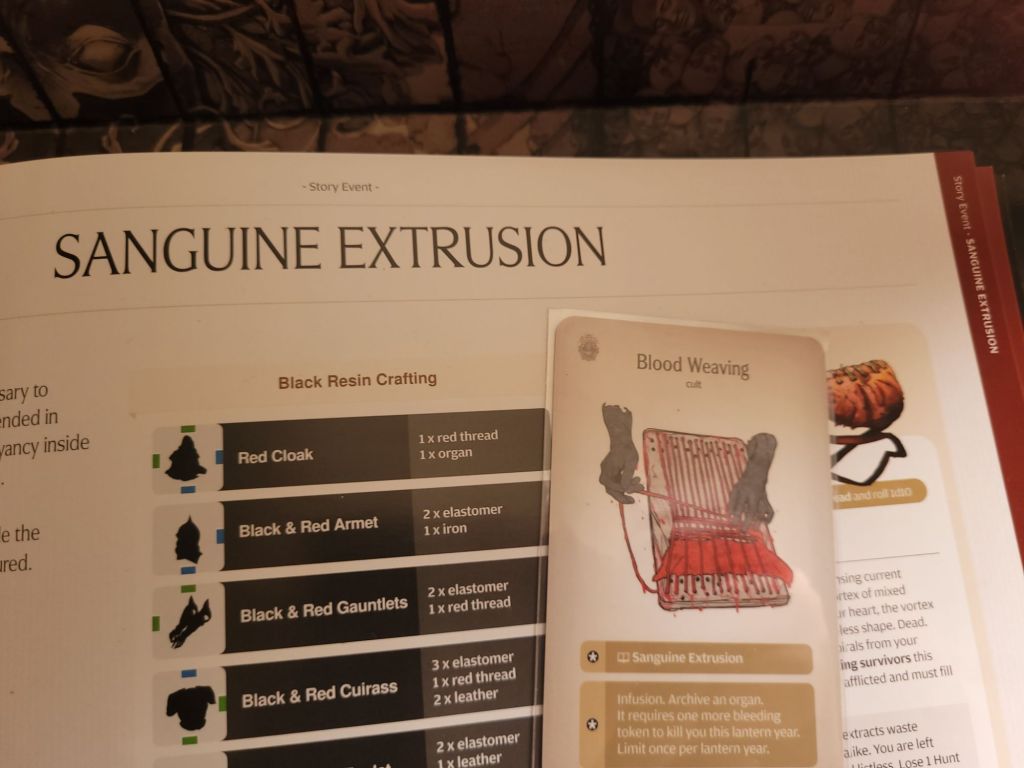
If you manage to beat Braal (or any of the three encounters with the Red Witches) you will notice a strange strand of red fabric left behind.
From this initial discovery your settlement will innovate Blood Weaving which will give you the ability to make your own Red Cloak and ultimately set you onto the path of building the Black and Red Armor set.
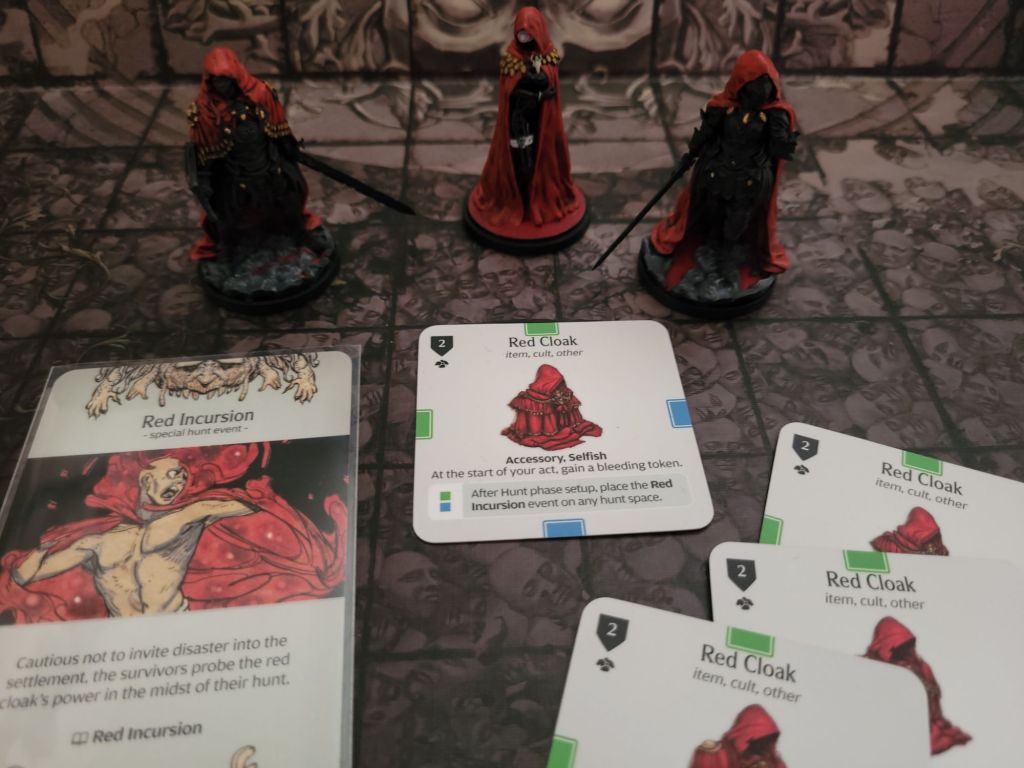
Once you have your first Red Cloak and have connected the necessary affinities in a gear grid you will be able to place the Red Incursion hunt event similarly to Mineral Gathering or Noodling of Death.
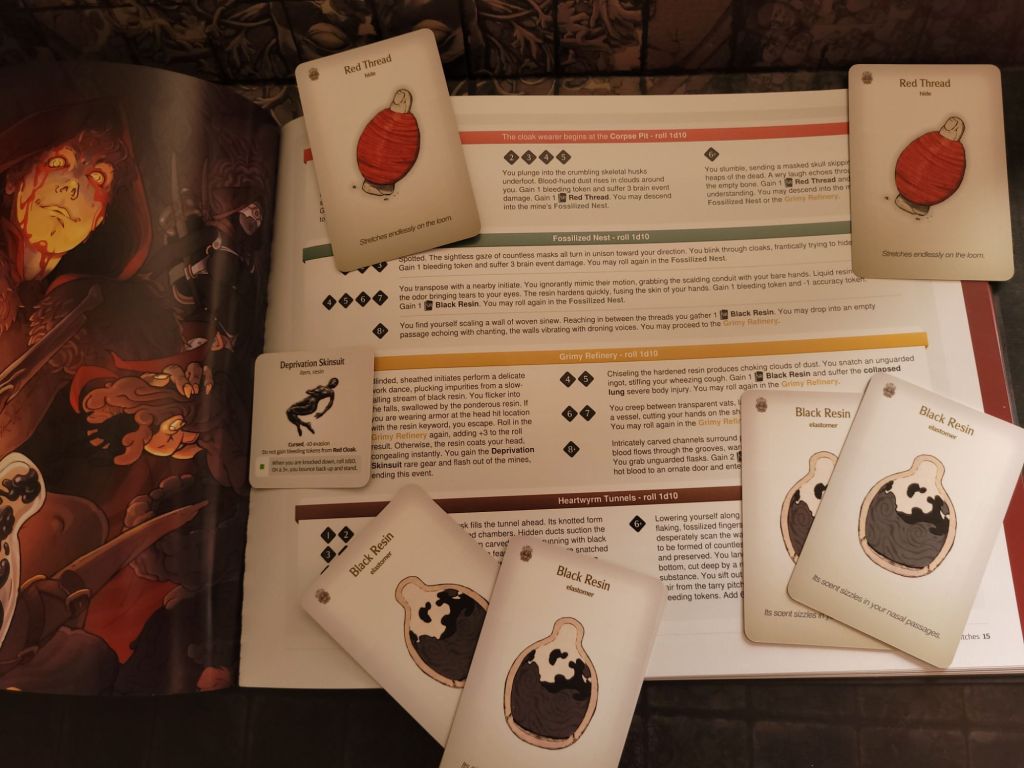
Without giving away too much, this hunt event has a 50/50 shot at sending you into the Elastomer Mines where you can start harvesting materials to build your new armor or a handful of weapons from.
Eventually you might not only be able to increase those odds but also find yourself with the chance to explore other places, giving you a chance at some very powerful rare gear – including possibly the best bow in the entire game.
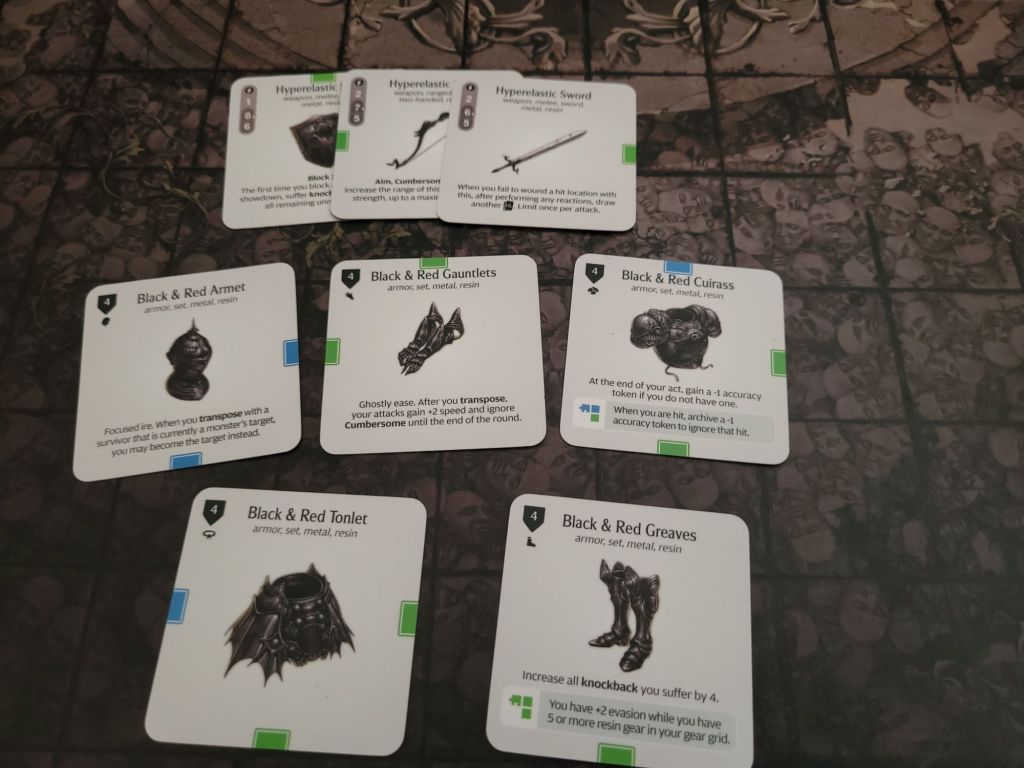
Thematically, the Black part of the Black and Red Armor set is built to withstand the corrosive nature of the Red Cloak i.e. it giving you a bleeding token at the start of each act.
Mechanically it represents a Leather-tier armor totaling up to 4 armor at each hit location when fully assembled which turns -1ACC tokens into hit mitigation whilst also increasing your EVA and the knockback you suffer.
The weapons you can build from Black Resin also don’t exactly hit well. But they do hit reasonably hard.
But the real draw of this set is the Transpose survival action you unlock once the full set of all 6 pieces has been assembled. It allows the wearer of the Black and Red Armor to switch spots with another survivor wearing a Red Cloak.
This not only allows for the switching of attack targets but also quick movement across large areas of the board. And, if you find yourself in possession of a lot of Black Resin – eventually you might even set up a 5th person back in the settlement to switch into the fight.
There are a lot of avenues to explore here!
The Red Witches have received a lot of praise for the inclusion of this armor set as a Nemesis monster and it most certainly contributed to the hype around this box set.
However I would not be a true copper-apologist if I didn’t use this chance to point out that whilst, yes, Noodling of Death is A LOT less forgiving and willing to actually hand out copper (the random terrain – Copperfish Den still being the best individual source of copper by a mile and a half) when compared to the Elastomer Mines – which just gives you a Black Resin here, another there and how about a third from down there – but you also need far less copper to build the LATE-GAME Bullfrogdog Armor and a functioning LATE-GAME weapon.
In comparison, the Black and Red Armor set, despite its tactical depth, is a mid-game armor unless you are stacking EVA with inherent risks in the additional knockback (especially in the context of the Inverted Mountain), which you will likely want to replace at some point, unless you are focusing your gameplan wholly around it (which, to be fair, is a valid approach).
***
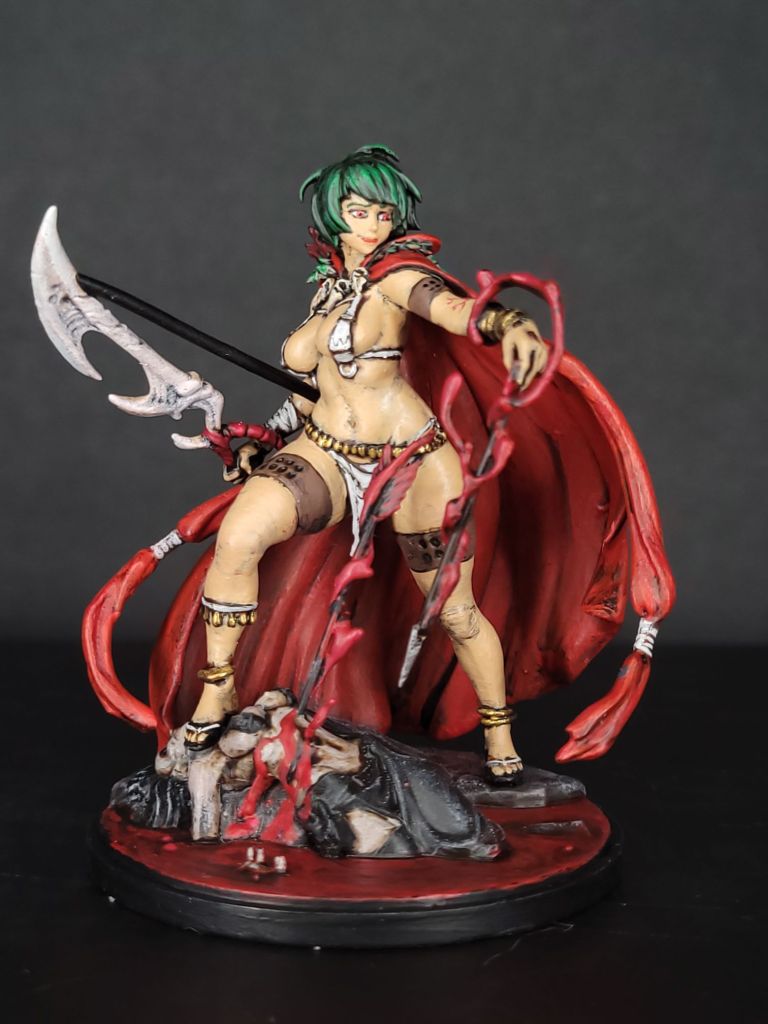
The Second Red Witch – Nico
***
Visiting your settlement in Lantern Year 19, Nico, the expert interrogator, is found carving up a survivor to get his confession on Feline Entity knows what.
It’s pretty clear from the very first moment that she enjoys every aspect of her job too much. And she is just getting started.
Do you want a Red Witch to spit into your mouth? She’ll do it .. for a price. Let’s say.., a slice of your liver?
With Nico added to the fight, Braal’s temper has been reigned in and you no longer have to deal with her timer. Instead she can now switch positions with Nico mid-attack if you draw certain hit locations.
I’ll be honest .. I’d prefer the timer.
Switching also triggers basic actions, so you don’t have to miss out on Braal punching you in the gut an extra time!
And Nico isn’t the only addition to the fight – she has brought along the cult’s Red Initiates as well. Whilst none of them start on the board – they might appear from hitting the Red Witches’ cloaks.
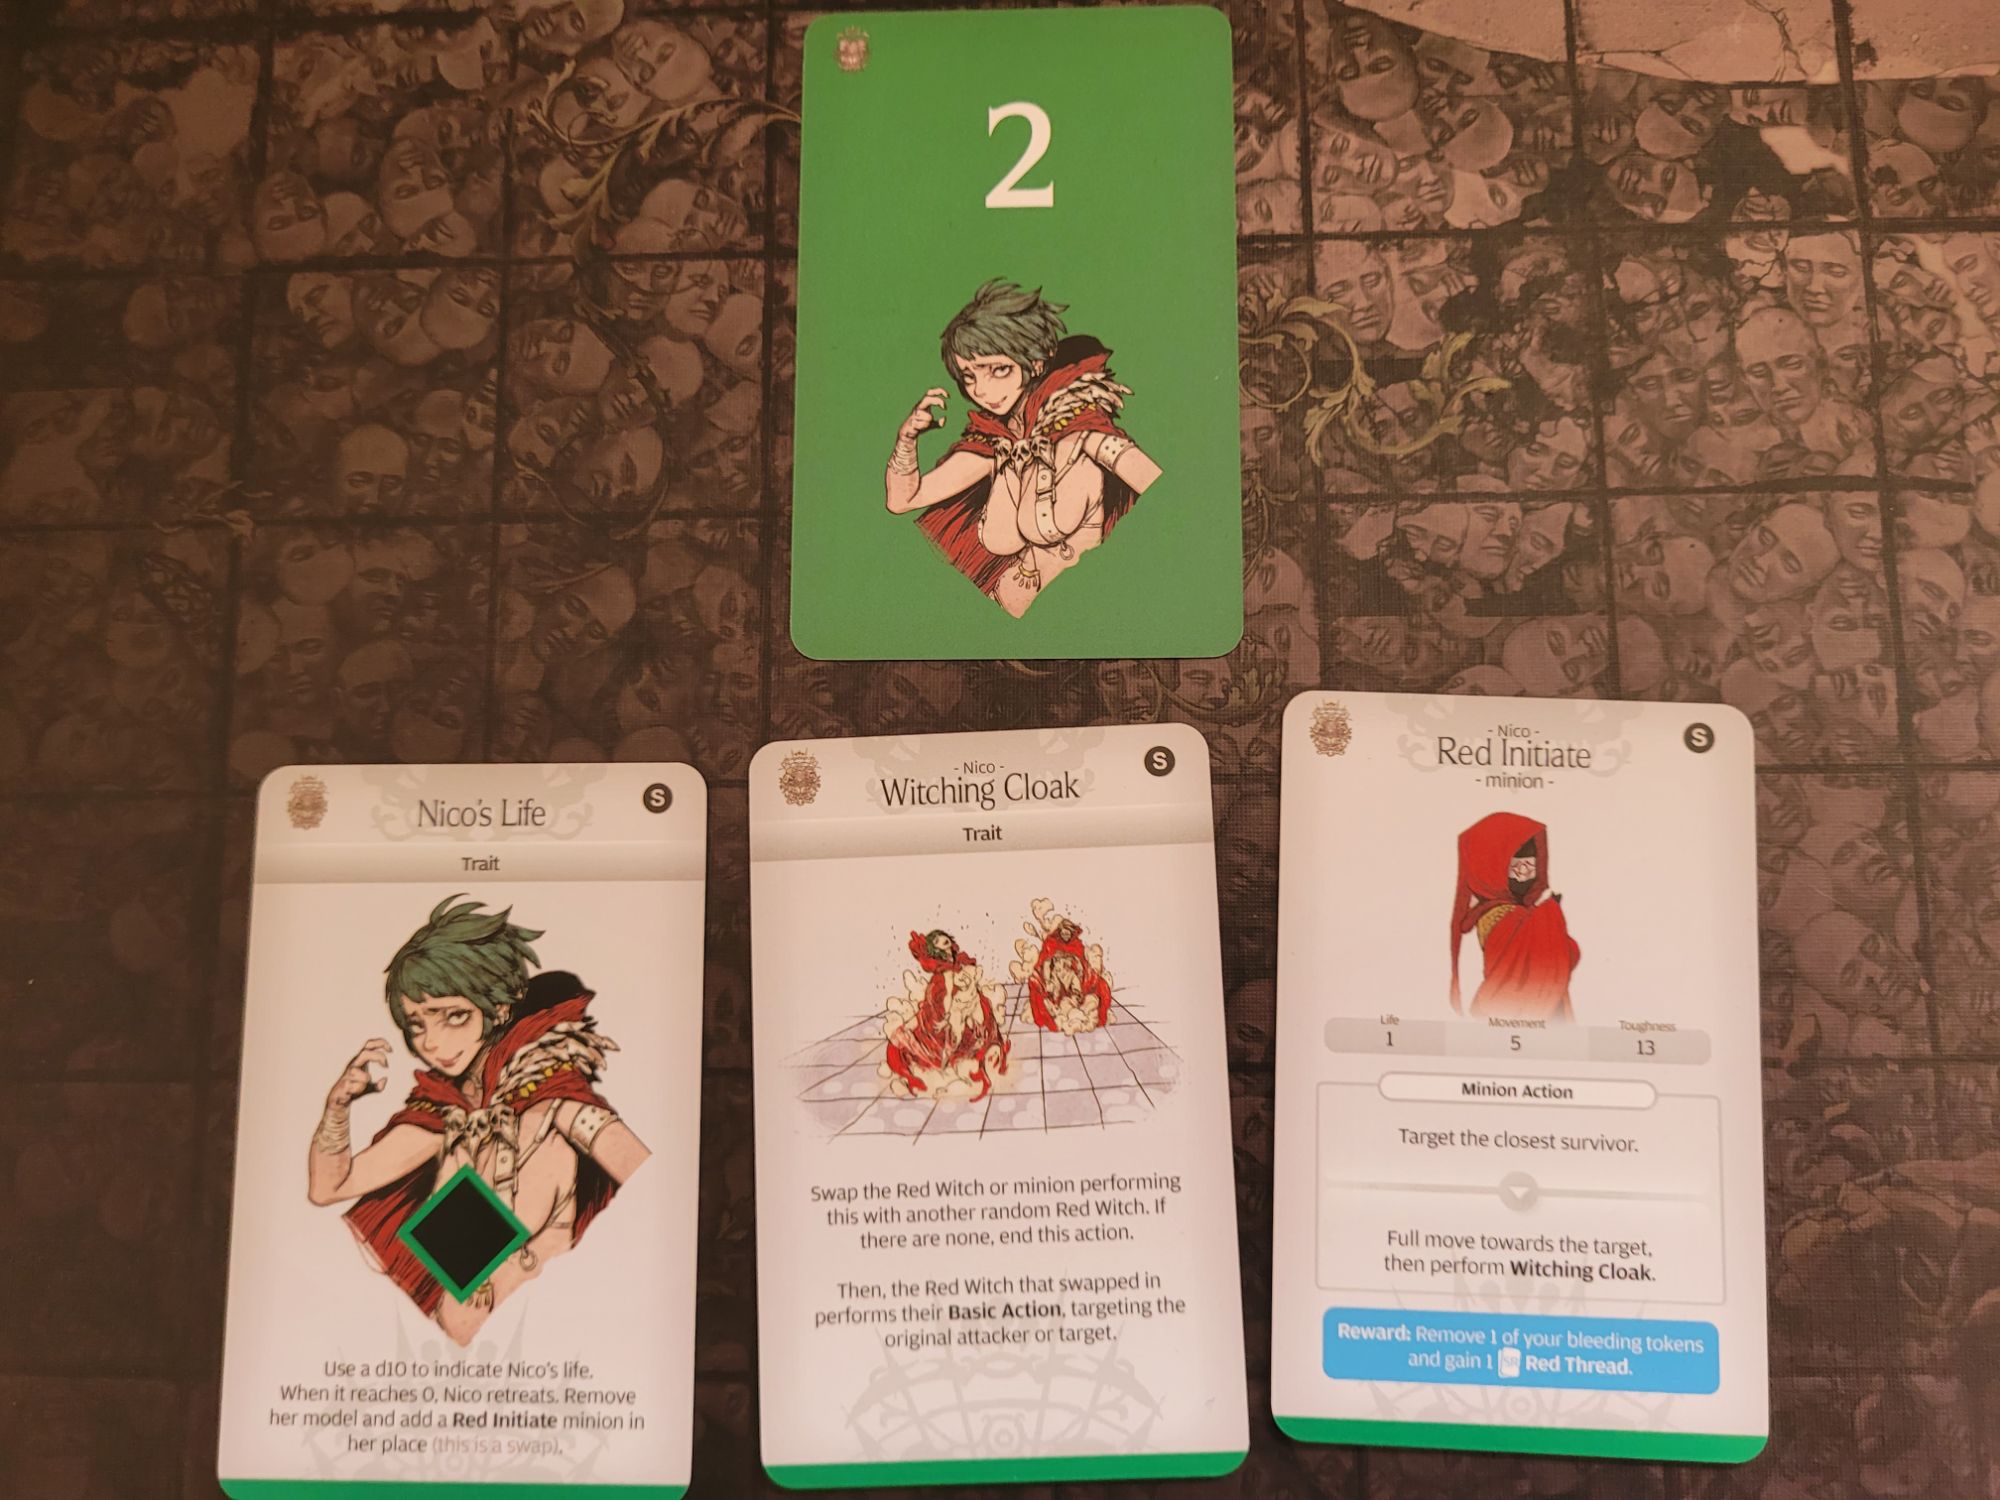
Whilst Nico and Braal both share 7 MOV, Nico does have slightly more TGH at 13. And, surprise, surprise – she actually uses her bow!
With 6B, 4A and 2L cards in her deck, she also has a total of 12 AI cards with her personal Life trait set to 8.
Nico’s main gimmick of the fight is draining survival – usually 2 at a time. Both her attack and hit locations will routinely do it, and she is able to hand out a survivor status as well which inflicts a bleed token each time you spend or lose survival.
She is also fairly adept at bypassing survivor’s defenses, both by dealing high damage and just flat-out ignoring it, which typically will confer a bonus to severe injury rolls at least.
Everything about her wants you to focus her down first and as quickly as you can. And I do think that is the correct strategy – depending on your set-up in LY19, you might very well be able to do so.
It’s just unfortunate that her hit location deck is one of the worst to attack into in the entirety of the game.
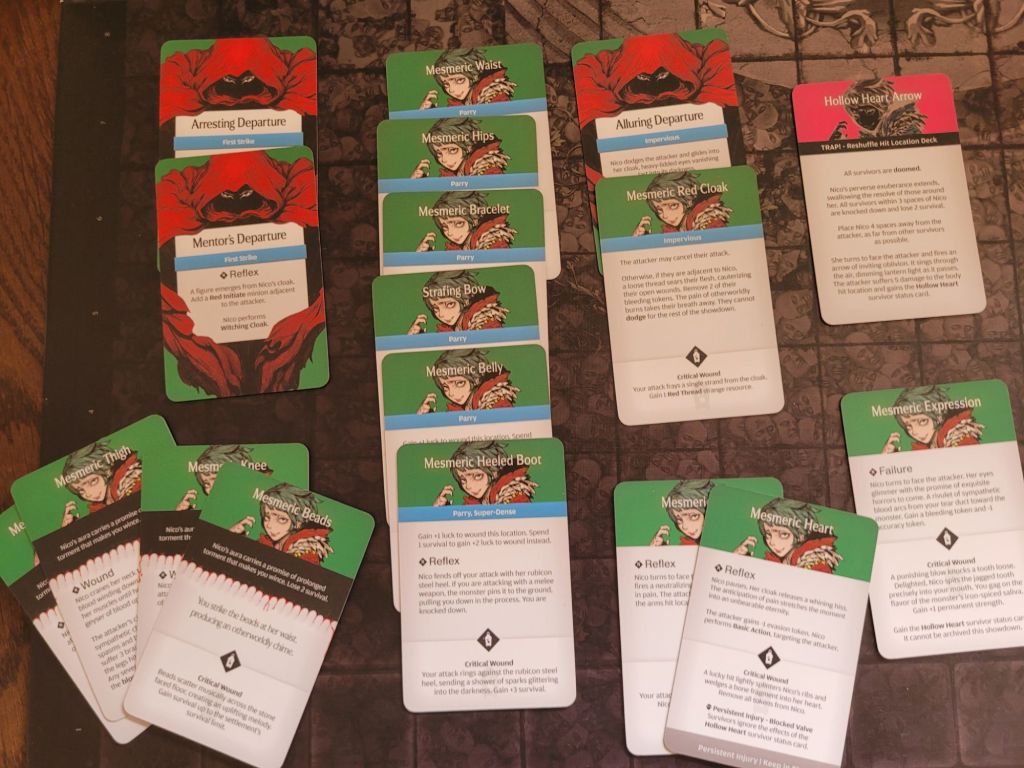
She just loves to parry – what super-dense is to Braal, parry is to Nico. Her blood magic (thankfully not on parries) drains 2 survival and even on top of that she has a whole host of terrible reflexes of her running off and shooting a rain of arrows in your direction – which, you might have guessed it, deals damage and drains survival.
Surprisingly she doesn’t feel nearly as mobile as Braal, despite her ranged capabilities she seems to rely mostly on the presence of the more brutish witch or an initiate or two to trade places with.
Overall, Nico feels like a testament as to why Devastating is so good in this game as you both want to get her out of the fight as quickly as you can whilst attacking her as little as possible.
The fight will only end when both Braal and Nico have been defeated, though the order in which they go down ultimately does not matter.
Should you manage to defeat this second encounter with the Witches, Bloodletting (I) will get a boost in the following Lantern Year and you get a second shot at gaining some free Red Thread and Bloodweaving (I) should you not already have it.
***
The Red Witch Trials
***
This is synergy content with the Pariah expansion – as mentioned several times over various posts – if both the Pariah and Red Witches are in the same campaign this event is added to your timeline in Lantern Year 20.
Whilst there are several instances where these 2 expansions interlock for their combined narrative, both mechanically and thematically, the Red Witch Trials stand out as a high-light being a full-on story event.
This is the closest they will get to figuring out whether or not your settlement has been infiltrated by their quarry during your campaign and should you get caught only oblivion awaits those tarnished by the Fiend.
There is a chance to lose your campaign at this point as well, and it is one of the most talked about moments for this interaction, so I do at least have to acknowledge it exists, especially after having written about it before whilst looking at the Pariah.
IF you drive the Fiend off before Braal and Nico show up you will be fine in the grand scheme of things. Or.., you could just not get caught with the Precious Fragments (I).
***
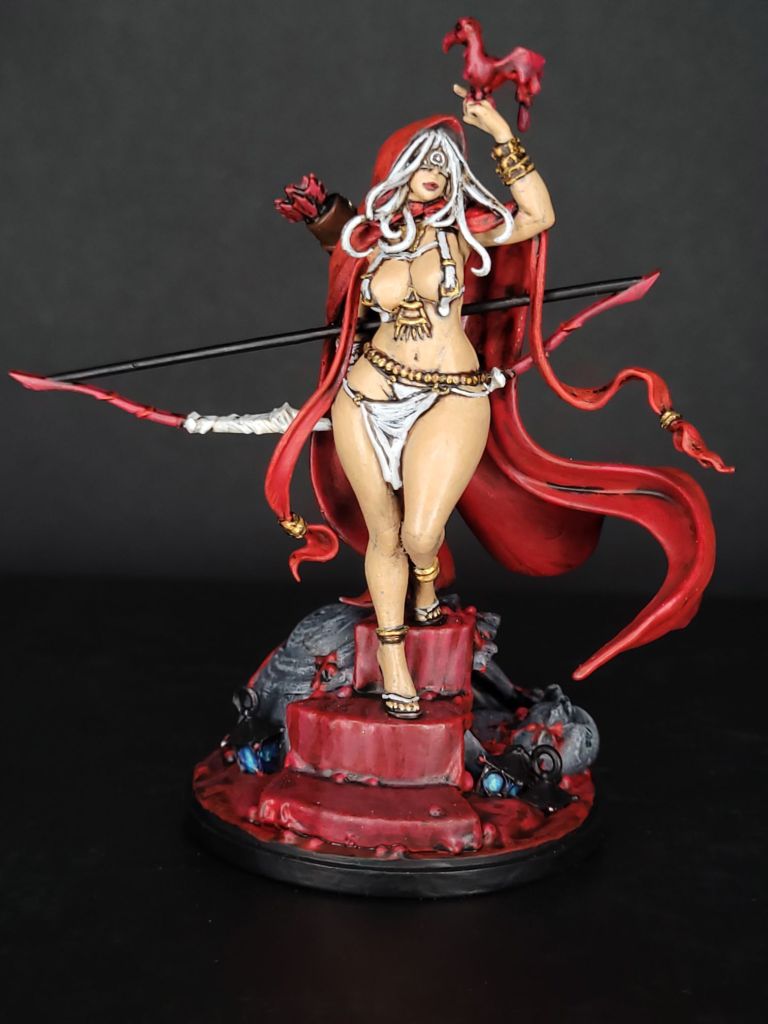
The Third Witch – Seer
***
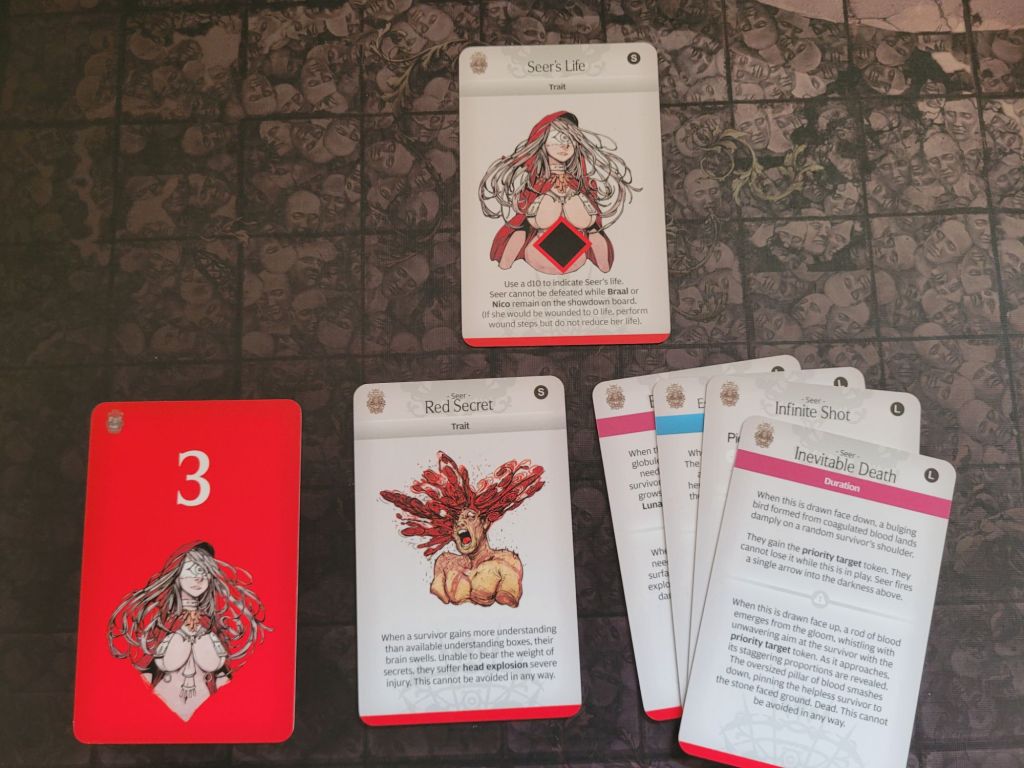
Before stoic Seer ever sets foot into the settlement she will likely have killed several of your survivors with a single arrow loosened from her bow – the event Red Cannon – heralding her arrival in Lantern Year 26 – has a blood arrow shoot from the darkness, pinning several survivors to a wall, killing them.
If the Pariah is in your game, this number might actually be higher though.
For all we know Seer is omniscient or extremely close to it. She stares up from the page at the player, her abilities often have infinite range and accuracy and she is able to kill survivors off the board in ways that cannot be prevented.
Dipping into the frowned upon art of power-scaling: she is likely one of the strongest individuals we currently have models for – top 3 maybe? Top 5 definitely.
Whilst the blind fold she is wearing does have her appear, well, blind – it is more or less the exact opposite: she sees too much. And whatever you are trying to do – Seer knows.
She has also been voted Best Girl with 5 of 5 votes amongst my KD:M group and friends.
There is something arcane about her – the shop blurb calls her “otherworldly” and both her abilities and demeanor reflect this equally.
Again at 7MOV, but with 17TGH, her presence has Braal and Nico fight harder – both gaining the typical +2SPD/DMG for the encounter this time.
Seer does also have 12 cards – split into 6B 2A and 4L cards and her Life trait set to only 6.
But don’t be fooled – she will only be able to drop down to 0 if both Braal and Nico have already been defeated.
Fighting does seem like an after-though for Seer though. Many of her cards are Durations, with her often times just starting to meditate.
It is the trait Red Secret that will make this dangerous though – turning too much understanding into a death sentence. She also freely hands out a Secret Fighting Art that despite having positive effects as well, also deals damage to each hit location if that survivor ever gains understanding.
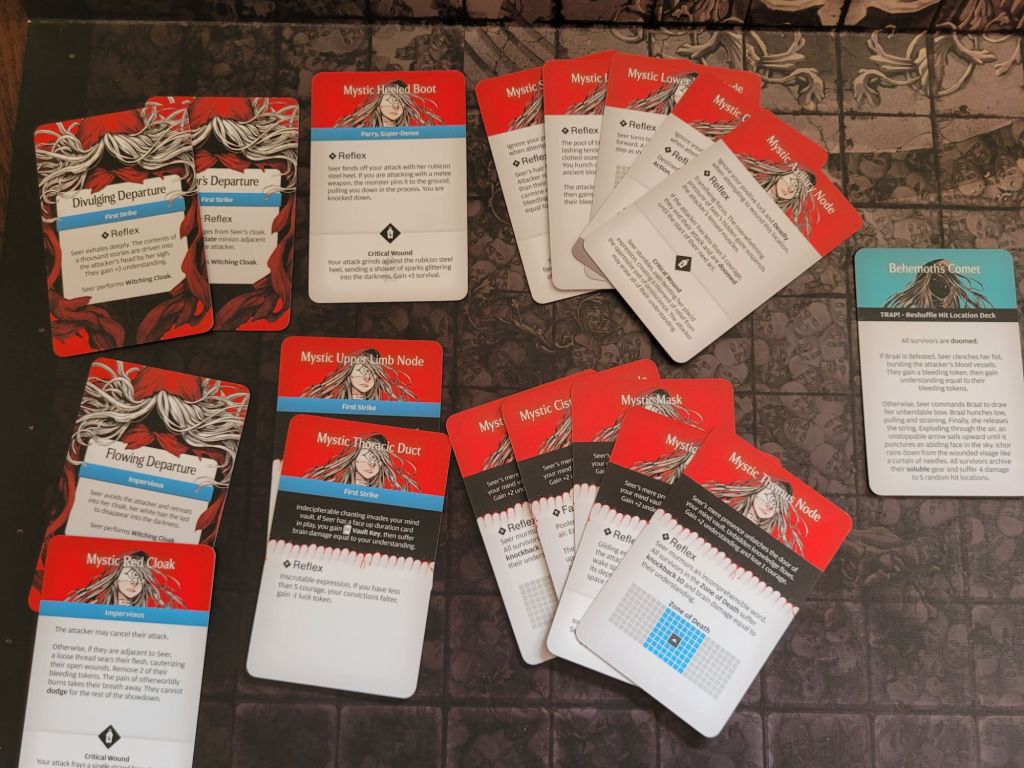
As for her hit locations, her blood magic will give you understanding – you now know why that could be a problem and her trap has Braal finally shoot her bow.
Seer is more like a force of nature than an opponent – not necessarily antagonistic towards the player but her motivations are on too grand a scale for us to grasp – which does sound a lot like the concept of most Entities we have come to know of so far in the game – Rust, Storm, Absolute and more.
And whilst I don’t believe she classifies as one of these god-like creatures just yet, she is likely pretty close.
***
Final Thoughts
***
The Red Witches are certainly one of the harder Node 2 Nemesis Monsters and if you are on the look-out to replace your King’s Man from the core game, they are a good place to go looking, but unlikely to make your campaigns any easier.
They do shine especially bright when it comes to theme and flavor though.
Especially Braal’s Boiling Blood – curiously much like the Pariah’s Cyclopean Empathy – gives the first fight a completely unique flavor. I’d say it is something you would not want to have to put up with often, but can enjoy it very much in moderation.
I had speculated before that the Red Witches might turn my “Big 4” into a “Big 5” – and whilst I can’t argue that they come in a big box filled with a ton of goodies – I don’t think I will be adding them to that short list after all.
Do not understand me wrong – I did very much enjoy my time with the expansion as a whole thus far, especially the fights, and I do like the idea the additional armor represents and what it offers to the game, but I am also not absolutely floored by all it’s content – like I was with the Black Knight or Sunstalker for instance.
Which ultimately means, for me, they are in a similar tier to the Dung Beetle Knight, Flower Knight or Slenderman. And that’s some good company to have I’d argue!
If you are looking to complete the Inverted Mountain campaign the value for you having them in your collection also goes up again, so there is that as well to consider.
Overall, I would guess that the Slenderman expansion is going to retain its crown as the go-to King’s Man replacement for the time being, especially once it gets reprinted during the course of this year.
With my feeling laid bare: Should you buy the Red Witches expansion?
If you do have the money and are looking for a different showdown experience, the Red Witches offer that in spades.
So, yes, go for it.
Again, if looking at picking up a first expansion to buy for the game or as the only one, this assessment changes a little.
If you do not have GCE-money to spend, a Node 1 Quarry monster like the Gorm, Frogdog or the upcoming Titan Bee will see a lot more play over any given campaign.
Alternatively the Node 3 and 4 monsters featuring other campaigns, like Dragon King (PotStars), Sunstalker (PotSun) and supposedly (possibly) 2028’s Gryphon (PotNest) represent huge bargains with hours upon hours of additional gameplay beyond just hunting a new monster and crafting its gear – their prices do reflect that though.
Overall, I do still think my “Big 4” would be more in line with the idea of “must-buys” for the game – Dragon King, Sunstalker, Black Knight and Frogdog – but that doesn’t mean the Red Witches are a bad pick-up by any means.
If available, a cheaper, but no less deadly alternative for the NN2 slot would be the Slenderman expansion.
***
And that is it. I hope I didn’t forget to mention anything crucial.
Before I go, I wanted to briefly talk about last week as I spent 8 straight days blasting through a PotStars campaign, partially to finally get Aeneas to the table.
Whilst that worked out for the most part – and I can report a success-filled killing of the Dragon – all fights have been incorporated into my stats page (why do my PotStars keep murdering each other so much?!) – I mainly wanted to bring this up here because I used the Red Witches as well during that campaign.
Interestingly, whilst they effectively remove 1 Nemesis encounter from the PotStars campaign – the Witches show up in 2 of the same years you are fighting the Tyrant as well, making for a curious double feature each time.
I also wanted to have an extra Showdown in LY26 against the full cadre, but as I only had 4 constellations by the end of the campaign, I quickly understood why you don’t fight Seer with constellations.
Red Cannon killed 2 of them (I got decently lucky on those rolls) and then Seer proceeded to insta-kill a third before she made the other guy’s head explode with forbidden knowledge – which would have happened to 3 people at once had my other 2 constellations survived the introductory event.
Combining Spidicules and Sunstalker into the same campaign was also a choice I got to regret for a moment, but it worked out fine by the end.
So, yeah, just wanted to share that.
With that said, thank you very much for your time!
If you have made it this far, I do hope this article has helped you make up your mind about the Red Witches one way or another. And whilst I still retain my position that I don’t think Nemesis Monsters need to be all that rewarding, I have enjoyed my time with the Red Witches so far.
As always, thank you very much for your time, Seer knows.
Amathul

Leave a comment