Today we are headed into a make-it-or-break-it type of Lantern Year. I feel like whether or not we can defeat the Pariah will tell us how well we are going to be able to deal with the next part of the game, which should be up to the Watcher, at the very least.
And whilst this campaign has been a mixture of both slowly walking and crawling towards these final Lantern Years, somehow we have managed to best all nemesis fights so far. Let’s find out if we can keep this trend going!
But first, we needed to collect endeavors for developing the settlement: 5 were earned in total (3 for returning survivors, 1 from Cooking (I) & 15 population) and then we drew our random settlement event. And I was feeling good about it!
Plague?!
What had been going on here whilst we were gone?
Lucky, Sapphire, Frogdos and Chrysanthemum were nominated and with these rolls they were all going be fine, thanks to Bloodletting (I).
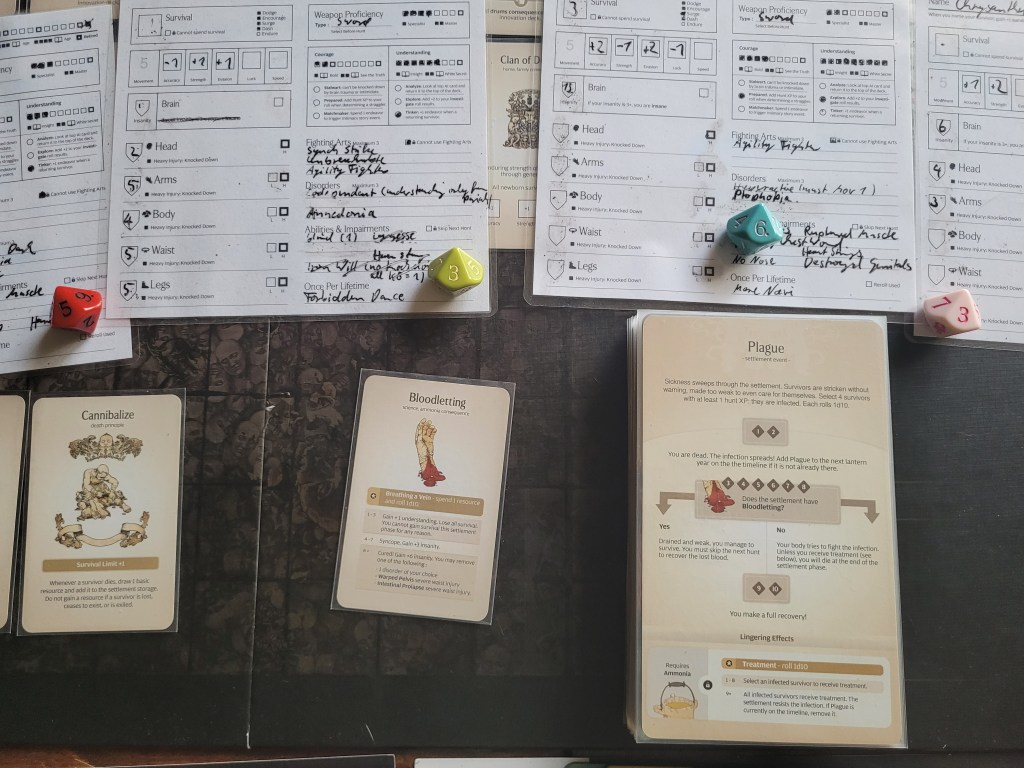
As we updated the death count for the small little mishap we had at the end of the last hunt we moved on to the develop step.
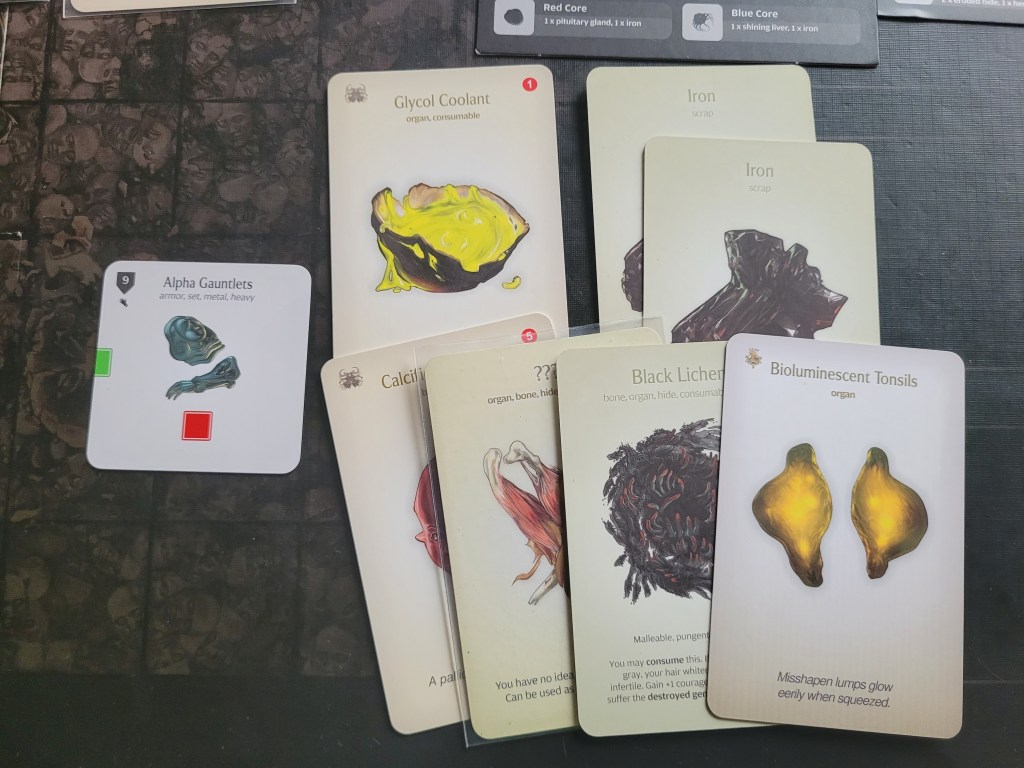
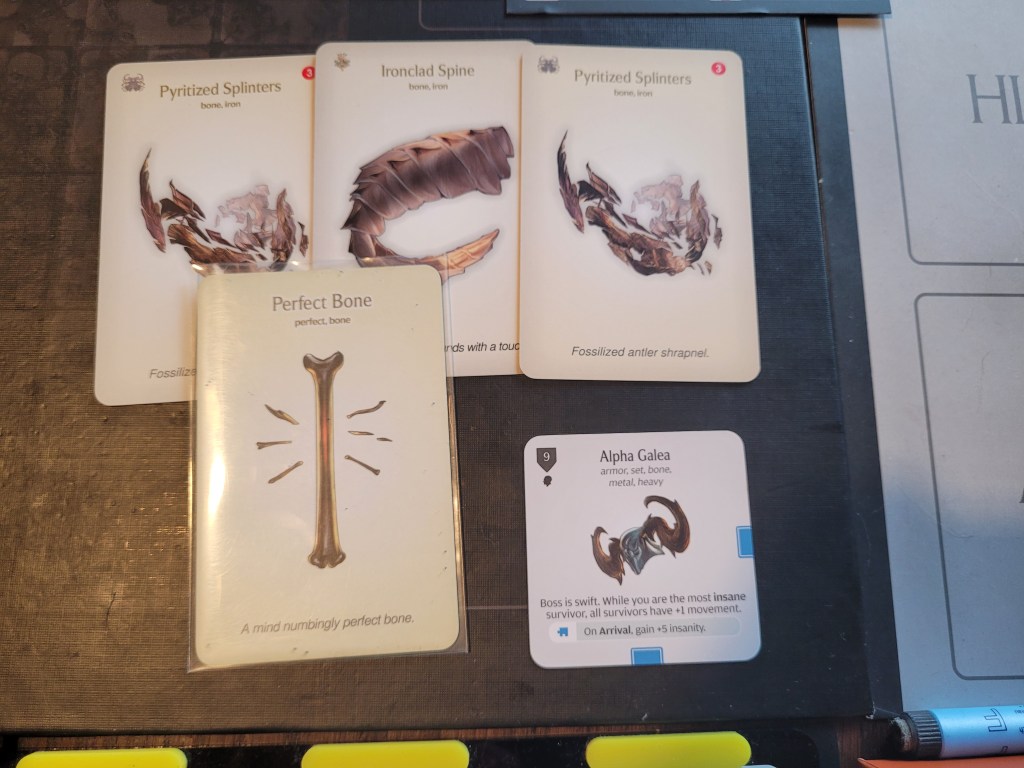
Quickly looking at the Great Hall I noticed that we had all the named resources for the Alpha Galea (head piece), Alpha Gauntlets, Vandal Spatha (sword) and the Godspeed Lantern. The amount of other bits required would probably limit what we could actually build though. 6 bones weren’t exactly easy to come by and then there was also the matter of the Iron we needed: as we “only” had 3 iron and the 2 armor bits already needed 4.
I spent some time thinking and went over a couple of possible ways of how the next few Lantern Years could play out and came to the conclusion that if we were going to postpone the Watcher until Lantern Year 25, I might as well make the most of the additional time at the Lantern Hoard by innovating again.
Storytelling, Sacrifice, Scarification or Saga.
Another classic line-up of choices (missing Partnership and Pictograph admittedly) and I picked up Storytelling mainly for the +1 survival limit here.
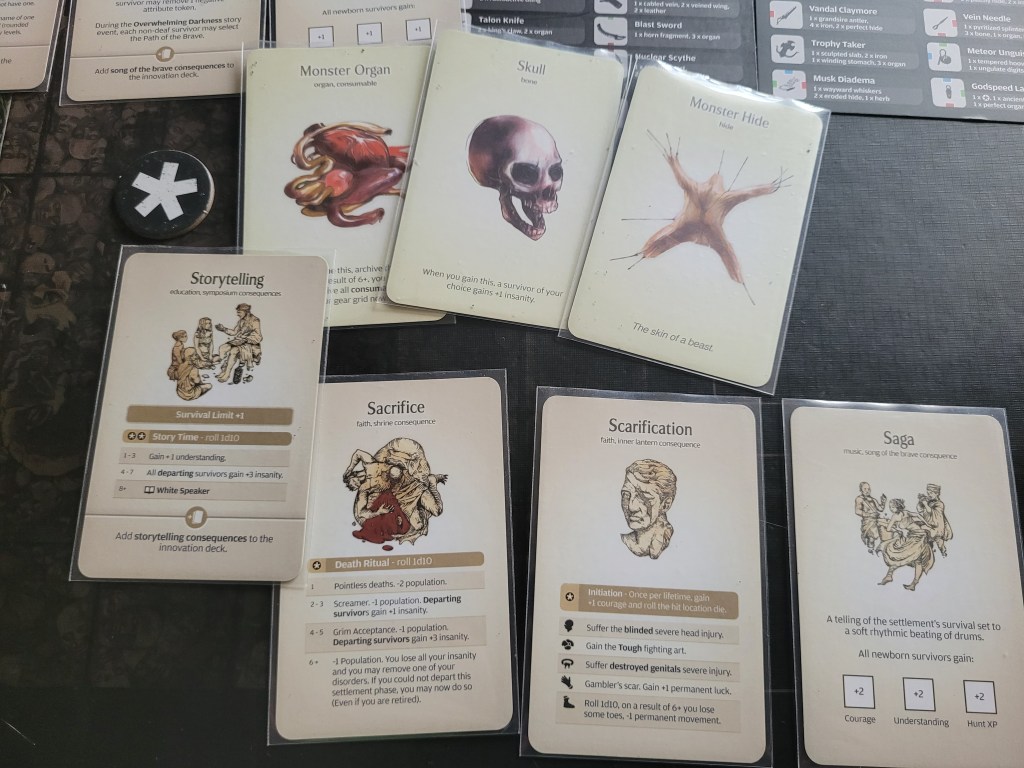
As I’ve started considering Trick Transport (I) amongst all my planning as well, I should also mention that we had 17 Black Resin in the settlement as well as 3 Red Thread, which wasn’t quite enough for that full extra set, but we were quite close all in all.
It was mainly the iron we were still missing.
But back to building items:
Getting the 4 organs together for the Alpha Gauntlets was tough, but I just went all in for them. This did activate the waist armor’s bonus in the Lemniscate grid. And then one of the more pronounced mistakes I had made clicked for me:
I had noticed a fairly significant mistake on my part: the Lemniscate gear needed 2 puzzle pieces to give the stat-bonuses! For some reason I had only seen it as 1 puzzle piece and 1 regular affinity. That was a fairly big ol’ “Oops!” on my part!
But I did check the past 4 Lantern Years and it would appear that luckily it didn’t matter that much. Whilst it would have changed a small number of interactions, both whilst attacking and whilst being attacked, including last Lantern Year’s killing blow, but overall that gear grid did surprisingly little with its high stats besides a couple of swings with any rolls below 8+ anyhow.
I have since figured out a set up to actually get the items active. Again, I apologize for this mistake, I can’t even read symbols, it would seem.
In the end, I did also spend the resources to build the Alpha Galea because the sword did not actually feel like that much of an upgrade (3/7+/8 with barbed 4). Which might have been a mistake?
Figuring that we would need more people in the settlement, next on our agenda was to go augur.
First roll: a 9 – that’s babies! A 1 and a 10. Sure. Hard pressed to pick anything else, with the Gambler’s grace, I chose twins.
Indigo had 2 more daughters this time, named Violet and Purple.
2nd roll: +1 survival
3rd roll: +1 survival
Our final endeavor was used to activate Shrine (I) and we rolled a 7: +1 armor for everyone!
Listless and with growing anxiety, the settlement started to feel a lingering malice in the air. Like a pinch in your stomach that makes all food taste sour, the familiar touch of a Fiend we only knew all too well was painfully clear to us: the Pariah had done something.
We had to make it stop!
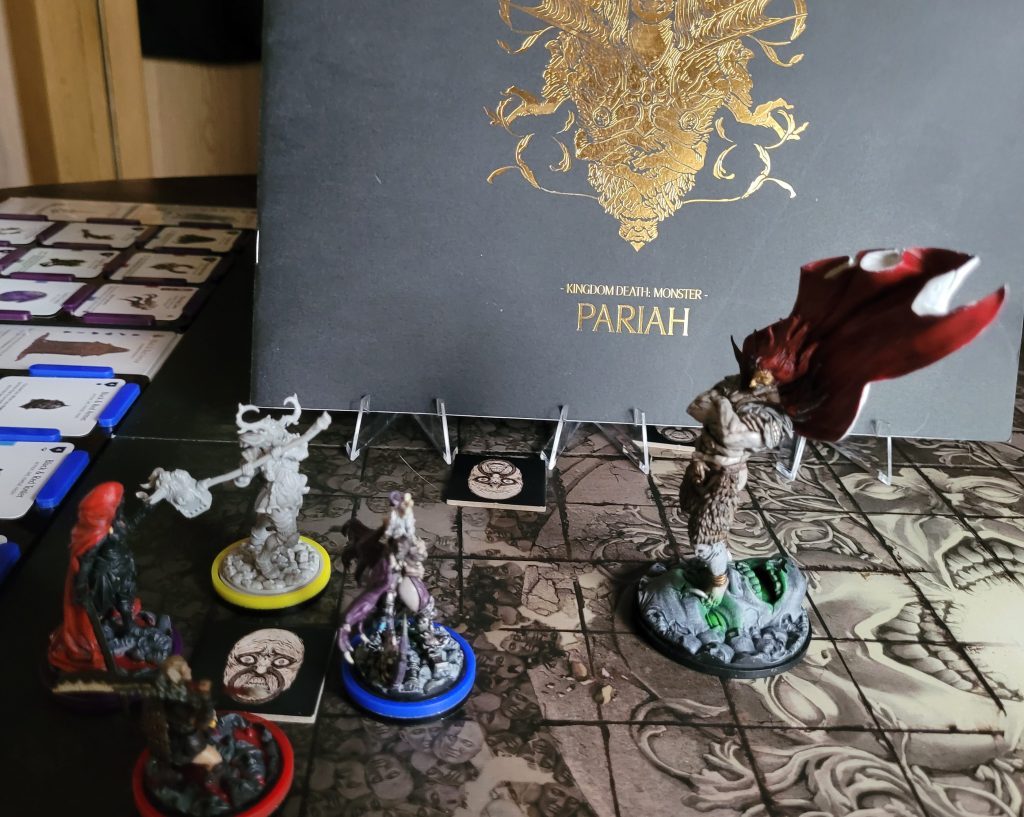
To quench this malediction, our most trusted members of the settlement were sent to deal with this monster once and for all.
The Chosen Fighters:
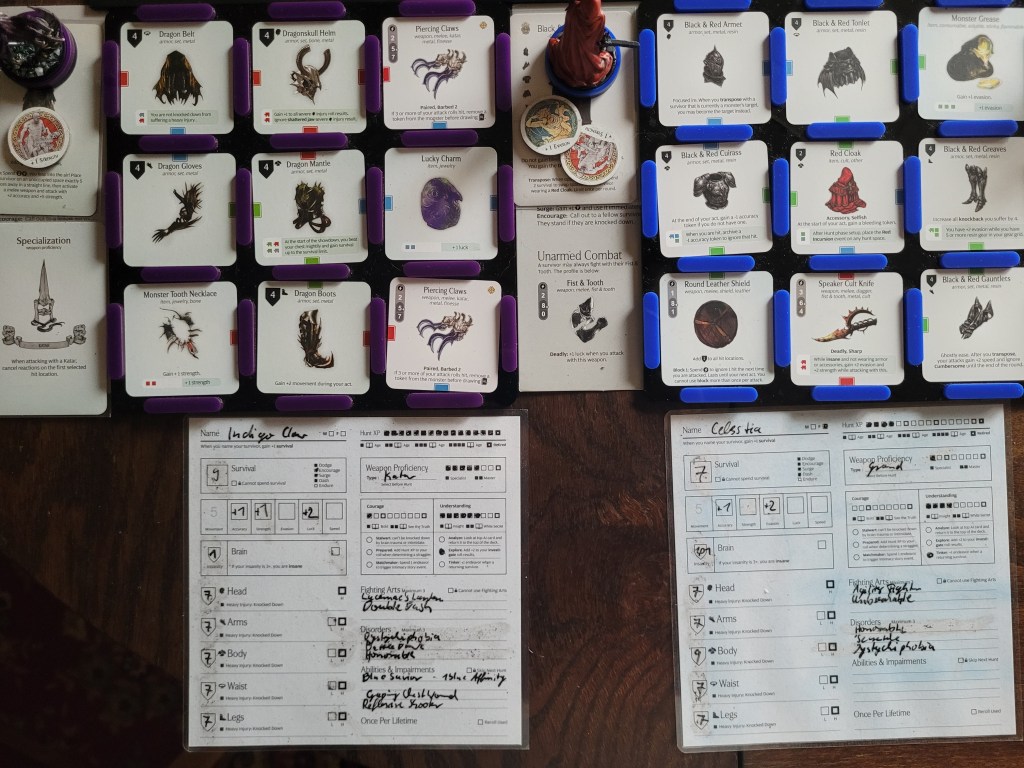
Indigo – purple (Dragon Armor, Piercing Claws)
Celestia – blue (Black&Red Armor, Cult Speaker Knife)
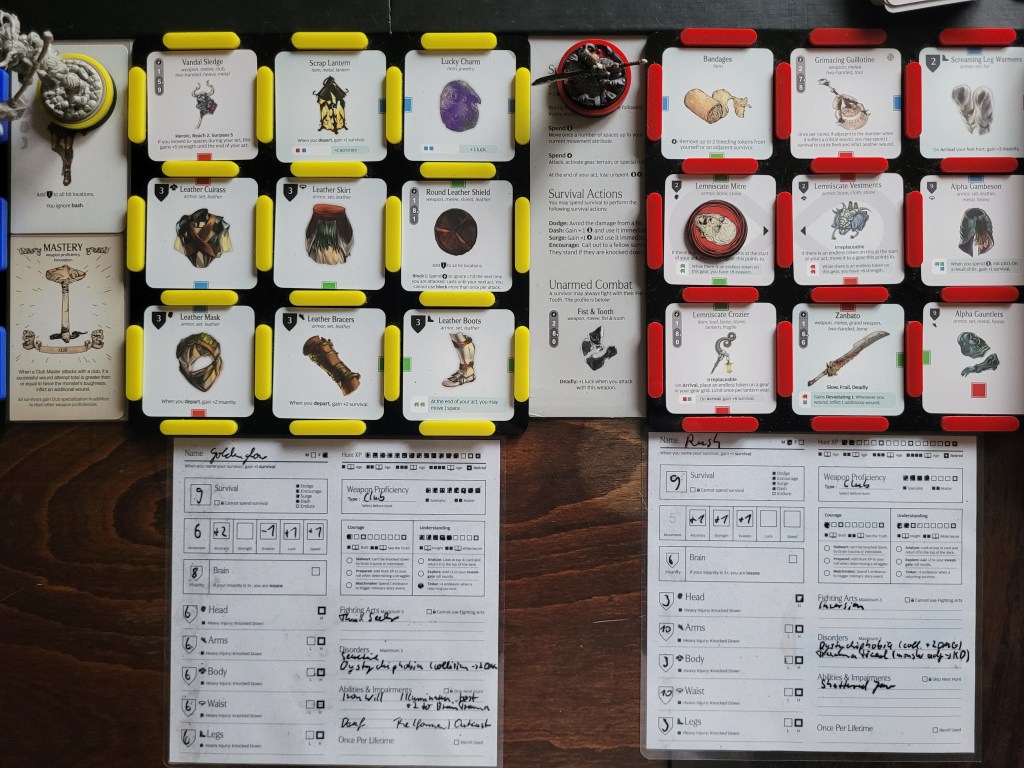
Goldenglow – yellow (Leather Armor, Vandal Sledge)
Rush – red (Outcast gear, Zanbato, GrimacingGuillotine)
Using the Zanbato here was a little bit risky, but as there were only 2 super-dense hit locations in the deck, I figured that with a little planning ahead we should’ve been fine, really.
*cough*
Anyways.., I was hoping that these 4 could deal with the Pariah for us, once and for all. And as Indigo would disappear at the end of this or any other fight no matter what happened, and I wanted to try my best to make the most of her final showing!
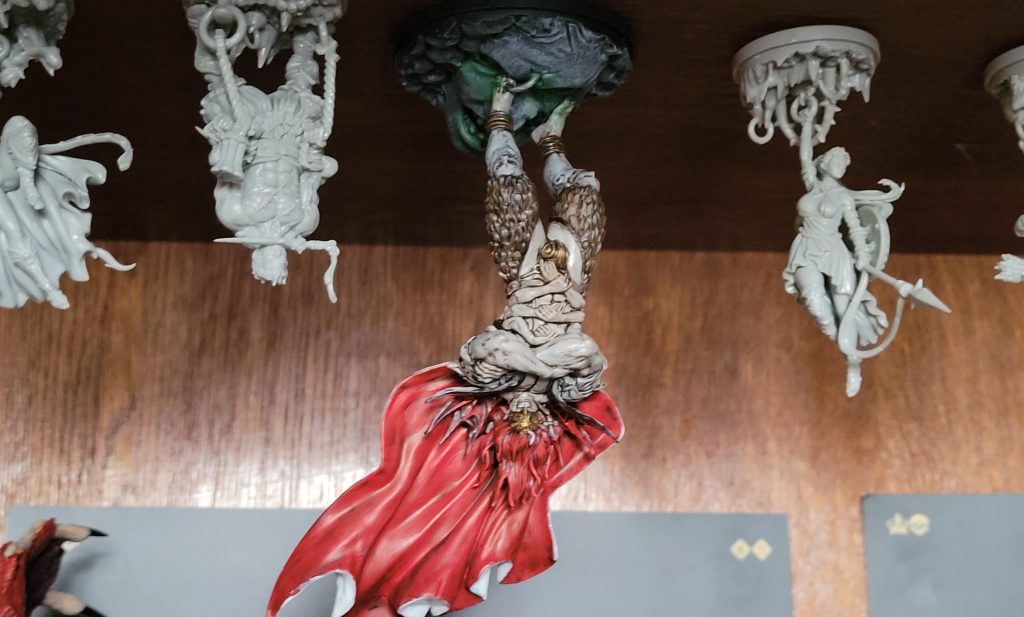
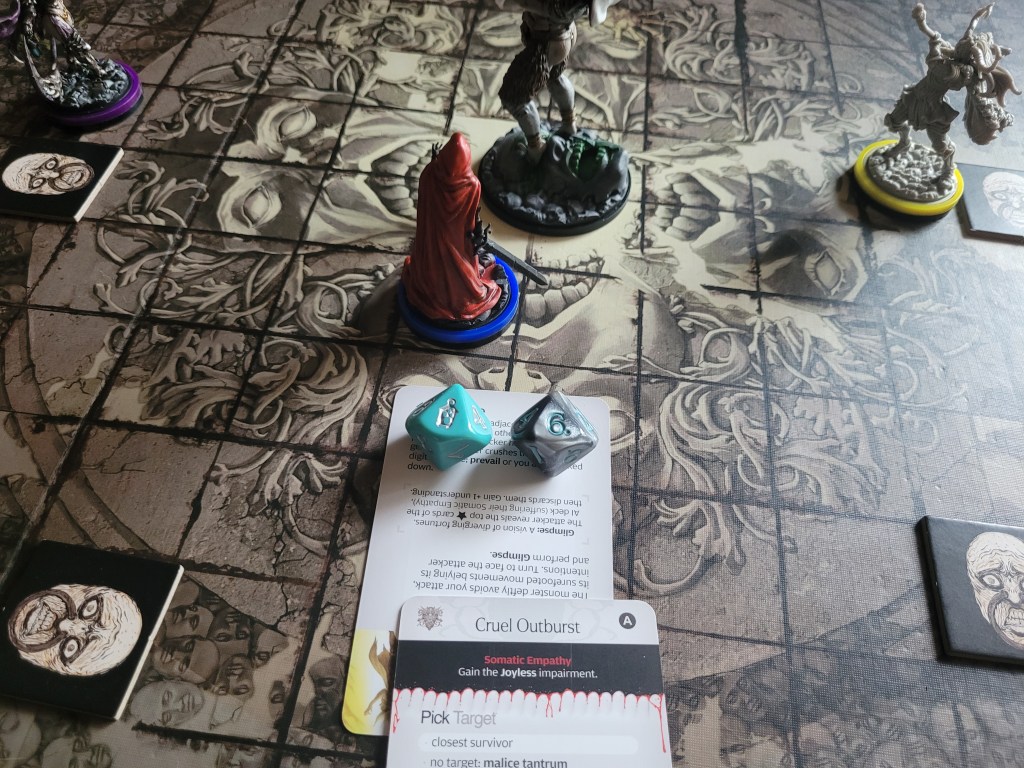
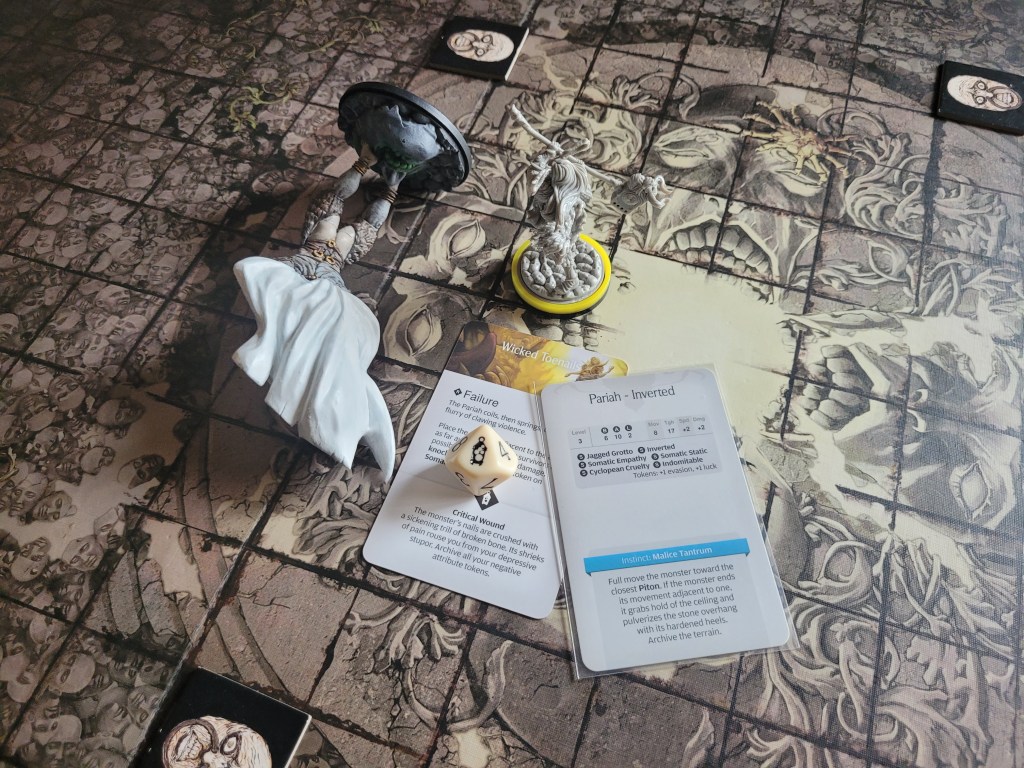
The Level3 Pariah, and its inverted showdown, adds another whole layer of danger to this devious foe: dangling from the ceiling above a long drop onto spiked terrain.
In addition to its 17TGH and the typical +2/+2 for DMG/SPD most Lvl3 monsters would get, the Inverted Pariah has 6 traits as well as both a +1EVA-token as well as a +1LCK-token.
Everything we already knew from prior encounters is still present here as well: Somatic Static, Somatic Empathy and Somatic Cruelty all still do the same things as last time.
And Indomitable should also be clear at this point.
Inverted and Jagged Grotto, however, are new additions to the fight, simulating the terrain the encounter takes place in.
Inverted will jank survivors back to the closest Piton (a piece of terrain spread out across the map during set-up) unless they spend 1 survival after attacking to stay in place, as the whole fight is happening upside-down and any attackers are clambering both for a stable spot to grasp on to as well as moments of respite around the monster’s system of iron rings placed on the ceiling.
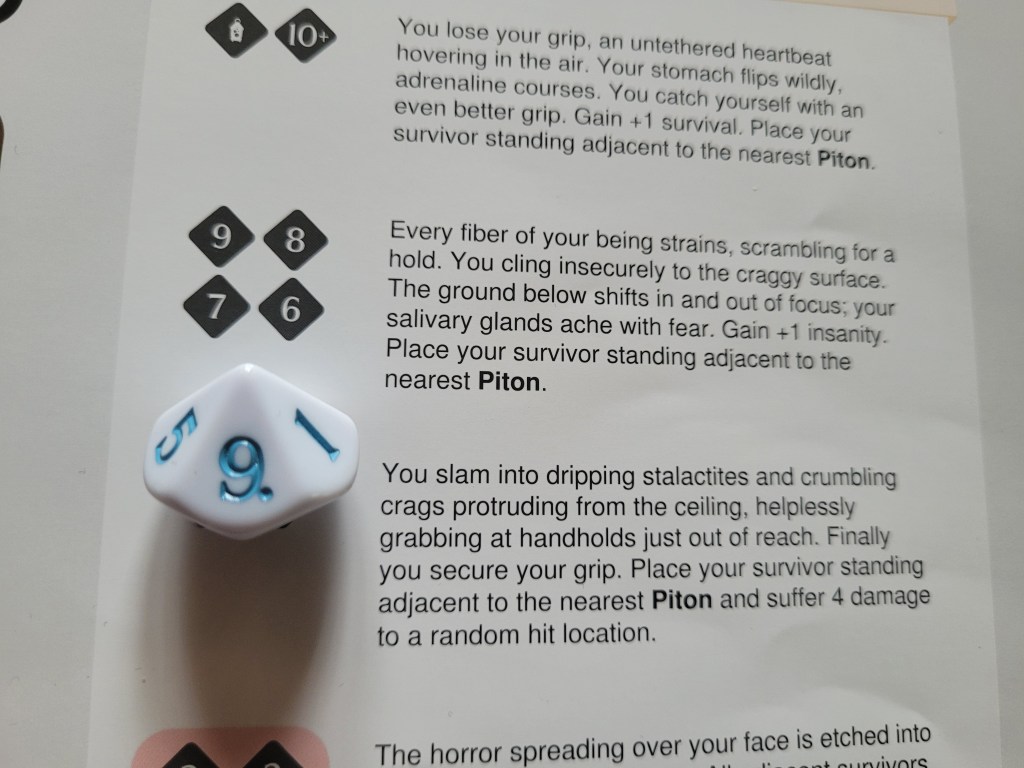
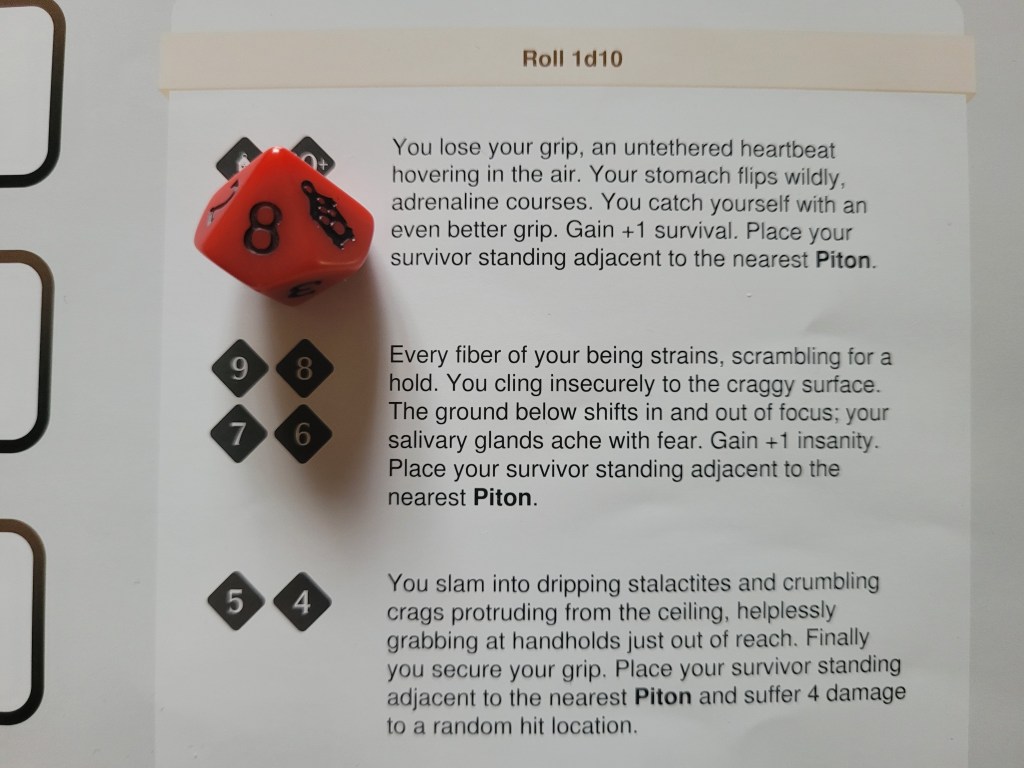
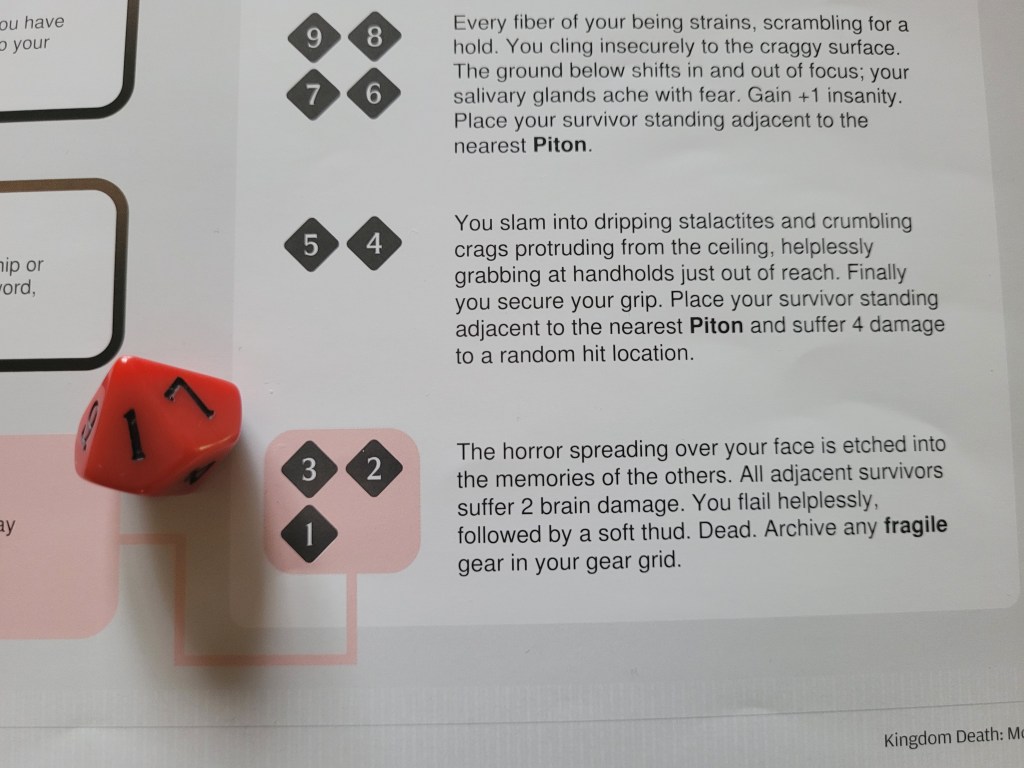
And Jagged Grotto adds a custom Scramble to Survive table to the fight.., which you get to roll on every time you are knocked down.
..
And its not a forgiving table.
..
And the Pariah has a lot of knock down reflexes.
..
The aforementioned Pitons are your safe spots across this battle field, but the Pariah does have the tendency to smash them, slowly removing the places your survivors get pulled towards and cling to, one by one, the longer the fight goes on for.
All that combined with 18 AI cards, 2 of which being Legendary, makes a for a dangerous proposition.
And I haven’t even mentioned the fairly harsh punishment for losing the fight yet. Or well, considering all the Hovel-(I)-hate that exists, maybe it doesn’t actually matter all that much for most settlements.
On the flipside, the possible rewards for a victory here is pretty good as far as slightly-poisonous presents go.
All that being said, its about time we get this show on the road.
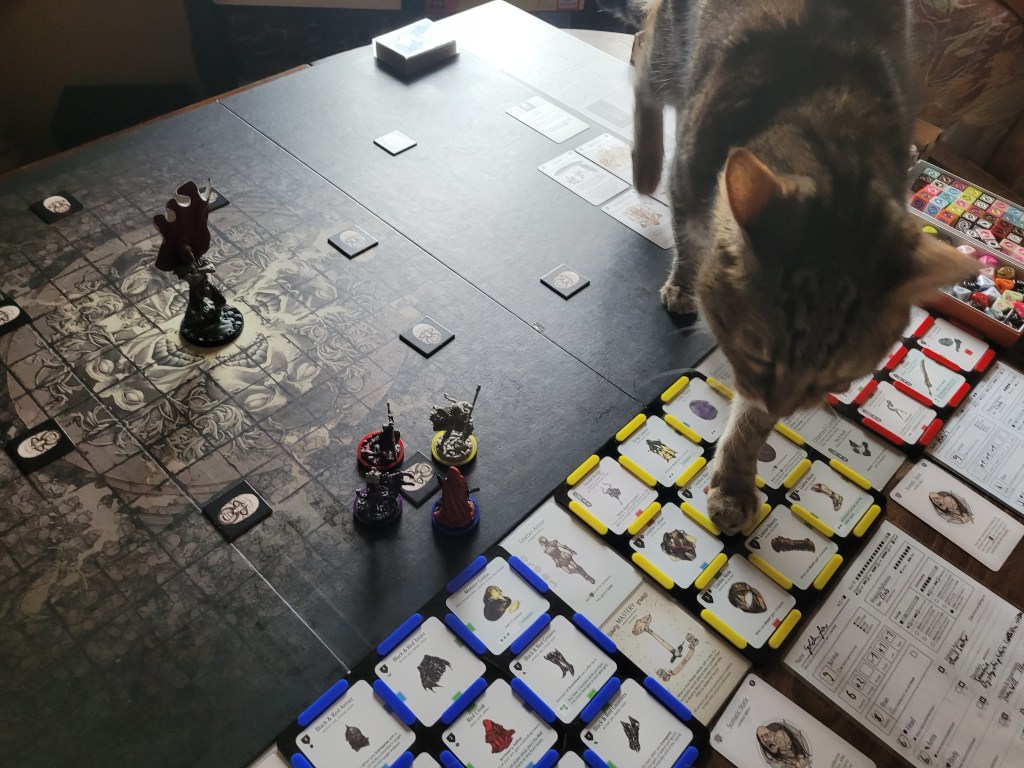
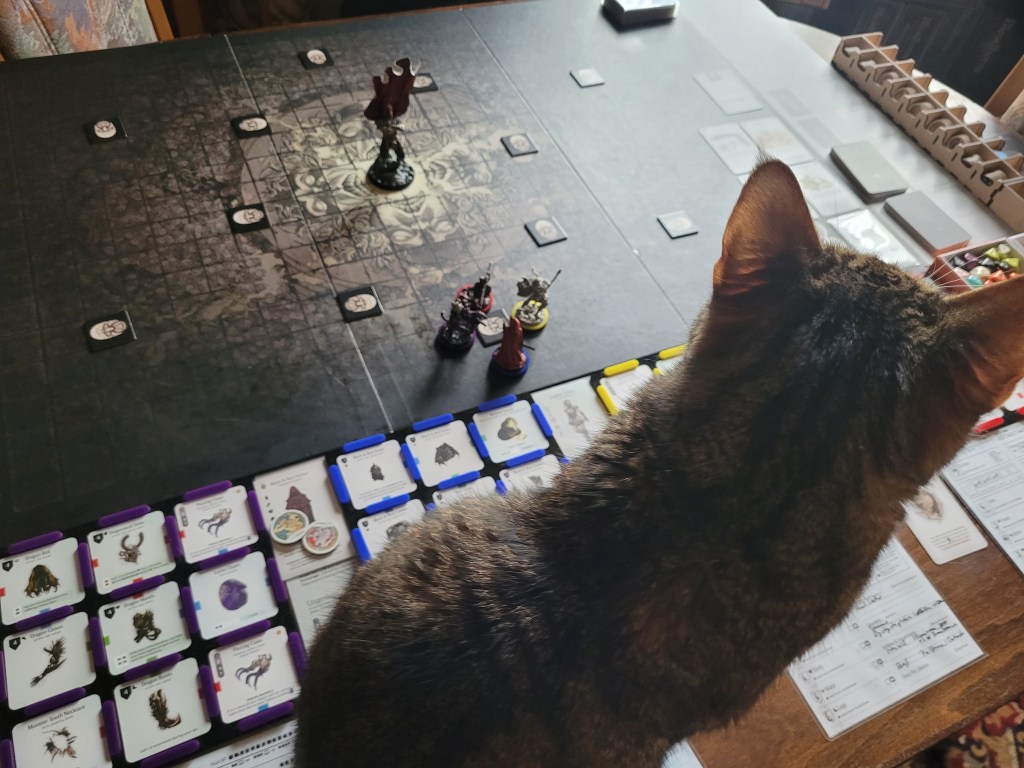
I was really not sure where to best put my survivors at the start of this fight, partially because I’ve only played it so little at this level so far .. so I opted to go with the “clump A” option.
18 cards in the deck, the survivors got to go first.
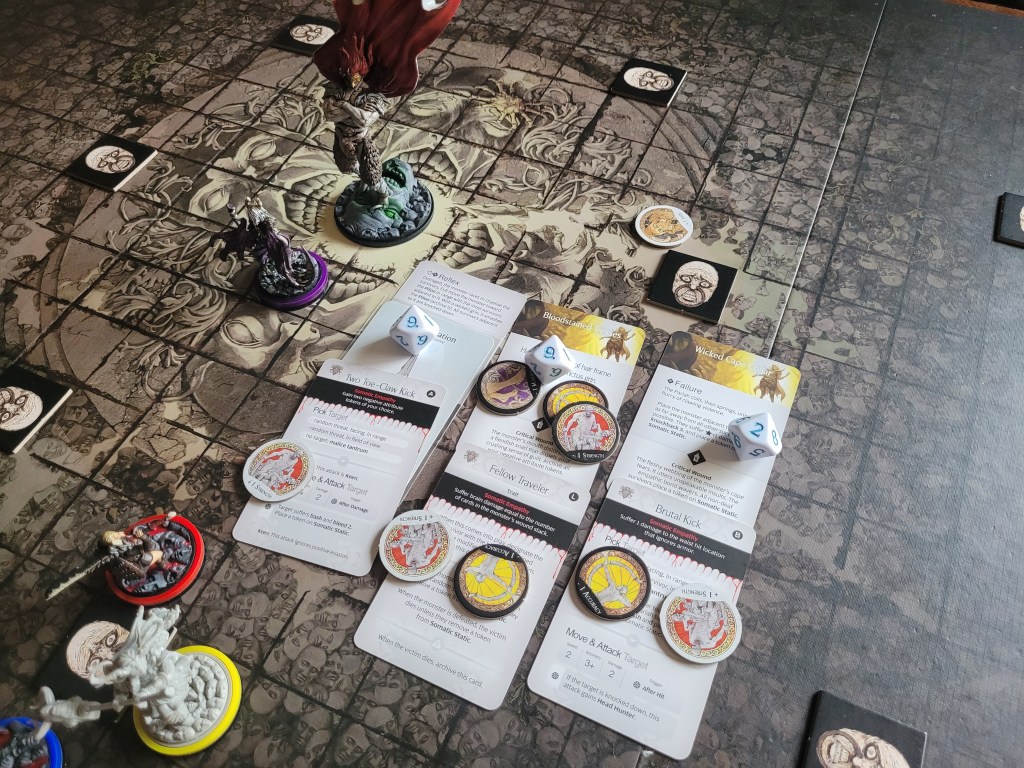
Indigo was placed ready to go in via Leap and try to remove the tokens on the monster first thing. With this maneuver she had a nice 3+ to hit because of the monster’s EVA. Between a perfect hit but also a 1 she found the required 3 hits to remove the LCK token first – giving the rest of the team a chance to also deal critical wounds. Her katar spec then canceled the inverted reflex .., but she was hit hit with 2 negative tokens immediately. The 2nd hit dealt a crit and she removed those again instantly.
2 brain damage and 1DMG to the waist rounded out this first line of attack.
Indigo spent 1 survival to stay in place before she dashed around the Pariah to finish off her act with a surge.
She only managed 2 hits on this attack, so the +1EVA-token stayed put for the time being, and the first strike tanked her katar spec as well, so she had an Inverted reflex to look forward to. But she was knocked down because of Somatic Empathy dealing damage to her head even before that..
A 9 kept her alive for the moment. Standing next to a Piton at this point, the inverted reflex fizzled out as Indigo was no longer adjacent.
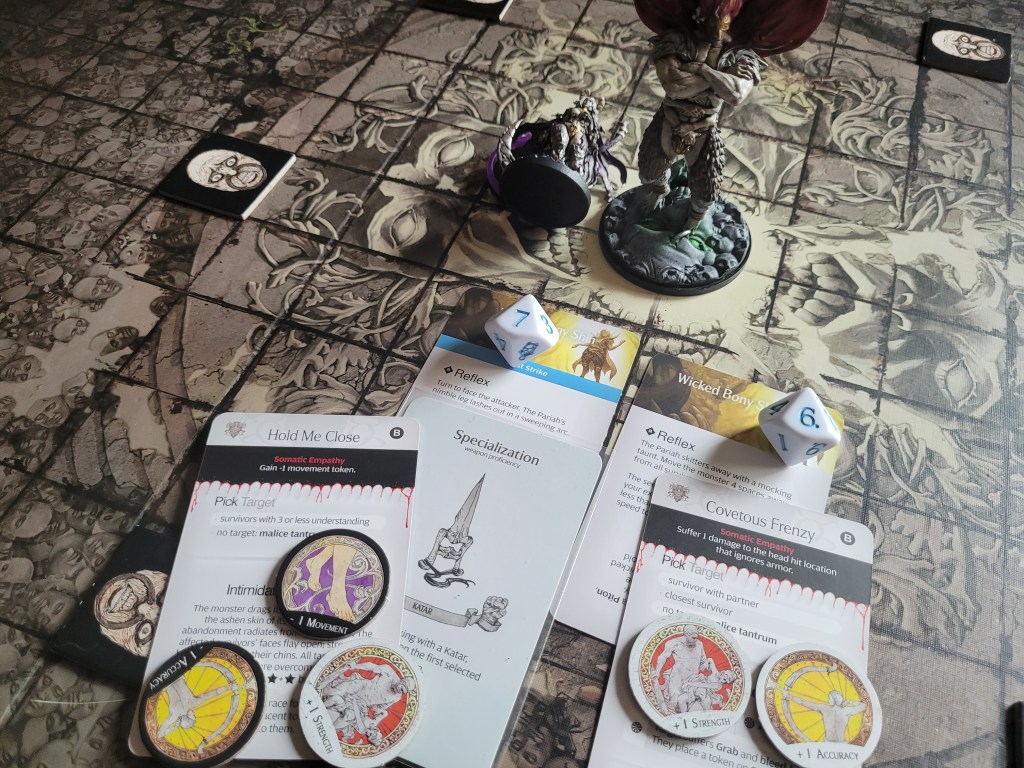
So that was 5 wounds dished out real quick!
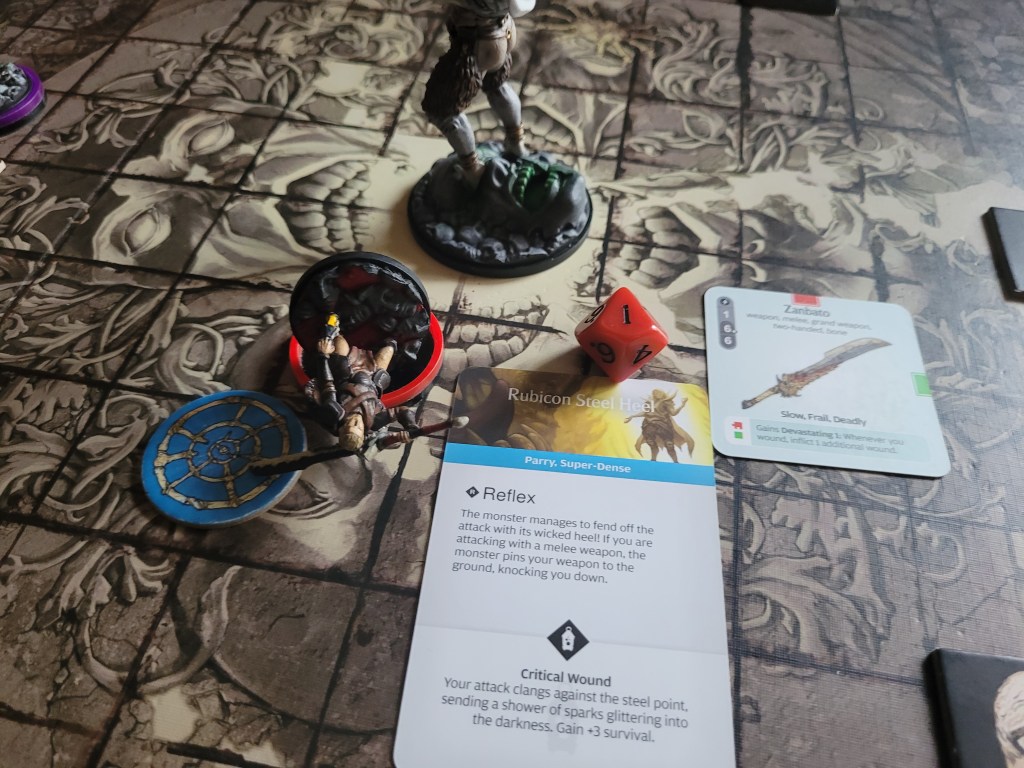
With the deck still quite thick, Rush switched to STR-mode (this time not imaginary) and used the Zanbato to attack for 2 more wounds, which knocked him down instantly. With another 8, Rushwas placed next to the closest Piton as the Pariah kicked the air in front of him.
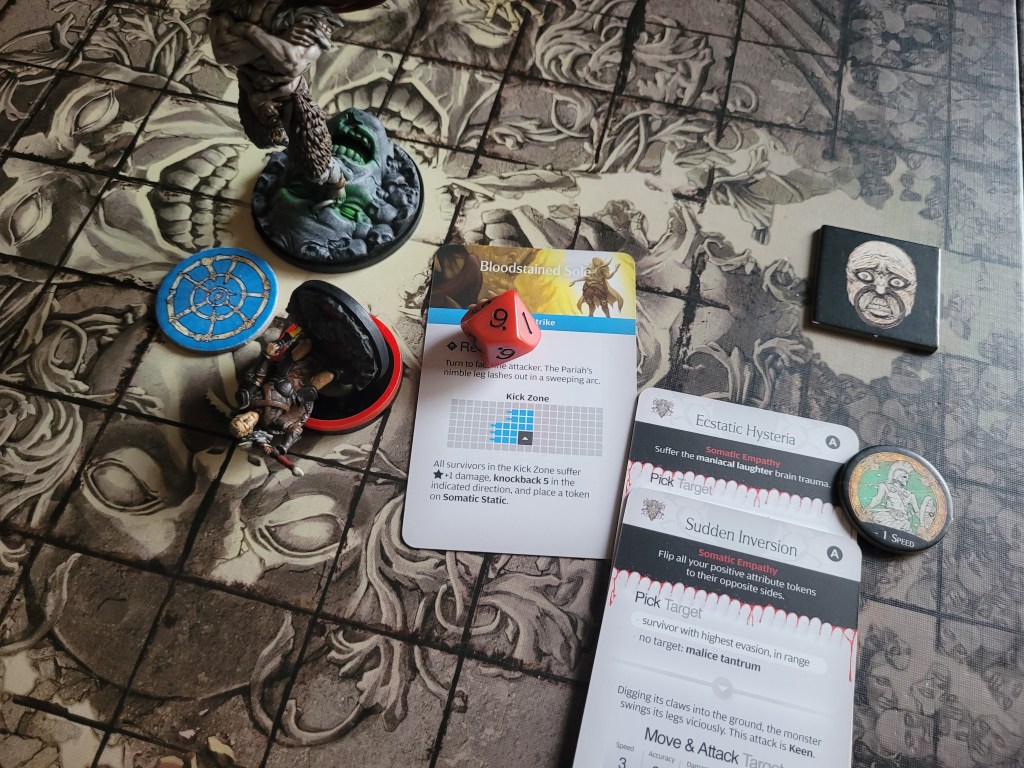
Rush then moved back in, as I felt safe and confident in just attacking again. Naturally, the game was ready to punish a moment like this: he hit with ease, but he had found the parry & super-dense hit location: the Rubicon Steel Heel. Critting on 9s he rolled a 1 to make extra clear that his weapon was broken and the Zanbato shattered in his hands.
And whilst I just couldn’t stop laughing for a bit, stuff just kept piling on: Rush got knocked down by this attack’s reflex as well and the shame of the moment had been too much for him .. a 2 rolled was turned into a 1 – insult to injury – and he fell to his death, removing the Lemniscate gear from this campaign for good.
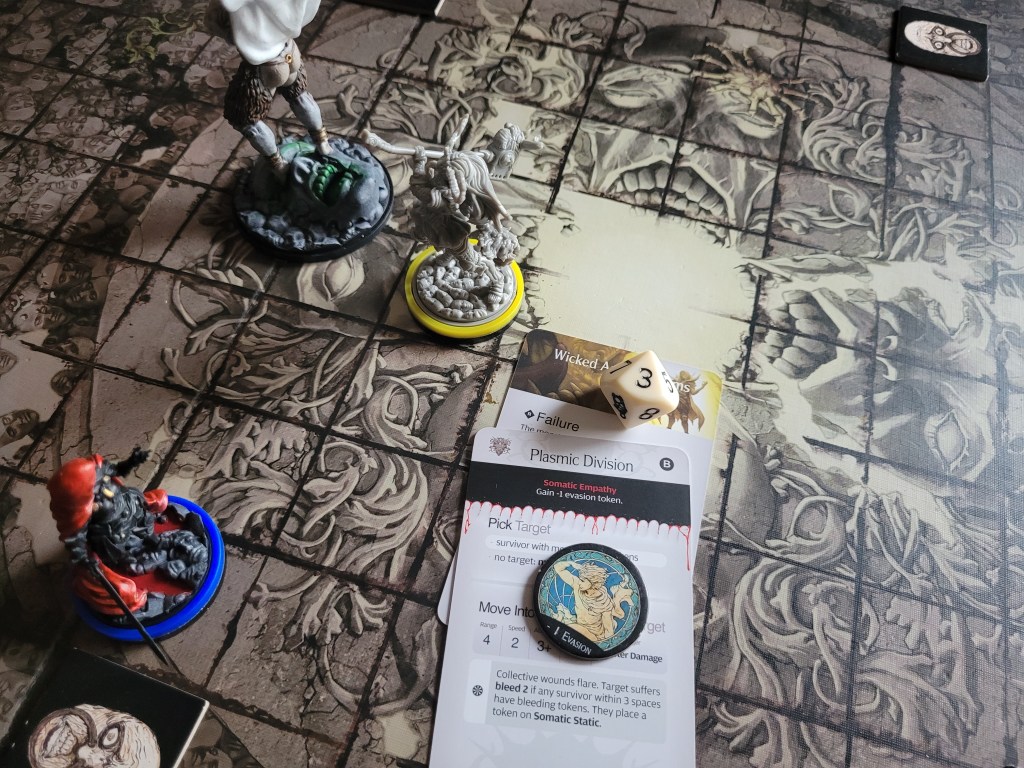
Undeterred, Goldenglow moved up to the Pariah with a dash to get the +5STR (possibly critting and dealing double wounds on 8+): 2 wounds were dealt without a double-up and Goldenglow lost a permanent SPD from the exchange thanks to an unfortunate line-up of Somatic Empathy effects.
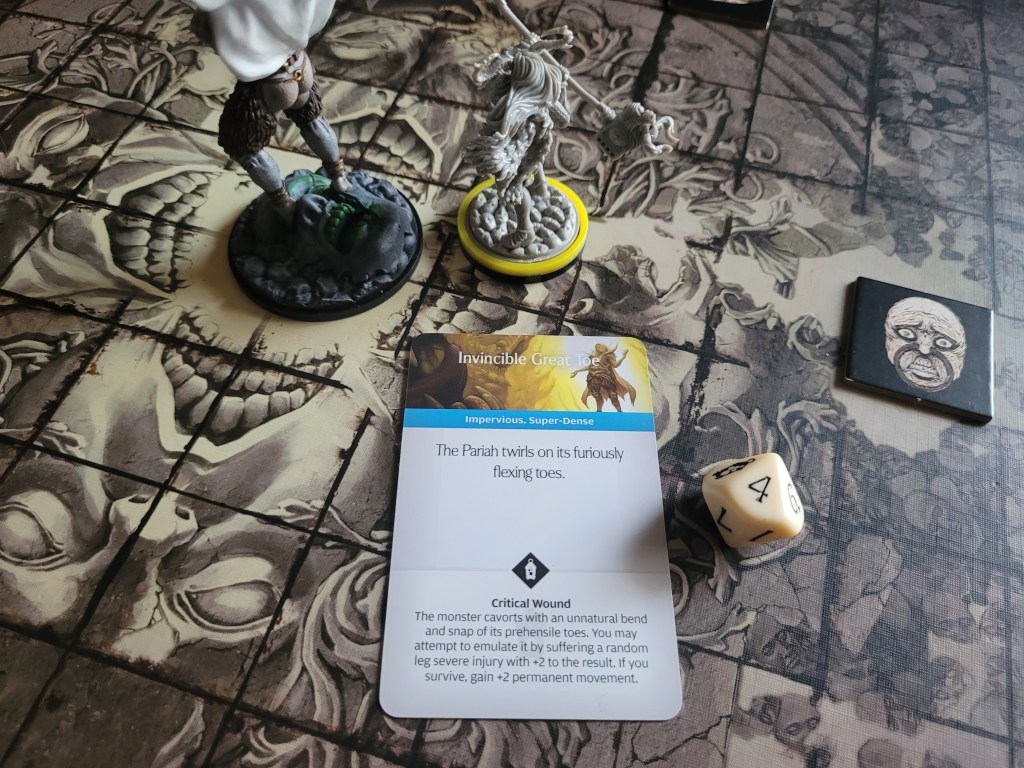
She spent 2 more survival to stay and surge, but only hit the Invincible Great Toe.., which did indeed turn out to be invincible.
Finally, Celestia moved up as well after some hesitation, and dealt a single wound granting her the joyless impairment. That’s 3 for 3. *sighs*
Still, we had managed to deal 10 wounds in a righteous flurry of blows.
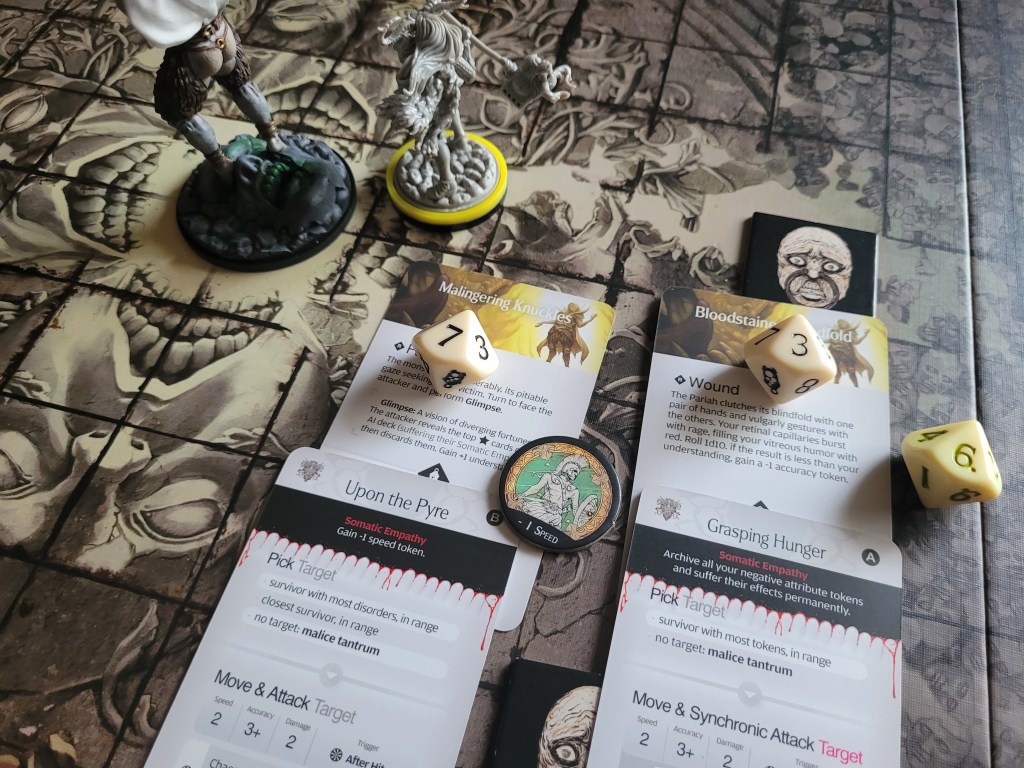
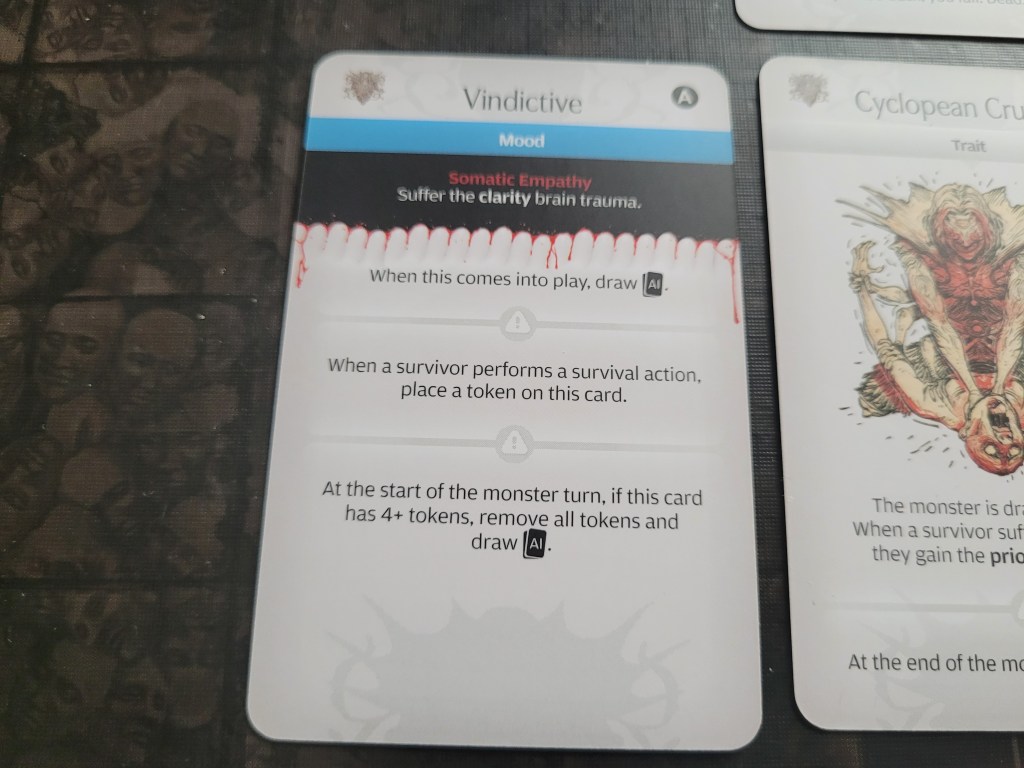
8 cards remaining. Vindictive – a mood – entered play. From this point onwards, every time my survivors used a survival action a token would get added to this card and if there were 4+ tokens at the start of the monster turn it got to play an extra AI card.
The second card for the round was Savage Push, targeting Celestia. The Pariah wasn’t able to hit her even once and the following tantrum shattered the Piton next to Indigo (Celestia took the chance to dash away).
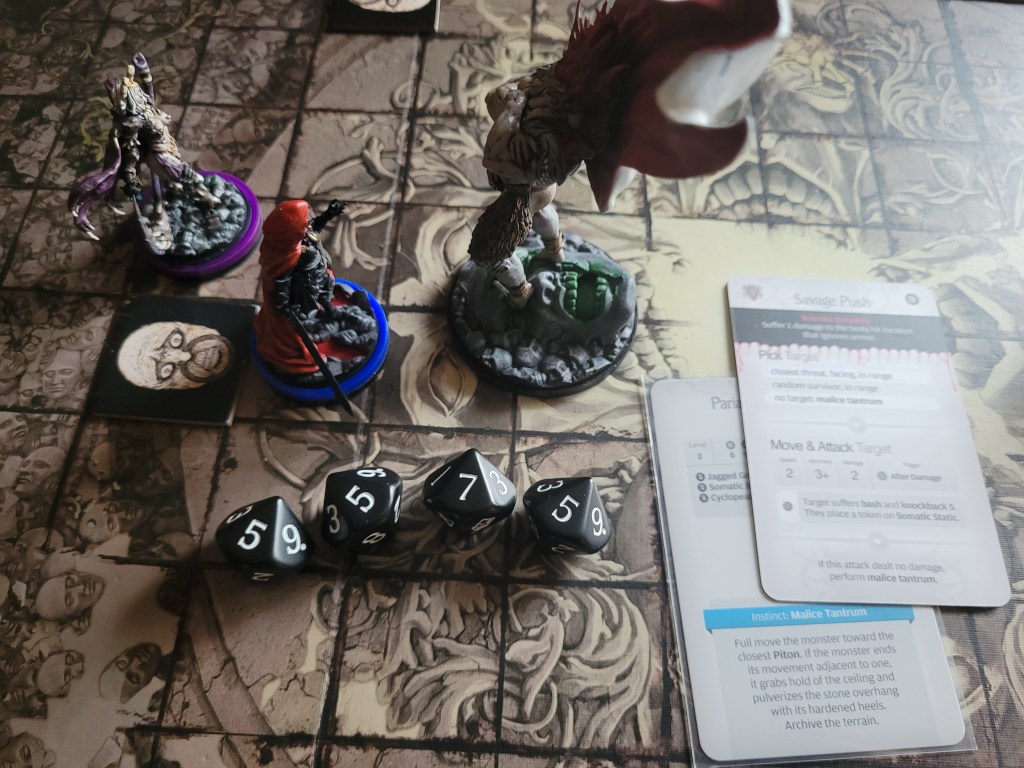
The third and final card we had to endure was Whipping Sway, randomly targeting Indigo.
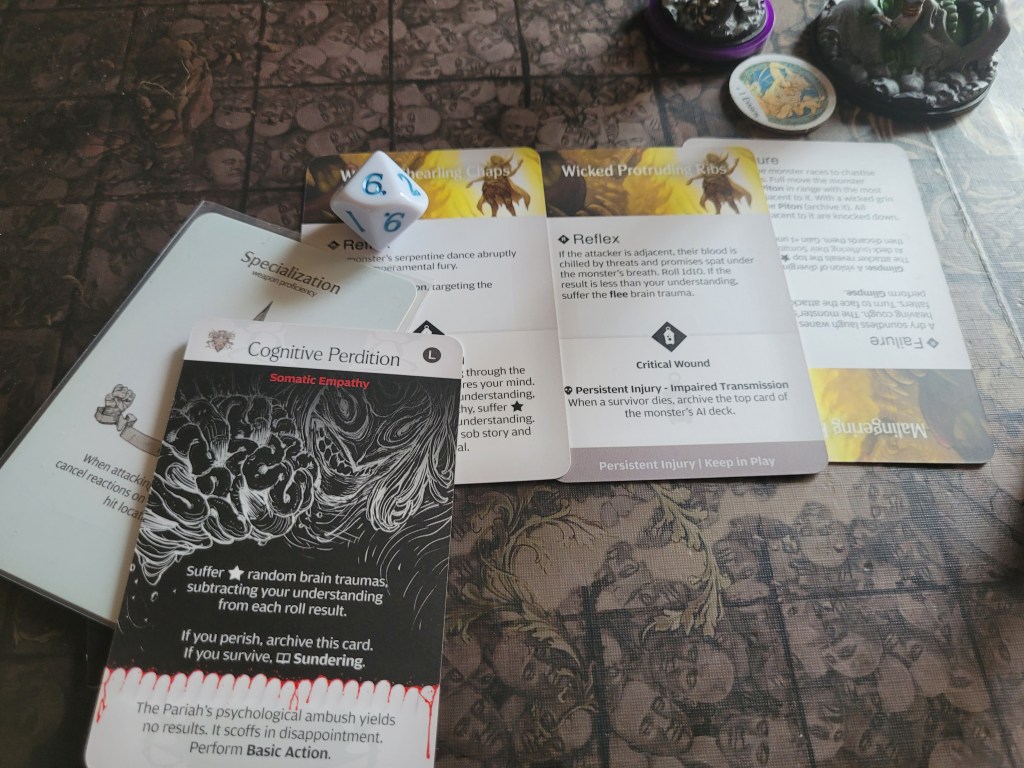
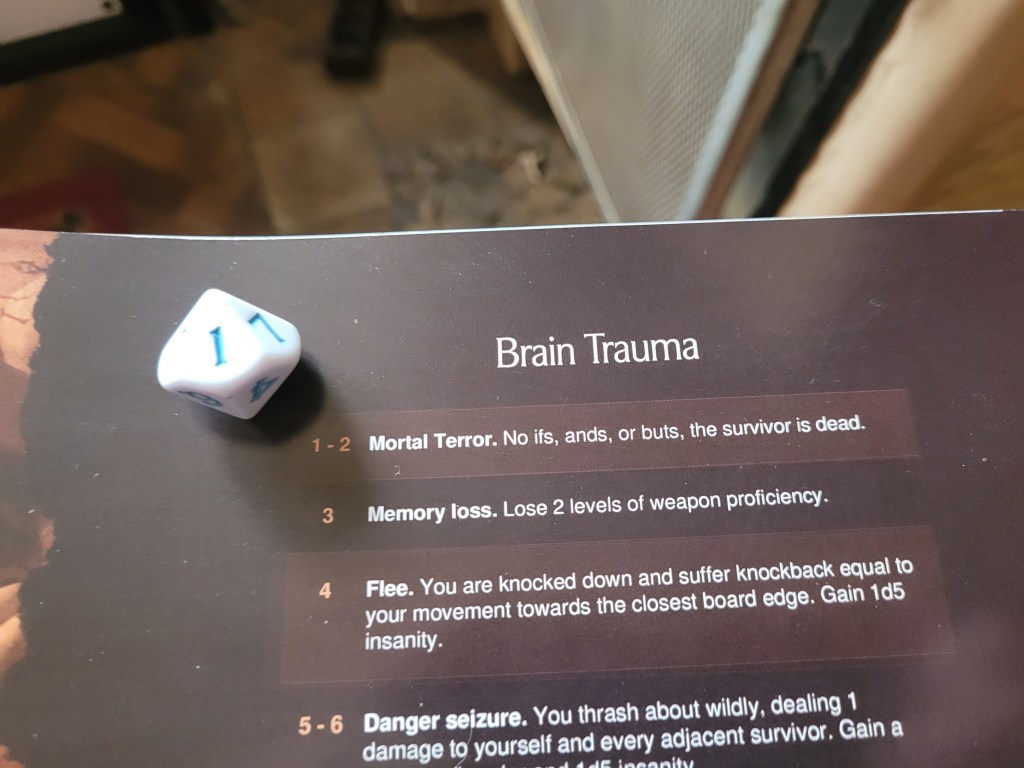
She did take the chance to surge during the card’s flow and she removed the +1EVA-token before she got demolished on the first wound’s Somatic Empathy effect: Cognitive Perdition was revealed for this wound and she suffered 3 random brain traumas with a crisp -6 to her rolls.
To nobody’s surprise: the first roll was already enough. She died to Brain Trauma and the card was archived for good as Indigo returned to the Dreamer’s side.
At least the AI card also ended because it no longer had a target.
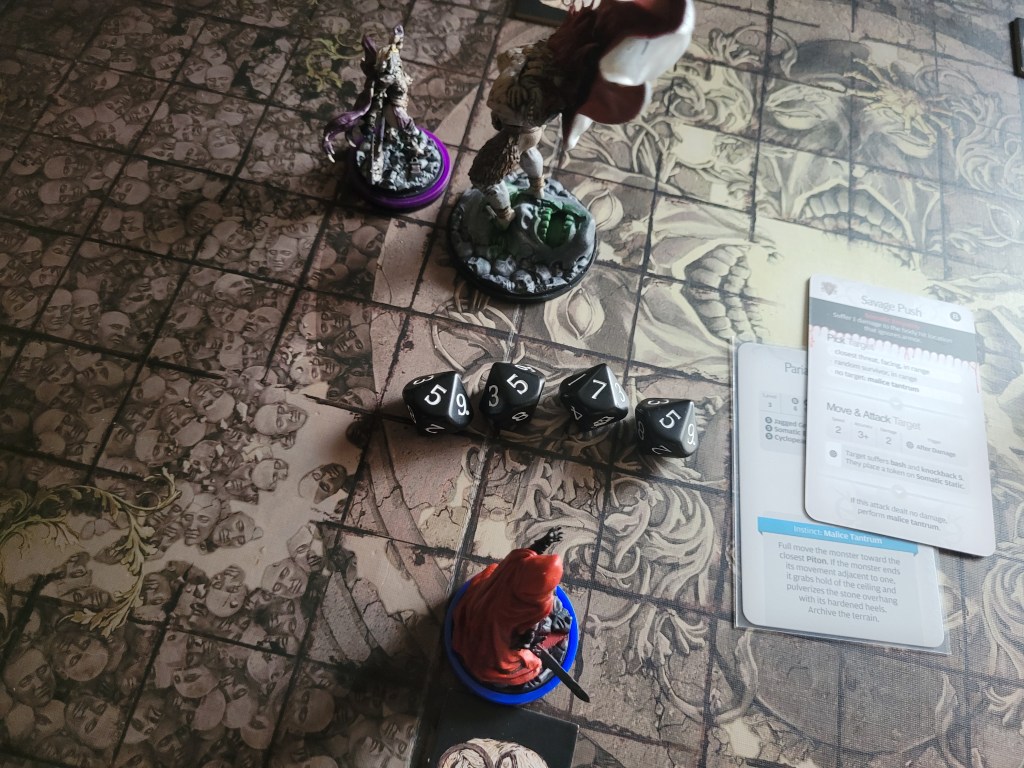
Down to 2 survivors, Goldenglow now had the highest damage-potential amongst the remaining group by far. She spent another dash to gain the extra +5STR with the Vandal Sledge and hit the Fiend once for 1 wound at a cost of a -1EVA-token.
But here we were and she had to get something done! 1 more survival was used by her to stay in place and yet another 1 for the surge follow up. With this Vindictive was set up to trigger next turn, but she crit the monster’s Wicked Adorned Neck .. 2 wounds and a Somatic Static token for everyone! Finally! Some static!
Goldenglow had to still suffer Anhedonia (D), but even a slight reprieve was more than welcome at this point.
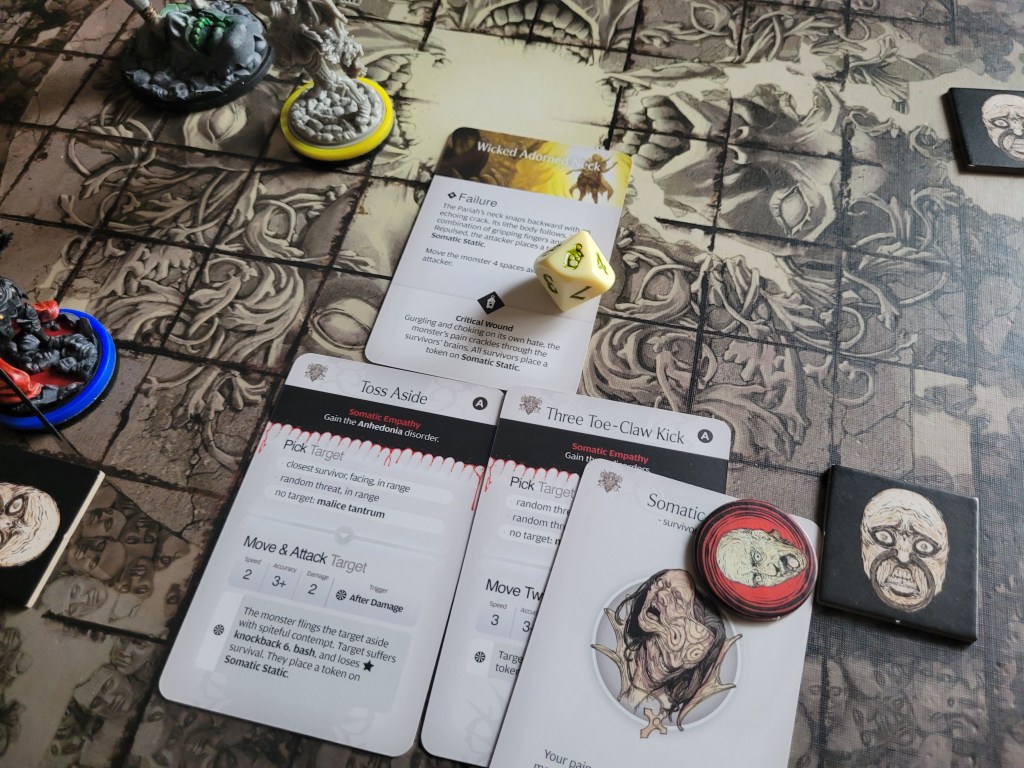
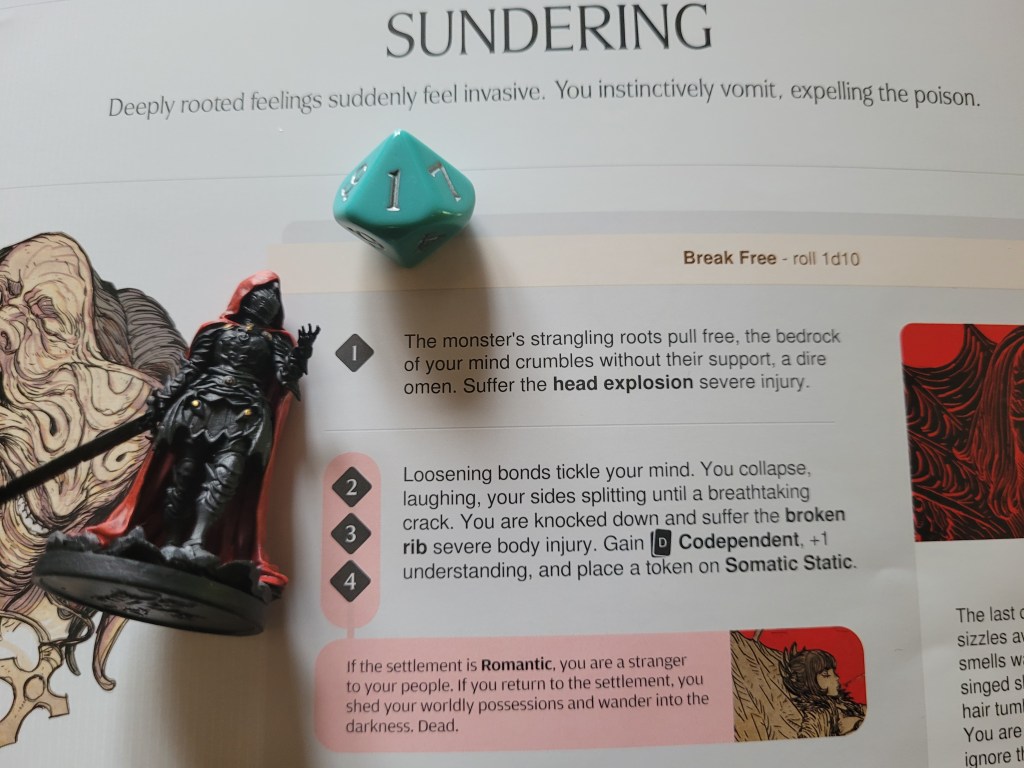
Celestia moved in to get another hit in as well, which turned to 2 hits and 2 wounds, but she triggered the Sundering event on a crit!? I typically liked to avoid this event .. and as her head exploded I remembered why.
(This was actually an omen! I only picked up on this after the fight though.)
1 card remaining & 1 survivor remaining as well.
Vindictive activated and the monster drew an extra AI card for the turn – the last card remaining in it’s deck: Savage Push.
I felt like there were 2 ways how I could go about this:
Either, I have Goldenglow run up to the monster and surge to hopefully kill it (on an 8+, or after a perfect hit on 2+).
Or run away, have 1 AI fail and hope to survive the other 2 instances of it.
..
As Sir Hermes would have said in a different settlement: No Fear!
..
The Pariah picked its target: Goldenglow. The only one left.
She ran in first though.
The monster clearly surprised, she easily hit it (2+) .. and as it was struggling with the audacity of the moment, Goldenglow dealt another critical wound!
The Fiend barely caught itself before it fell, snarling and hissing at Goldenglow through jagged teeth. Something within it was broken, and in need of time to mend. Something in us was broken and gone.
The Pariah flexed his straining connection one last time and as Goldenglow flinched ever so slightly, it darted off into the darkness of the grotto.
Goldenglow shed one final tear, watching the monster vanish into the deeper darkness, and as she felt the sting of abandonment, she aged (+1SPD).
Finally we made note of our rewards.
Implanted Memories (I) was archived, meaning we no longer gained departing understanding (which was a little sad) but we were also back to having White Secret for potentially gaining the ever-coveted Ageless ability.
And as we had just recently innovated Storytelling (I) we also gained the Story of the Heartless for the whole of the settlement from this.
This reward added the Fused ability to any survivor managed to achieve White Secret during the rest of this campaign, no matter the roll result! Fused would deal an automatic crit to the monster (exactly like a Founding Stone would) whenever a survivor with this ability suffered a severe body injury during the showdown.
And whilst you aren’t likely going to want to get severes with this ability, it might just tip the scales of fate into your favor now and again.
***
And that’s the Lvl3 Pariah for you.
A quick and brutal fight, it felt like we dealt most of that damage to ourselves.
Whilst I did not expect for us to lay into the Pariah this hard, but after hunting the Screaming God with its 18TGH, 17TGH doesn’t seem all that much anymore.
And whilst I would like to think of this fight as fairly one-sided, 3 of my survivors exploded themselves.., so there’s that to consider as well.
But most importantly for this encounter, at least in my opinion, we managed to avoid the defeat condition .. which would have removed Family (I), Partnership (I) and Clan of Death (I) from the campaign.
And whilst that might not be that much of a devastating blow in most set ups – I felt (and feel) like we did need our precious few base stats that we did have.
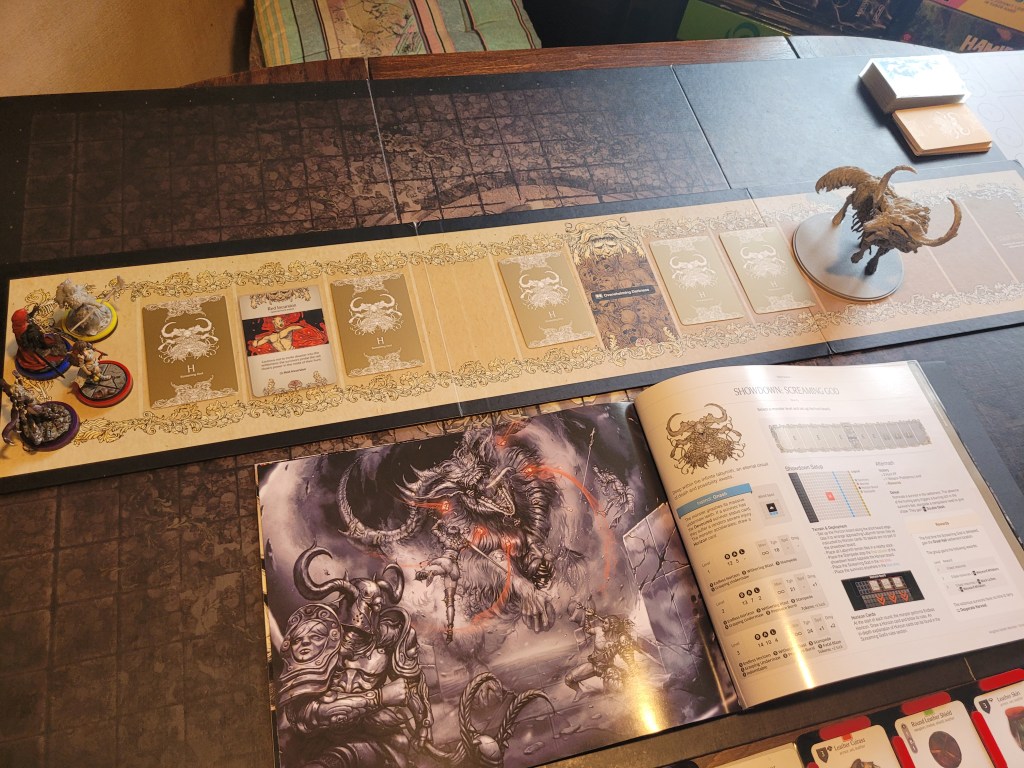
So, with the limited time we have left to go before we have to face off against the Watcher – as LY24 is the third fight with the Black Knight – we are looking at another Screaming God fight next Lantern Year as well, in hopes of either getting the resources to finish the armor set or built another weapon at the very least. I wouldn’t mind the spear or the shield!
***
Today I watched Deno fight his first Parasite Queen and I guess it played out just about as one might imagine.
Still, that monster is something special, I think. Whilst I am not ready to go into much detail right now, there is something about the Parasite Queen that feels different.
Whilst Kingdom Death: Monster as a whole had something dark and monstrous to it when I first played it, the more I found out about the world – no matter how limited the scope you are viewing it with may be – and the more often I fought the monsters, the more I came to know them and the less “scary” they actually were. Things like the White Lion or Dung Beetle felt at home in their ecosystem and more like “animals” rather than “monsters”.
But the Parasite Queen FEELS different to this. She (it) feels like more. An unknowable horror still lurking out there in the darkness. And whilst this is surely impacted by the fact that its a new showdown and thus the familiarity with it is still wholly absent, it feels like she (it) is working on a different scale altogether. Between her (it’s) artwork and mechanics, she (it) seems to be w much more grand a being than what we have seen thus far – a ruthless and rippling part of this world – both in her mechanics as well as the way she (it) is presented.
But I am doing a bad job at explaining this.
I also had such a reaction to the artwork of the Manus Mandala event when it first got teased way back when. Like trying to describe a piece of music you just can’t grasp to remember but still have a deep lingering feeling towards it.
And I’m doing a bad job again.
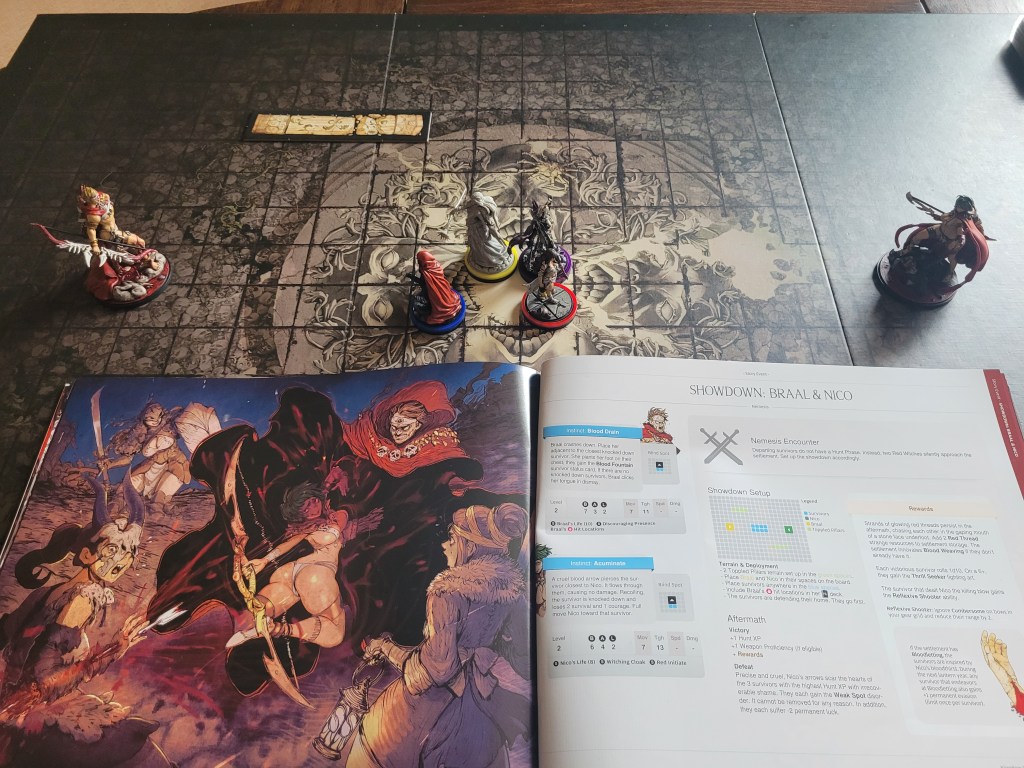
What I can say is that I am looking forward to hopefully trying her out – if we should make it all the way to the fight in LY30. Black Knight Lvl3 and Seer will surely pose a challenge still – I’m not as worried about the Watcher. Or what comes after the Red Witches – should we hunt another Frogdog or lope, the poor thing is going to explode.
Which, if I learned anything about hubris in this settlement .. doesn’t bode well.
But I will leave it at that for now. With a little luck I will get my end-of-may order in a couple of days! And maybe we’ll actually play a campaign with half a character deck at some point in the future!
As always, thank you very much for your time, the Pariah is on the look-out for a new settlement to stay in – so be weary of a Fiend creeping in!
Amathul


Leave a comment